

How To Change Velocity in Ableton Live and How It Can Empower Your Productions
MIDI Velocity is not simply like a volume control that adjusts how loud a note is. Yes, that's one way to look it, but we think it goes much much deeper than that.
Velocity is an entirely different thing because it isn't actually audio data. When you adjust velocity between 0-127, that can trigger effects, change samples, and a whole lot more. MIDI Velocity is a set of instructions.
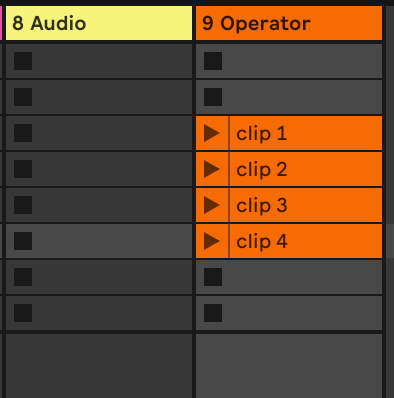
And the way Ableton does things is different than other DAWs. You have MIDI tracks and MIDI clips like a lot of other DAWs. However, you have two different places to work with them: the session view and the arrangement view.
Most DAWs only have their version of the arrangement view and a piano roll.
How Note Velocities Affect What You Hear
The velocity of a note usually programmed in a way that determines how "hard" the note is played. Again, MIDI is just instruction data, not actual audio, but this data affects what we actually hear in major ways. For example in most sampled software instruments, there are breakpoints where a MIDI velocity within a designated range trigger specific samples. Higher or lower MIDI values trigger different samples.
Note: If you're concerned that Ableton handles MIDI in different ways than other DAWs, don't worry! The MIDI protocol is always the same. It's kind of amazing we have this standardized protocol to get all out instruments talking to each other in the studio. However Ableton provides some unique ways of working with MIDI that we're going to explore.
When you play a MIDI instruments in Ableton Live, the velocity values can be routed and programmed to change all kinds of things beyond the playback volume of the sound, examples include the volume, brightness, and envelope characteristics of the sound.
A higher velocity value can be used to make the volume of the note to be louder, influence the shape or resonance of a filter envelope, or modify the ADSR envelope.
Every virtual instrument and synth is a little different in this regard. In Ableton's Sampler instrument, there is a velocity editor which can be setup to affect all kinds of things.
The velocity of a MIDI note can also be used to control more complex aspects of the sound, like the balance of different sample layers, the reverb wet/dry mix, or introduce changes based on what octave a player is performing in. You may not want the bottom of the keyboard to do the same things as the keys on the higher octaves of your MIDI controller.
This enables you to really be specific about how an instrument behaves.
MIDI note velocity is a big factor in any DAW. Ableton Live, Logic Pro, Pro Tools, they all have their own quirks of dealing with all these details.
Experimenting with programming different velocity value mappings can help you find the perfect sound for your music and add expression and depth to your performances.
How To Edit Individual Midi Note Velocities in Ableton
In Ableton Live, you can change the velocity (volume) of a MIDI note by editing the velocity value in the MIDI editor. Here's how:
-
Open your Ableton Live project and select the MIDI clip that you want to edit.
-
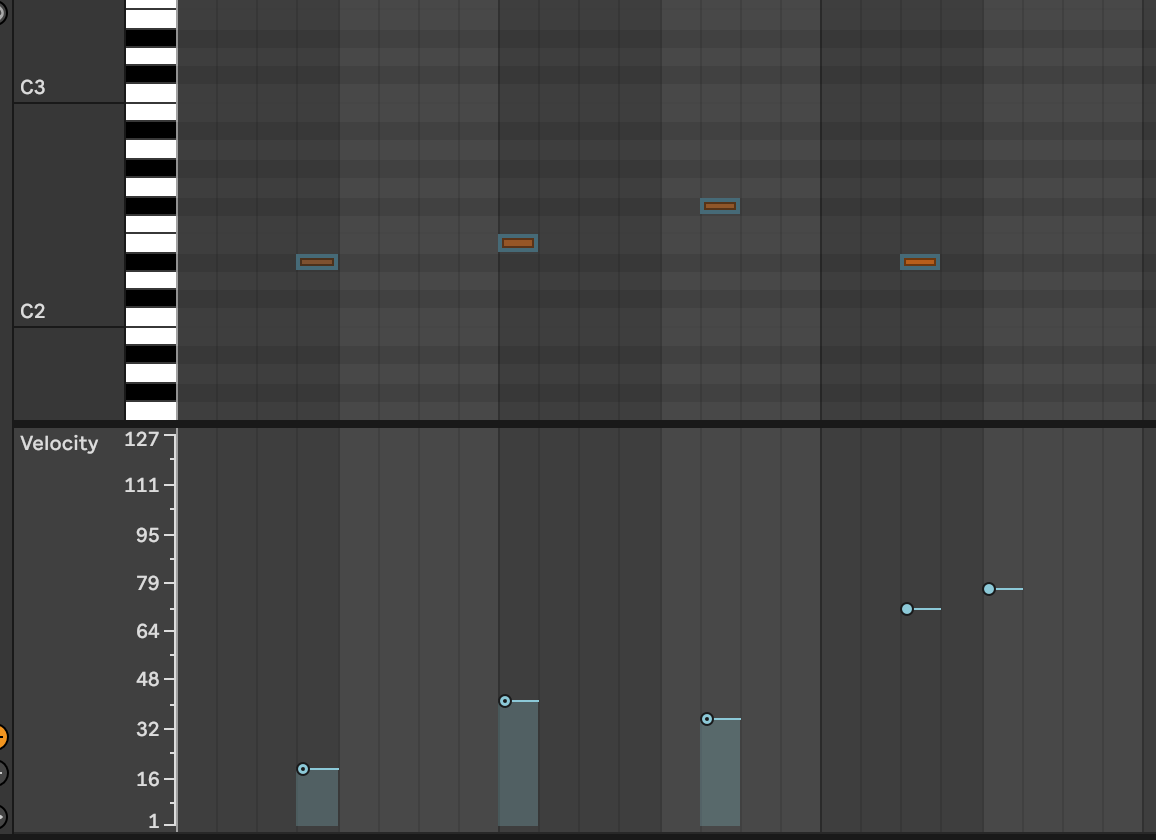
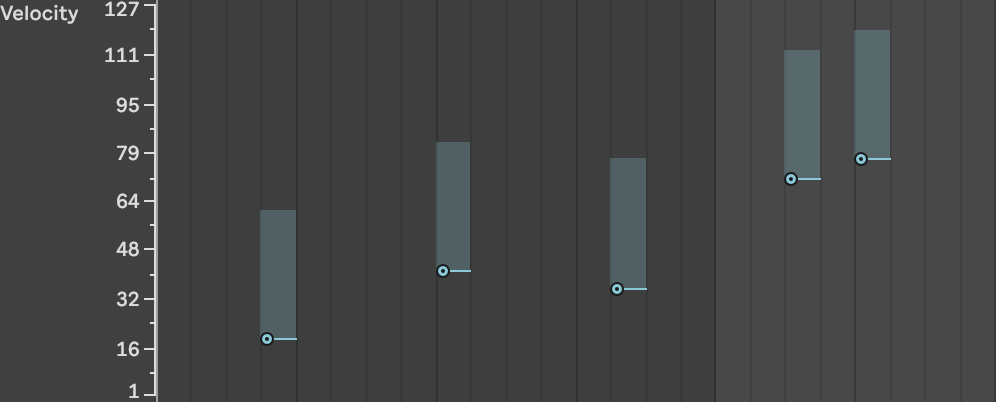
Click on the MIDI note you want to edit. In the Velocity editor below (you may have to expand it if its hidden) there is a velocity marker you can drag up or down to change it's value.
-
Alternatively, you can hold the command (Mac) or control key (windows) and then click and drag the mouse up or down to quickly change velocity. You can also change groups of MIDI notes this way even if they are not at the same velocity.
It's important to note that the velocity of a MIDI note can have a big impact on the sound of your music. Higher velocities will generally produce louder, more powerful sounds, while lower velocities will produce softer, more subtle sounds.
Its important to remember that even small adjustments in velocity or a single note change can make a big different in a track.
Chance Velocity Values In Ableton Live
Unlike other DAWs where you must program fixed MIDI values, Ableton allows you set a range of velocities on a note or group of notes inside a clip.
Simply select the notes or velocity markers and in the left pane of the MIDI editor change the Velocity Range value from 0 to a positive or negative number.
You can also click and drag on a velocity marker (not the note) while holding the Command or Control button (Mac and Windows, respectively) to set the range.
This setup will make notes playback at random values within the range you set in your MIDI Clips.
Why Do this?
For certain kinds of arrangements, this can save a lot of time versus editing midi notes one at a time in the piano roll. Instead of having to click and drag on 30 snare hits in a drum rack to make them play back slightly differently, you just set a range and let Ableton do it's thing.
Draw Mode In Detail
The Draw mode or pencil is a tool that allows you to create and edit notes in the piano roll and other events directly in the clip's timeline.
To enter Draw mode, you can either click the Draw mode button in the toolbar, or use the keyboard shortcut "B". If this shortcut isn't working, make sure the keyboard midi input is disabled. Hit the M key to toggle it on or off.
When you enter Draw mode, the mouse cursor will change to a pencil icon, and you can use the mouse to draw in MIDI notes and other events directly in the clip's timeline. To draw in a MIDI note, simply click and drag in the timeline to create a new note. You can change the length of the note by dragging the left or right edges of the note, or you can delete the note by dragging it out of the timeline.
Draw mode also goes beyond just MIDI, so it's a good tool to be familiar with. You can use it to draw in automation events and other events, such as tempo changes, time signature changes, and clip triggers. To do this, select the appropriate event type from the Event list in the toolbar, and use the mouse to draw in the events in the timeline.
Using MIDI Effects in Ableton Live To Change Velocity Values In Interesting Ways
There are a number of effects in Ableton that we can use to manipulate velocity values of clips in addition to the obvious one, the Velocity midi effect. Here are a few examples to get you started:
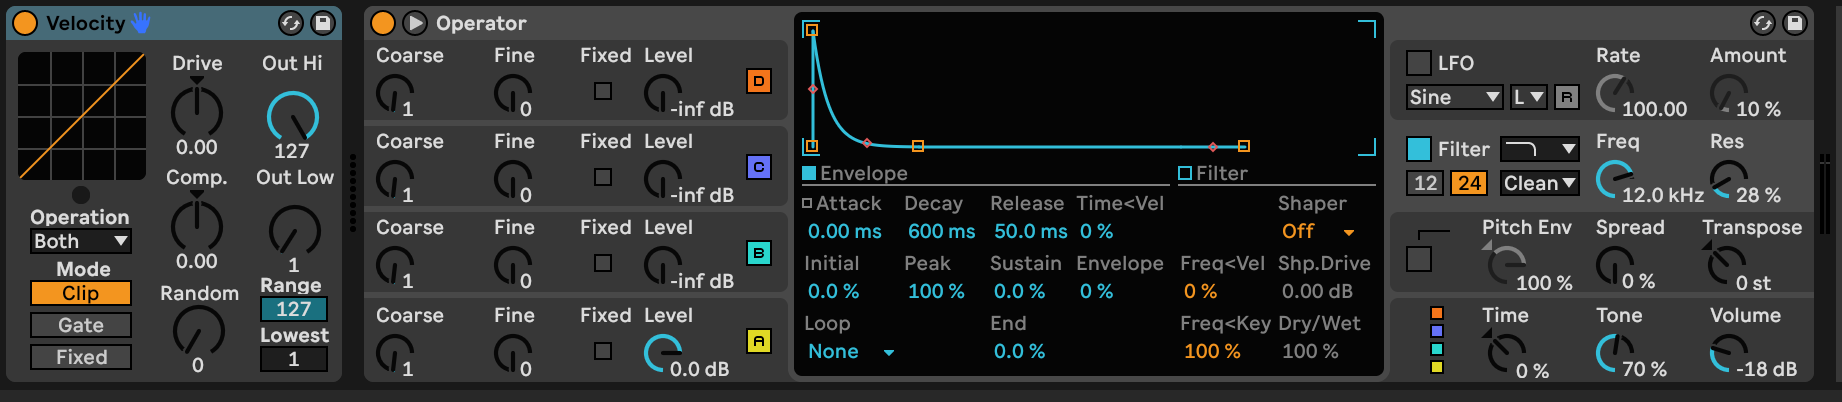
Velocity
The Velocity Midi effect allows you to adjust the velocity of each MIDI note individually, or apply a global scaling factor to the velocity of all notes. This can be useful for balancing the overall level of a MIDI clip, or for adding more expression to your performances. You can also set minimum velocity, use the random knob to introduce some unpredictability to incoming notes, or set compression-like curves to notes.
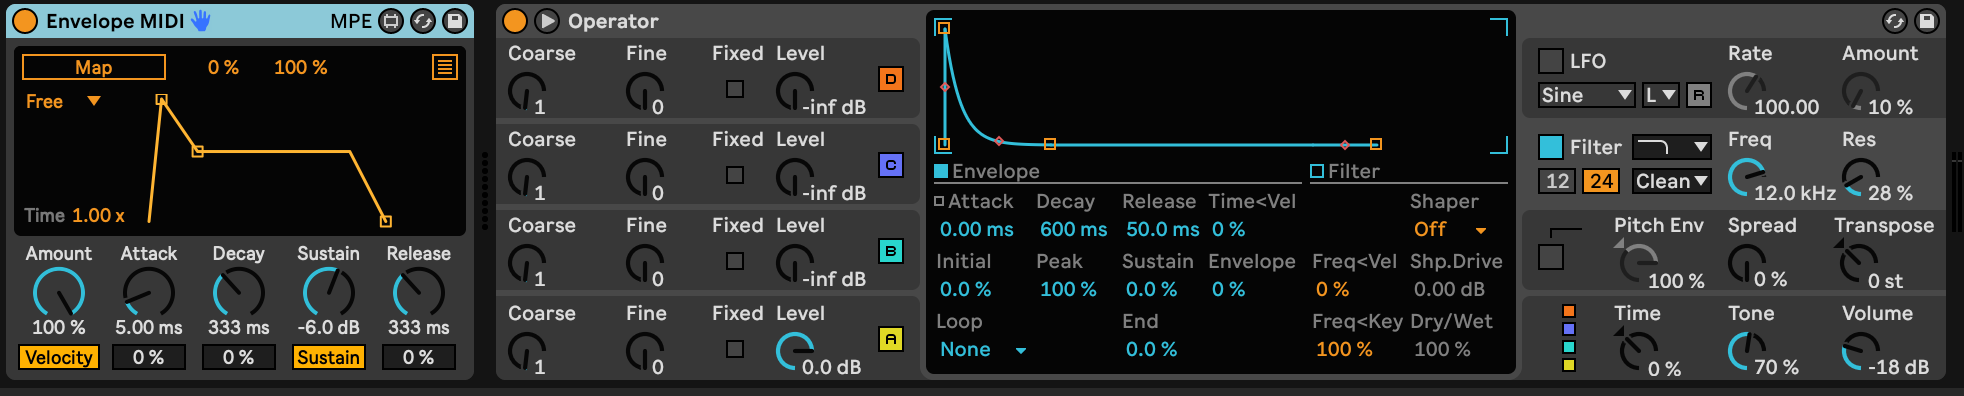
Envelope
The Envelope effect allows you to draw in a custom envelope triggered by incoming MIDI notes and map that to synth parameters. This can be set to be static or velocity sensitive. Utilizing velocity can be useful for creating more complex and expressive sounds that are more expressive to play and experiment with.
Arpeggiator
The Arpeggiator effect can be used to generate a series of arpeggiated notes from a single chord or note, with each generated note having a different velocity value. This can add movement and interest to your music, or help you to create complex and dynamic rhythmic patterns.

To use these effects to change the velocity of MIDI notes in Ableton Live, simply add the effect to a MIDI track or drum rack pad and adjust the settings as desired. You can use multiple MIDI effects in combination to create more complex and expressive velocity patterns, or use the Velocity control in the MIDI editor to fine-tune the velocity of individual notes.
The Randomize Function
In the piano roll, Live has a Randomize button in the left pane of the MIDI editor. You select one or multiple notes, then are able to randomize them in a given range with you set in the slider next to the button.

This can be used to add subtle variation or huge changes in the notes you apply this to.
Velocity Controls On Synths
Many synthesizers and samplers have options to alter how velocity data affects the end sound.
For example, its a common feature to have filter or ADSR envelopes scale in proportion of velocity and in Ableton's Sampler you can adjust to what degree that happens all the way from being completely disabled to 100% or in between somewhere.
Always be on the lookout for interesting velocity mappings in synths because getting creative with these can yield interesting results. Mapping velocity to oscillator pitch might not make sense if you're taking input from a keyboard, but from a drum pad controller feeding a drum rack, this could be very expressive.
The Limitations of MIDI Velocity
MIDI velocity is a powerful tool for adding expression and nuance to your music in Ableton Live, but it does have some limitations that you should be aware of.
-
Dynamic range: The dynamic range of MIDI velocity is limited to a range of 0-127. This means that you can't use velocity to control sounds that are significantly louder or softer than this range. To achieve greater dynamic range, you may need to use other techniques such as automation of volume control or filters.
-
Sound quality: The quality of the sound produced by a MIDI instrument is largely determined by the quality of the sample or synthesizer being used. While velocity can affect the character and intensity of the sound, it can't necessarily make a low-quality sound into something better.
-
Dynamics: The velocity of a MIDI note can affect the dynamic character of the sound, but it can't fully replicate the subtleties and variations of human dynamics. To achieve a more realistic and expressive sound, you may need to use other techniques such as humanizing, round robin sampling, or deeper sampling.
If you only have a loud set and soft set of samples that split at a velocity of 50, you're going to have a crude result. Having 5-6 sets of samples for different velocity levels will have more dimension.
-
Compatibility: Not all MIDI instruments and devices support velocity sensitivity, or use the same velocity range or scaling. This can make it difficult to achieve consistent or predictable results when using velocity with different instruments or devices. To overcome these limitations, you may need to calibrate or map the velocity values of your instruments or devices.
How Ableton Handles Velocity Data Differently Than Other DAWs
In Ableton Live, MIDI velocity is controlled in a similar way to other digital audio workstations (DAWs). The velocity of a MIDI note is represented by a value between 0 and 127, with higher values indicating a harder attack and lower values indicating a softer attack. This value is used to control various aspects of the sound, such as the volume, brightness, and envelope of the sound, depending on the characteristics of the instrument or effect being used.
However, there are a few differences in the way that Ableton Live handles MIDI velocity compared to other DAWs. These differences may be more or less significant depending on your workflow and the specific features that you use:
Clip-based vs. track-based editing
MIDI velocity is typically edited on a per-clip basis, using the clip's timeline or the MIDI editor. This can be different from other DAWs, which may allow you to edit MIDI velocity on a per-track basis, using the track's automation lanes or other tools. This can affect the way that you approach velocity editing and how you organize MIDI clips in your project.
Velocity scaling
You can use the Velocity effect to apply a global scaling factor to the velocity of all MIDI notes in a clip. This can be useful for balancing the overall level of the clip, or for adding more expression to your performances. Other DAWs may have similar tools for scaling velocity, or you may need to use other techniques such as automation or MIDI mapping.
Velocity Ranges
Most DAWs force you to assign a specific value to MIDI notes. This works, but if you have a lot of notes to edit, it can be extremely time consuming to set individual velocity values. Or perhaps you want to emulate the inconsistencies from take to take that a real musician would have. Ableton allows you to set a velocity range to address these issues. A given note will play back somewhere in the range you set and won't be the same every time.
Overall, the way that MIDI velocity is handled in Ableton Live is similar to other DAWs, but there may be some differences in the specific tools and features that are available. It's important to familiarize yourself with the velocity-related tools and features in your DAW of choice to get the most out of your MIDI performances.
Not A Boring Topic (We hope!)
It's really easy to dismiss velocity control in Ableton as a boring, after the fact kind of detail, but we hope that now you see that couldn't be further from the truth!
Because it is just a type of data getting passed around, we can not only use Velocity to control notes and how they play back, but all automate other kinds of behaviors in the DAW which affect what we hear coming out of the speakers.
If you've never played with some of the features we mention, try going through them one by one with the article open and see what new territory you can get yourself into. Throw the same data into drum racks, VSTs of acoustic instruments, your hardware synths, or anything else you have to get the creative juices flowing!

