

Tips For Building A Boom Bap Drum Kit & Free Download
Yes, there are tons of free downloads for boom bap drum kits all over the internet, but we are making an original one today because we're production nerds here and want to understand how these samples work.
And music is supposed to be exciting and fun.
Downloading free packs over and over again is convenient, but if you're a fan of producers like Pete Rock, J Dilla, DJ Premier, wouldn't you want to know how they thought about sampling?
(And of course we also have a free download of drums anyway to help you get started writing songs and beats. Check out the end of the article for the sounds)
What is Boom Bap Hip Hop?
A boom bap hip hop is simply a subgenre of late 80's and 90's hip hop that originated in New York City. This is sometimes referred to as "The Golden Age" of Hip Hop.
The name comes from how the beats literally sound. A lot of the style is all about how the kick and snare samples sit with each other in the beat and the kinds of samples producers chose.
A certain amount of it is also a vibe and feeling you get that can't be put into words, so you need to listen to a of the boom bap style to really know when things feel right.
We're huge J Dilla fans and grew up watching Wu Tang Clan videos so when we think of boom bap production, classic producers like Dilla, Pete Rock, RZA, DJ Premier, & Q-Tip all come to mind.
Those are all great places to start if this is a new style for you.
But there are also many modern producers making this style and continuing to innovate on it.
This is genre of hip hop is alive and well.
Choosing Good Samples for a Boom Bap Drum Kit
The boom bap sound is all about sampling. So you're going to be looking for good samples and putting them together in a kit, not synthesizing them most of the time (but there are exceptions!)
Unlike trap drums which used more digital or synthesized samples (as well as generally brighter sounds), those would sound out of place in boom bap.
While the producers who pioneered the genre did use more traditional instruments like synths sometimes (you can see J Dilla's MiniMoog in a museum now) the majority of the sounds come from a sample on vinyl records.
There are also tons of sample packs to choose from that emulate this style of sampling.
Some people feel you need to sample from vinyl directly to be authentic, others lean on sample packs so they don't have to deal with clearing samples, getting sued, or their music being taken down from streaming platforms.
The Best Records To Sample Drums From
There are pros and cons to both, but in either case you want to be looking for certain kinds of sounds and we aren't going to tell you which is the best fit for you, that's a personal artistic choice.
As the saying goes, "It's the ear, not the gear"
Picking a great sample is as much a musical skill as learning scales on the piano.
Samples that work well for boom bap production usually come from old jazz, funk, soul, rock and bossa nova records. The sounds of 1970s records are a big source, but don't restrict yourself to that decade of music.
A good boom bap sample pack, drum loop, or melody pack is going to emulate that sound.
If you want to develop an ear for what to listen for, these are all great examples:
Kool And The Gang - “N.T.”
We have an article entirely about how you can create a similar feeling drum beat with different sounds using Q-Tip's "Breath and Stop" beat, which samples this song (go to 5:35 to hear it)
Melvin Bliss - Synthetic Substitution
A huge hip-hop sample that's been used in dozens of songs. Bernard Purdie lays it down in the intro. The swing of the beat and the way the snare lays back instantly makes you want to nod your head.
Stay Curious When You Sample
Soak up those drums and get that sound in your head.
When you dig through more obscure records, sample packs, or you record your own drum loops with musicians, that signature sound will help guide you to the perfect sounds for boom bap production and help you build drum kits that feel great.
Sure, you could just chop up those classic drum sounds and build kits from them, but if you want to innovate you should look for new sounds.
That's what all the masters did who figured out sampling in the first place.
Also, don’t limit yourself to any one approach because someone told you to do things a certain way.
What makes the greats who they are is they were looking for their way to make music that was fresh and original with the resources they had access to.
And most importantly, follow the process that inspires you and makes you a better music producer.
A great music producer can take damn near any sample you throw at them and make something interesting.
Listen to all styles of music and listen for the element you can grab and use in your own songs.
People who make boom bap tend to have BIG appetites for musi. They listen to all kinds of music you might not expect.
Just like there are classic pieces of equipment, there are classic samples. Usually, there are loops or drum kits made from popular songs (like in the list earlier in the article), that were then turned into different classic hip hop songs.
What To Look for in Drum Samples
If you're using royalty free sample packs, look for acoustic drums kits that are really analog sounding. Lots of midrange punch, gentle distortion & soft clipping mixed with vinyl or tape noise.
If you're using very modern recorded drums, you're going to have to add analog distortion. Also, do some low pass filtering, layer in some noise, and even add pitch wobble. This will help to capture the feeling of those sounds.
Should you choose to sample from vinyl records directly like the OG boom bap producers, you may also look into modern methods of removing vocals from the track.
This can help open up samples that were not useable to previous beatmakers. Unlike you, they had to rely on loops built from the drum break or just instrumental sections of the song.
Just be aware these are not royalty free, so you may have to pay to clear the samples later. This is why we got into the sample pack business!
We think music producers deserve to keep all their royalties. Music is a tough business, especially for independent people, so we make samples and sounds you can just use. We're betting you got into music because you love music, not calling your lawyer!
How many sounds do you need for a good boom bap drum kit?
At the very very least, probably 3 or 4 good samples. You need a hi hat, a snare, and a kick drum. That’s the heartbeat of boom bap.
But this would be really minimal and you might have issues with things sounding stiff and too mechanical.
Two different kicks is better, as well as a few snare sounds.
For example, you might want standard snare hit that feels good to use the majority of the time. Then, supplement that with snappy snares that are higher in pitch, cross sticks and rim shots.
Having a few closed as well as open hi hat samples is also helpful. You'll need them to write fills or changeups in your beats.
Snares
The “bap” in boom bap. Try all kinds of stuff. High, low, dry, ringing, there are endless snare variations. They can all serve as the back beat to your tracks and add character.
Here are examples of snares from classic samples that you want to look for to build a boom bap drum kit.
James Brown - "Funky Drummer"
Go to 5:35 and hear the drum loop that changed the world.
The Honey Drippers - "Impeach the President"
This one is probably as widely used as the previous track. This one is worth really studying because it has all the feel and tone you need to look for in a good boom bap loop.
Don’t worry about trying to rip these if you want to use them.
There are some free samples and loops bundled at the bottom of this article for you to download and use in your songs. But if you want to know the vibe of a great snare, these are it.
Kick Drums
Kicks are the “boom” in boom bap and anchor a lot of the song.
James Brown, “Funky President (People It’s Bad)
Something about the kick drum sound on this James Brown recording is just perfect which is why they're sampled so much. The tone kind of sounds like the kick is made out of a cardboard box, but in a good way.
It's punchy and sits with the snare perfectly and has a lot of the analog coloration that people love.
But a common problem with a kick sample from vinyl like this is they sometimes have a great tone, but sound a little thin by modern music production standards. The low end isn't super huge.
So sometimes music producers will layer in a synthesized kick sound.
Or even a basic sine wave below 100Hz, to help the kick have the right amount of thump in the low end.
Hi Hats
The overall shape and tone of a hi hat makes a big difference. And how you sequence or play them are a big part of what makes beat swing, lay back, and dance in most genres of music, not just boom bap hip hop.
Sometimes you find a sample that’s perfect as is, but for hi hats you may have to filter out some top end or use a transient shaper to make the attack more or less “pointed”.
However you decide to shape the sound, make a few variations, flatten them, then load them up in your sampler and play some beats in by hand to see how they feel.
Percussion
When people think of drum loops in boom bap production, or hip hop in general, a standard rock or funk drum kit might come to mind
But digging for other percussion samples helps a beat stand out.
Interesting claps, shakers, and hand percussion all help you add flavor to your beats and drum kits.
Lyn Collins, “Think (About It)”
This Lyn Collins track is a good example that features a prominent shaker part in addition to the core drum kit sounds you would expect.
Kit Layout and Recording
Another big part of the boom bap style that's essential to good drum kits is how you lay them out.
Some producers use drum loops and work primarily with the mouse.
But originally before modern DAWs like Ableton Live or FL Studio were developed, boom bap producers would play in their beats using the pads on a MPC.
If you have a boom bap drum kit ready from a sample pack, try laying it out on the pads or keyboard a few ways.
In many DAWs, you can also mix and match one shot samples with a drum loop on some pads.
There’s no rule that says each key or controller pad for your drum kits can only have a single drum sample.
Try putting rolls, hi hat loops, and melodic loops on pads along with you kicks, snares, and standard hi hats.
Samples and Chops
A great boom bap drum kit usually isn’t strictly drum samples.
Having some melodic samples you use in a rhythmic way, like a drum, helps you establish a voice as a hip hop producer.
No two producers do this in the same way.
Lots of producers practice by simply taking different styles of music or samples of guitar, piano, or whatever they like and see if they can flip it to work over a drum beat and get it to work as a loop.
Here are a few classic examples:
Free Boom Bap Sample Pack
Making good drum kits in any genre of hip hop is an art and making a great boom bap kit is no different.
We recommend you build a lot of them! It will teach you about sound design and improve how you make beats.
Free Drum Kits
If you’ve made it to this part of the article, congratulations! We have something for you.
Here is a free drum kit to get you started putting together interesting sets of samples to chop. It is called DUST DMG. The samples are 100% royalty free, include both one-shots and some loops and ready to use for you to create new beats.
Click Here To Get The Samples

More Essential Listening For Boom Bap Drum Sounds & Samples
Hope you enjoy our samples, but if you're looking for more examples of heavily sampled classics, check out these.
Led Zeppelin - "When The Levee Breaks"
The intro drums. Super compressed with tons of cavernous echo.
Billy Squier - “The Big Beat”
This lives up to the name. The drums are easily just as huge sounding as the Zeppelin tune.
The Winston's - "Amen, Brother"
Spawned entire genres of music. Jungle or Drum n Bass might not have happened without this one.
Mountain - “Long Red”
Get the live version for the sample!


Free Ableton Sample Pack | Vision Magnet Lite Synth and Space Echo
A lot of producers, both beginner and advanced, inevitably ask the question of whether or not it's a legit technique to use other people's samples and commercial sample packs.
What about all the free ableton live packs out there? Is it ok to use sounds that literally the entire internet has access to?
We might be biased, but of course its legitimate and encouraged!
We wouldn't have entire genres of music like hip hop if it were not for sampling and sampling culture so we think contributing a bit to sampling culture is an important part of any music project whether you're doing it as an artist or a music technology company.

Yes, cool instruments like analog synths and quirky drum machines are great, but sampling as a practice is still a huge influence and even part of those branches too.
You can build some really interesting instruments by layering samples and synthesized sources under the hood of an instrument.
Ableton Live Packs Loops & Racks For Your DAW
Today we're going to be discussing some of the philosophy behind what we do and cut through a lot of the noise people like to make about sampling.
Much of the sampling debate is counter productive for artists so our main opinion basically comes down to taking sounds from whatever source you prefer and finding something original to do with them.
It's less about where you get sounds and more about how you can find ways to flip them and make them your own.
Enter into the World of Ableton Sample Packs!
If you've spent any time at all on the internet and you're interested in music production, you've likely been bombarded with offers for sample packs, both paid and free for good reason.
They're a big part of a modern music producer's workflow. Everything from drum samples of acoustic drums, to rare analog synths that are hard for most people to get access to.
Your sample pack collection becomes as much a part of your workflow as your DAW, whether that's Ableton Live or something else entirely like FL Studio or Logic Pro (or one of the many other options).
Ableton Live Packs: Drums & Synths
This is where we chose to jump in with Glitch Magic, a recording hybrid kit called GRITMATTER and sounds made with analog synths called VISION MAGNET.
GRITMATTER Sounds
We're always using live presets and looking for new drum samples, drum loops, and interesting audio effects to make our next track really feel fresh and different.
VISION MAGNET Sounds
Why Not Just Make Your Own Sounds?
You can and should! That's how we made our first Ableton pack.

A good place to start is to take the drum samples you already have, spend time making drum loops or processing your drum sounds, then when you have some loops you like, flatten them into new drum loops and start collecting them together in a folder somewhere.
Congrats, you are on your way to your first Ableton live pack of your own!
Use them in your own music as is, cut them up and process them again into your own drum kits, or release them with your next album as bonus content.
The last one is especially a good idea if a lot of your audience makes beats or would be interested in using your samples.
In certain genres, particularly hip hop, swapping samples is a huge part of the culture of the number of people who make music as a hobby or part-time is exploding. We don't see this slowing down any time soon.
Developing your own sounds and style (with sample packs)
The other side of the coin is using external sample packs in a way that is unique to you. It's easy to slap together a pre-made sample pack and say you wrote the track, but if you don't put your own spin on it, it's going to sound more like a remix of the sample maker's work than yours.
You don't have to do it all yourself, but finding ways to make the sounds you download feel like your own sound is key as a music producer.
What Is Vision Magnet Lite?
Vision Magnet Lite is one of our free sample packs, which is also available in a huge version with way more sounds.

The free pack alone is over 1 GB of samples that includes synth loops in every key (the paid version has one shots too), both major and minor.
The whole idea is we want you to be able to drag and drop these into your drum racks, drum machines, compile them with found sounds, build melodic instruments, mix them with other free packs and generally be really flexible so you can make them part of your own production style.
Maybe you don't want to use them as melodic elements at all and you just stack them with a reverb plugin to make ambient textures to layer drum sounds over.
How Were The Samples In Vision Magnet Made?

Everything in the Vision Magnet Sample Pack is done with a Dave Smith/SEQUENTIAL Prophet 6 and a Roland RE-201 Space Echo.
Why?
We love analog synths and the Prophet 6 is a "modern classic". The Roland Space Echo is unquestionably a timeless classic. Some would even call it a legendary instrument thanks to its role in shaping Dub music which influenced most major genres of modern electronic music.

What special recording techniques does Vision Magnet use?
Every one of the audio clips is labeled with a number and there is a Dry clip and a Wet clip with the Space Echo effect. This allows you to position them any way you want in the stereo field
You can use them separately, pan them apart, or keep the dry clip in the center, then use a Haas effect or other stereo plugin to widen the Space Echo clip.
Does Vision Magnet include MIDI Clips?
The Lite version of Vision Magnet Does not include midi clips, but the full version does! You the get MIDI files we used to create and trigger every sound in the pack.

Why Not Just Make Your Own Sounds?
You can and should make your own sounds.
This doesn't necessarily mean synthesizing all your drum samples 100% from scratch or only using hardware analog synths instead of sampler instruments.
Developing your own sounds and style
The important part is having some sounds that you really make your own and have your own fingerprints on them. We would argue that this includes techniques like how you process drum samples, breaks, or foley and found sounds.
This is really what developing your own sound and style is all about and that's exactly what we hope you do with any Glitch Magic products you download. They're set up to be used this way!
Why we don't have many genre-based packs designed for Trap Music, Jungle, Hip hop or other popular genres?
The short answer is everybody does that and its not very interesting to us. We'll probably do a few, but it's not the main priority.
Search "free sample packs" + any genre and you'll find all kind of stuff of varying quality. Also we think it's pretty silly to try to compete with websites like Splice or Native Instruments or Ableton.
They all have various collections of melodic loops, analog synths, synth presets, and more. The genre focused pack is a very well covered area.
All of these places have more than a single producer would ever need, so we're constantly thinking about ways we can do something a little differently that the big companies are not.

We're also more interested in experimental sound design that will help you find inspiration quickly so you can innovate within the genre of music you work in.
There are too many sample packs that are just copying whatever style is popular and compiling sample packs that are fairly generic.
Can you make money doing this? Sure. No hate if you do this and you're happy! Do you.
But that doesn't get us excited about making sounds and exploring new territories.
The exciting part about electronic music of any genre is finding new sounds and inventing genres, not painting by numbers.
If we wanted to just copy things and make money, there are much more profitable things we could do, but our real passion is searching for amazing sounds.
In Conclusion, Take Our Sh**!
Seriously! We didn't decide to make free ableton live packs so they can collect dust on a server somewhere.
Download the free version of VISION MAGNET and start making some tunes and don't ever apologize for using a sample pack. As far as we're concerned the fun of the game is all about how you shape your sounds and tracks and less about what you're using for source material.
You can use just about any sound for musical purposes if you know what to do with it.
Stay creative!


Unique Max for Live Devices That Will Make You Re-Think Ableton Live
Ableton Live is a unique DAW because it features a Max for Live integration which allows users and third party developers to turn it into much more than a DAW.
You literally have the ability to create a custom sequencer, your own instruments, audio effects, or whatever else you can dream up that would help your workflow when making tracks. Just look up the basics in a max for live tutorial and get patching!
Today we're going to dive in to what Max for Live is in detail and our favorite devices that all make good starting points if you're new to the platform.

What is Max for Live?
The short answer is Max For Live is a programming environment that allows you to extend Ableton's functionality.
How does Max for Live Make Ableton stand out from other DAWs?
Is there some effect or feature you wish existed but the Ableton folks didn't include? Have ideas for creating unique software instruments? Can't find what you want from third party music plugin developers?
With Max for Live you can potentially solve these problems for yourself and others by rolling up your sleeves and building what you need yourself.
You can build you own instruments, audio effects, MIDI effects, or automate the DAW itself to do interesting things via the Live Object Model.
How Do You Use Max for Live Devices?
There is a large ecosystem of Max for Live devices created independently by the Live community that are effectively like Ableton-only plugins. You just drag them onto a track like any other audio or MIDI devices or effects.
More recently, with the release of RNBO, Max developers are able to build devices that can be packaged as VSTs or web formats with features that extend the software even further.
What is the difference between Max for Live and Max/MSP?
Max/MSP is standalone software that is older than Ableton and originates at IRCAM in Paris.
Max for Live is an integrated version of Max you must use from inside a full copy of Ableton Live Suite.
Can you use Max for Live Without Ableton?
No, you would need a copy of Max/MSP which is a unique license and has some differences in the way you can access the program.
They didn't call it Max...for Live for nothing!
Is Max for Live free?
Max for Live is included with Ableton Suite only, not Standard or Intro.
So no. You need to buy the most expensive version of Ableton, but this is worth it in our opinion because you get most of Ableton's juiciest features and plugins.
Our top 5 Max for Live Devices
Now that you have some background on what Max for Live is & how it is different than Max/MSP, let's dive in and explore our favorite devices.
It was truly difficult to pick 5 individual devices out of an ecosystem with thousands, so we tried to make sure some official Ableton devices were included that are really powerful, as well as some suites of devices that will make you rethink what a DAW even is. #2 on our list certainly had that effect.
1. IRCAMAX 2
A suite of plugins from the source! Without IRCAM we probably would not have Ableton Live at all thanks to the innovative work that happens there and this set of live devices does not disappoint.
There are 12 devices in total with the IRCAMAX 2 bundle, 8 audio effects, 2 instruments, and 2 MIDI effects that all have an interesting twist somewhere.
Synths
Some highlights include the Matrix Synth and Modalys physical modeling synth which allows you to mimic the resonance of pipes, various membranes, drums and other physical objects.
You can then use this to process just about anything from an entire track to a single element of a track. This kind of flexibility makes for a great tool in a sound design situation or for a composer who wants to find new sonic territories.

CHROMAX
We've previously written quite a bit about how a MIDI note and it's velocity are a data source that can be mapped to a large variety of parameters to modulate or interact with or alter your sounds, especially in virtual instruments.
CHROMAX is designed for this! You can use MIDI clips to connect MIDI data to audio processing in real time.
But this is just scratching the surface, this suite of devices can do a lot!
IRCAMAX 2 is worth a look if you want to experiment with new, alien sonic textures or find a fresh, non-standard audio effect other DAWs might not have.
2. Zwobot

You can make your own visuals inside of Ableton Live using Zwobot. Yes, you read that right!
Check it out:
Because Max includes something called Jitter under the hood, it is able to work with real time image processing, particle systems, and other effects you'd expect to see inside of 3D software like Blender or Cinema4D.
Why is this a big deal? You can easily tether visual events to audio events. For example, say you have an Ableton Push controller you use to play live by triggering clips or effects.
You can use the data coming from the Push to also control your visuals. It requires a fairly fast computer to keep up, but the possibilities of this are big. You could potentially run your own visuals while you perform a live set or use the Zwobot output as an input to a dedicated VJ who controls the final video feed the audience sees.
Zwobot is a suite of Max for Live visual tools you can use to add energy to a live show or create content for promoting your work online.
3. Pretty Much Anything Dillon Bastan Designs

He's probably most well known for his Inspired by Nature series of devices which totally blew us away the first time we used them.
The user interface on each device is very unique and allows you to generate (as promised) very organic sounds and rhythms that have their own twist on them.
But the fun doesn't end there!
For example, this thing:
He has his own effects on his website that are all highly original and are among the best max plugins being made be independent designers.
Dillon has a very unique voice as a plugin and device developer and we recommend keeping an eye on his YouTube channel for when he releases new devices.
4. Drum Synth
These are a set of Max for Live devices that come bundled with Ableton, but we wanted to mention them here because they're buried in the browser so there's a decent shot you've had them all along and didn't realize it.

We use this collection in two primary ways.
-
When we're in a rush
When you're designing drums, its common to layer a bunch of sounds together as a composite. You may have one piece of something for the transient, another for the fundamental frequency, and something else for color on top.
We've previously written about this as well as sell our our sample packs and Ableton drum racks that are completely custom creations so take it from us:
The Drum Synth plugins are very, very helpful for laying into to a collage of drum samples you eventually will flatten and load into a sequencer as standalone samples. They don't have a ton of vibe or color on their own, so they are very flexible.
And they're free devices! You probably already have them!
5. Convolution Reverb Pro

This is an absolute must have Max for Live plugin. Lots of people are very vocal about the stock Ableton Reverb plugin having a character they don't like or feels not so flexible.
Convolution Reverb Pro is the other stock Ableton Reverb. It's much more flexible because you can blend the reverb captured from an impulse sample in their library or provide your own which can be used for it's intended purpose or others.
Why We Love Convolution Reverb for sound design
You can generate a lot of unexpected sounds for your music by hacking a convolution reverb. It's much more than just a reverb device.
It works like this:
You place Convolution Reverb after a sample, live device, instrument, audio track, or whatever you want to process.

Enable the effect then, instead of using a typical convolution impulse, drag in something you'd never think to use for convolution. Samples you took from a field recorder, a drum beat, or something with lots of transients are usually interesting.

Chances a good that you will hear some sounds you've never made before. Then you can continue to modify the effect with supplemental max for live devices like envelope follower automating the wet/dry parameters or delay to extend the effect.
Explore More
We encourage you to explore the live devices in the Max for Live ecosystem, there are a lot of live devices to try and new ones come out every day.
In the meantime, check out our sample packs, instruments, and devices to get the creative juices flowing.


How To Use Mid Side Mixing To Get Fatter, More Powerful Mixes
Mid side processing is one of those topics that isn't well understood by a lot of music producers despite being very common in modern plugins.
Or if you more or less understand it, you may not know the subtleties of it and what it's limitations are, so you're constantly guessing as to when to use it.
You also could have landed here because you got a deal on some sweet new plugins that has have mid side buttons everywhere and no idea when to push them.
But no worries, you're in good hands! By the end of this article you'll have a better idea of what it going on and when to use what technique to get your mixes sounding huge with mid side techniques.

What Exactly Is Mid-Side Processing?
The short answer is mid-side channels are an alternative way of representing the stereo information in audio. There is a middle channel and a side channel instead of left and right channels.
The middle is a mono signal and the side channel is only the material that is different. A more technically accurate way of describing this instead of Mid/Side would Sum/Difference.
Huh?
Left and right channels vs Mid and Side channels
You probably are comfortable with thinking about stereo recordings as left and right channels.
This makes intuitive sense. Half of what you hear comes out of the left speaker and and the other half comes out the right speaker. You can mute one side at a time to isolate what is happening in the right channel or left channel and get perfect separation.
An element like a snare drum that is panned dead center will live in your mid channel and have very little or no information in the sides, unless you've added stereo effects like reverb.
However, a wide stereo signal like a synth track or a full drum kit will have both mid information as well as a bunch of things only happening in the side channel.

Mid and Side Separation Is Not Perfect
You don't get perfect split between the middle and side channels. There will always be a bit of overlap and that is helpful to know when choosing to use a M/S tool or a more conventional one.
This is a simplified explanation of what is going on, but if you want the really nerdy details in all their glory, this article is a good source: https://www.soundonsound.com/sound-advice/q-how-does-mid-sides-recording-actually-work
Why Does Mid Side Matter?
The advantage to this way of dealing with stereo information is you can process the stereo image of the sound differently than the mono component which let's you fix otherwise unfixable problems, find ways of achieving bigger perceived width instead of using typical stereo widening plugins, or get totally crazy when you're doing sound design and looking for new creative territory.
If this sounds complicated to do, no worries! It's not.
To use mid side mixing, you can set it up easily with basic phase flip plugins built into your DAW. And plenty of modern plugins have built in mid side switches that do this part for you.
How Do You Use Mid-Side Processing During Mixing?
There are tons of possibilities here, but a common one is helping to resolve issues with conflicting frequencies that more conventional techniques don't solve for.
Say for example you have a bright lead synth playing over cymbals that are also pretty bright with a lot of energy in the high frequencies. They sound fine soloed, but together its too much.
What are your options to fix this? You might try just picking one element to be the the brighter thing, throw a high pass filter on the other, then call it a day. That's certainly one viable option.
But having mid and side signals gives you another dimension to experiment in.
You could try cutting some high end in the sides of your lead synth and cut some highs from the mid channel of your cymbals as a basic solution. Maybe you even automate the EQ to only happen during problem areas.

How to Use Mid-Side Processing When Mastering Music
A lot of mastering engineers don't actually do a lot of mid side work unless they have to!
Mid side processing can be a bit of a heavy handed technique at times and a mastering engineer's job is not to dramatically reshape a track. They are there to help it shine and be it's best.
With that said, sometimes a boosting high frequencies in the side channel with a high shelf filter can be pleasing. Or if there is a resonance somewhere in the frequency spectrum that is confined to either the mid channel or sides, it makes sense to use a mid side tool for that job.
When NOT To Use Mid Side Mixing
Before we talk about all the cool things mid side mixing can do to make a mix sound fuller and spice up your audio production, it's worth mentioned situations where this might not be the tool for the job.
Mix Bus Compression
It might seems like a cool idea to compress the sides of a full mix to get a wider stereo image. Make the stuff that adds width perceptibly louder and then instant presto way huge happy mixdown down time, right?
No.
Compressing the middle differently than the sides usually gets strange and not in a cool way because certain elements can start to be pushing in conflicting directions.
Try it for yourself of course, but a standard bus compressor usually sounds better in this scenario. Mid side compression is much more using for sound design purposes in music production.
If you want to use mid side mixing to create stereo width, a gentle mid side EQ is often a more natural sounding too.
Fixing Mix Problems
If you run into a problem that can be fixed in the mix, fix it in the mix. No reason to overcomplicate things.
Yes, sometimes more sophisticated techniques like M/S processing can get you out of trouble in a pinch when you don't have access to the original stems or something, but this is usually inferior to just getting to the root of the problem.
The biggest argument here to tread lightly is it is very easy to introduce phase cancellation problems with mid side processing that just wouldn't happen with conventional stereo gear.
When Things Are Already Overcooked
It's super easy when a mix sounds muddy due to over processing and try to carve out space in the mid frequencies or undo damaged from overuse of stereo width plugins, but this usually doesn't work.
You might be able to open things up a bit, but overall, overcooked is overcooked and adding more plugins and processing is usually not the way out of this problem.
Adding Stereo Width to Create a Fuller Sound
Let's start with stereo widening. There are dozens of stereo imaging plugins and stereo expansion tools that promise a wider stereo image.
Many of them work in a similar way: you have two signals for right and left, then the plugin delays one channel slightly to introduce some phase cancellation in the center and give a feeling of wideness.
This can work, but mid side opens up some new techniques to get us there. You can then choose which one makes the most sense.
A great way to get started is to use your mid side EQ to shape the mid band frequencies a little differently. For example a lot of the mid range fatness in drum sounds, guitars, synths, or background vocals lives in the sides of the low midrange.

Is Delay-Based Stereo Imaging Mid-Side Processing?
They're similar. Try both. A gentle EQ boost in this area can be smoother and less colored than a stereo widener plugin in many cases. A/B them both and roll with the one that feels better for a given mix.
Where To EQ For Width In A Mix?
When you hear a mix as being big, wide, fat, spread, or whatever you want to call it, it's important to remember that information is getting to you from some parts of the frequency spectrum, but not others.
The highest of highs and the sub bass regions are not it! The bass is very important to make a track sound full and have weight, but the mid range frequencies are the dominant frequencies where wideness really lives.
Stereo Track Mid range Frequencies
Most of the qualities we hear in a mix live in the middle frequency range, simply because the midrange is the majority of what we can hear.
So when you're working the stereo field with mid side processing to make a mix feel bigger and better, focus your efforts here before you treat more specific issues in the extreme ends of the frequency range.
Want To Improve Your Bass With Mid Side Processing? Ignore the influencers!
The Bad Advice
We find that the social media influencer crowd loves explain techniques that sound good in a video and made for enticing clickbait, but in practice don't work very well.
One example of this is the numerous YouTube videos where people use a low end filter to scoop out all the low frequencies in the subwoofer range in only the side channel to "clean" the low end frequency range.
Please stop doing this unless you have a clear reason for it.

Why This Is Silly
The rationale here is that you want the bass to be a more or less mono signal to avoid phase problems in the low frequencies, especially when printing to formats like vinyl. So use the mid side EQ to scoop out all the stereo stuff, right?
We would said no because this is usually fixing a "non problem". Listen to commercial recordings with the side channel soloed if you don't believe us.
Many big records have all kinds of stuff going on in the 80Hz range and below, in the side channel. Usually at a significantly lower level than the mono signal so it isn't stepping on anything important.
Sometimes not though. Everyone says this is a party foul, but if it was that bad, why does so much successful music production (that we legitimately love!) just let this fly?
Clearly these engineers thought it was better to just leave it alone otherwise they would take it out like the YouTubers are suggesting.
Proof In The Pudding
If you were having significant problems with side channel information in this range, you should absolutely go back and fix this in the mix if at all possible.
The other reasons this technique is silly—you may be creating low midrange problems that need to be fixed with other plugins.
The knee of any filter is always going to have some resonance due to the phase shift inherent to how a filter works.

We're all for using unorthodox techniques as long as they work, but we've tried this a zillion times and it usually doesn't help. Or if it does it sounds cleaner to just fix whatever elements are adding extra sound in the sides.
What You Should Do Instead
Try lightly attenuating low frequencies with a mid side EQ instead a little higher up, closer to the low mids. 100-500Hz is probably a good range to start.
Use a bell filter and experiment with EQ moves +/- 3dB to see how that opens things up. Some EQs allow you to flip between stereo and mid side mode so use that feature!
Work The Low Mids
When a mix feel crowded and stuffy in the low mids, often a cut in sides will be more transparent that a cut of everything. You get to unclog some of that stuffiness and you don't lose punch in the mix. (Remember that a lot of fundamentals for elements like drums live in this range)
This can give clarity to your low sounds and sometimes remedy a master bus compressor that is getting too pumpy from the energy down there.
Homebrewed Mid Side Processing: How To Make The Encoder Yourself
You can make any plugin you want. You just might need to separated the mid and side channels yourself.
Thankfully, most modern DAWs have a built in stereo phase tool of some kind we can use.
It's highly recommended you try this at least once. It will show you what is actually happening when you engage a mid side plugin and give you a better sense of when this is the tool for the job and when it is not.
This can be done in basically all DAWs, but we like Ableton Live here so that is what we will be using because the racks and Utility plugin make it very simple to do.
To Make The Mid Encode.
This is easy. Take a Utility plugin and set it to Mono. Done.

Make the Side Encode/Decode
Take a Utility plugin, set it to Mono and invert the polarity of one side, but not both. Put another Utility plugin immediately after it, leave it in Stereo, and invert the same side on this instance as well. It's very important that both instances are inverted on the same side, so either both Left or both Right, doesn't matter as long as it is the same.

Combine the Two
In Ableton, the easiest way is to make an effects rack with a two chains labeled mid and side, respectively. Other DAWs may need you to route differently or have two tracks that feed into a bus or group.

If you want to apply an effect only the mid field, put it on the respective chain (or track) after your mono channel plugin. If you want to affect the side field only, you must put your effect plugin between the two Utility plugins on your side channel. For example if you wanted to apply Reverb to the side, the signal chain would be Utility #1 > Reverb > Utility #2.
Here is an example:

Thanks for reading!
Hopefully this has given you a better understanding of when mid side makes sense to use and when it doesn't.
Before you go, don't forget to check out out sample packs and playable instruments and use them to experiment with mid side mixing when you use them!
If you check out the sign up box at the bottom of the page you can get some free sounds from us to get you going.


Using Ableton Loops For Creative Production & Performance
Ableton Live is one of the more unique DAWs out there because it lets you work with audio tracks and MIDI tracks in in ways that other options don't really have an equivalent of.
It can do most things that other DAWs can do like record and comp tracks together, but when it comes to looping and manipulating audio there are some features that truly make it stand apart from the rest of the pack.
A big reason for this is many commercial DAWs are designed by more traditional software companies and their target market is people in the music production, sync, or recording studio industry.
That's all well and good, but Ableton Live's history is a little different. It was designed from Max/MSP patches that the group Monolake used to perform live with.
It was designed by fairly avant-garde artists who, by their own admission, were not trying to take over the world and be the next Apple Computers.
Their early goals were to have a small, boutique software company and the founders thought they would have enough support from friends and colleagues that it would be a sustainable venture, so they created a quirky tool they actually wanted to use based on their own musical needs.
So, you may be here to ask...

Does Ableton have loops?
Common question, especially from people new to the software and the short answer is fuck yea it does! They even had a live event for a few years called, Loop. We were there a few times and it was a great vibe.
The entire Live ecosystem is built around loops for the most part. We're going to look at Live's looping possibilities through two lenses:
-
Using loops for live performance situations
-
Using loops in the studio to generate new ideas.
Before we get into the details, you need to understand the session view and the arrangement view in Ableton Live. This is a core concept to the software that approaches things a little differently than other DAWs which were basically built to mimic the function of a traditional tape deck.
The cool part about Live is it was built to be a live performance tool that you can also bring into the studio. This is what makes it really stand out as a piece of music technology. Nearly every other DAW available is setup to be a studio-only kind of tool you use to combine multiple tracks into a master track as your final product.
It's origins are in Monolake's late 90's Max/MSP patches that they used in live performance.
If you're curious, you can listen to some of the music they made with it here.
What is the difference between arrangement view and session view in Ableton Live?
Ableton Live is like two DAWs in one. The arrangement view is like most other DAWs you may be familiar with. There is a timeline with a fixed arrangement of sounds that you play back, which is more or less the same every time. '
The session view is designed to be more flexible. It uses a grid with audio clips that can be triggered at different times based on different conditions. We like to use this a lot in the early stages of a project because you can get a few ideas moving, then try to combine them in various way to see how they fit together.
The session view is also a lot of fun when playing live and there are entire midi controllers built around it. There is both Ableton's own Push I and Push II controllers and many similar controllers that utilize the 16x16 grid layout where each button on the grid allows the performer to trigger clips of sound.
(As of 2023, the Push 3 allows you to upgrade it with a processor and run Live on the hardware without a computer!)
Clips can have different lengths, follow actions that affect what clip is played next (we will explain follow actions in a bit), be audio files or MIDI, and all the clips are available more or less at the same time. A musician can trigger them at will.
You can set up the Session view to be stable and consistent for a live performance situation or you can make it very unpredictable and likely to surprise you.
Ableton Live's session view might be more desirable to be used in the studio this way, but for the adventurous, it's ready to take on stage too.
Basics
Recording Loops To The Arrangement View

You don't have to specify if a piece of audio or MIDI will be a loopable clip ahead of time. Simple record normally into the arrangement view, then click on the clip to open the clip view.
Why is the Ableton loop button greyed out?
You'll need to make sure Warp and Loop buttons are both engaged for that clip. If warping is not enabled, the Loop button will be greyed out. Turn warping on and you will be good to go!
Once you've done this, hover over the right edge of a clip and the mouse cursor will turn into a little bracket. You can then drag the clip infinitely and it will loop at the points you specify in the clip view.
Simple Looping In Ableton's Arrangment View
Live also shows you the loop points in the arrangement view with a tiny, easy to miss marker in the clip which you can see in the image below.

The Arrangement Record Button vs Session Record Button
Remember how we mentioned Ableton Live is kind of like two DAWs in one? You may have noticed there are two record buttons!
What?! How does that work?
Ableton Live has a record button for the arrangement view and another for the session view.
Look at the transport bar at the top of the screen. The solid circle next to the stop and play buttons is the Arrangement Record Button. Click this and whatever tracks you have armed to record will record into the timeline like any other DAW.
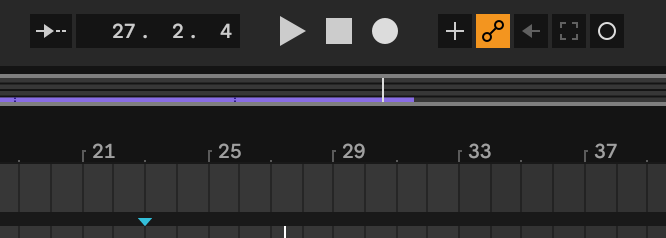
What happens if you click the open circle record off to the right?
Two things:
First off, you'll notice that the track is greyed out. What? Are you still recording?
Yes you are.

But where? We'll show you. You are recording to the Session view!
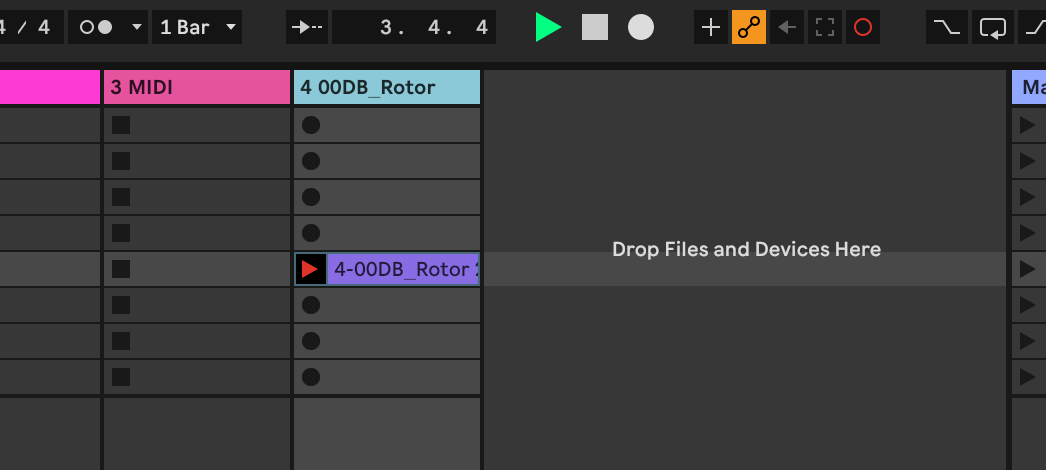
When you engage the Session Record Button Ableton will automatically start recording a looped clip into the selected clip slot in the session view.
Another Method For Recording Loops In The Session View
Let's focus on the Session View for a second. See how when you arm a track in the session side of Ableton, each clip slot has a circular button in each empty slot? Those are record buttons.
You can tell Ableton Live to record to a specific slot by clicking one of those buttons or mapping them to a MIDI controller. This works for both an audio track or recording a midi clip.
Loading Samples Into Clip Slots For Looping
You can alternatively just drag an audio file or midi clip into available slots on the session view.
If you plan on using a lot of pre-recorded clips for a Live performance, you definitely will want to do this ahead of time, not on stage, because you will usually have to set the clip's length, as well as the start and end markers for the loop by hand.
Doing this on stage is kind of playing with fire. If that's your thing, go for it but every time we've tried to do this its pure stress!
(After all there are people who literally play with fire on stage for the entertainment of other people so who are we to talk)
Creating Scenes in the Session View
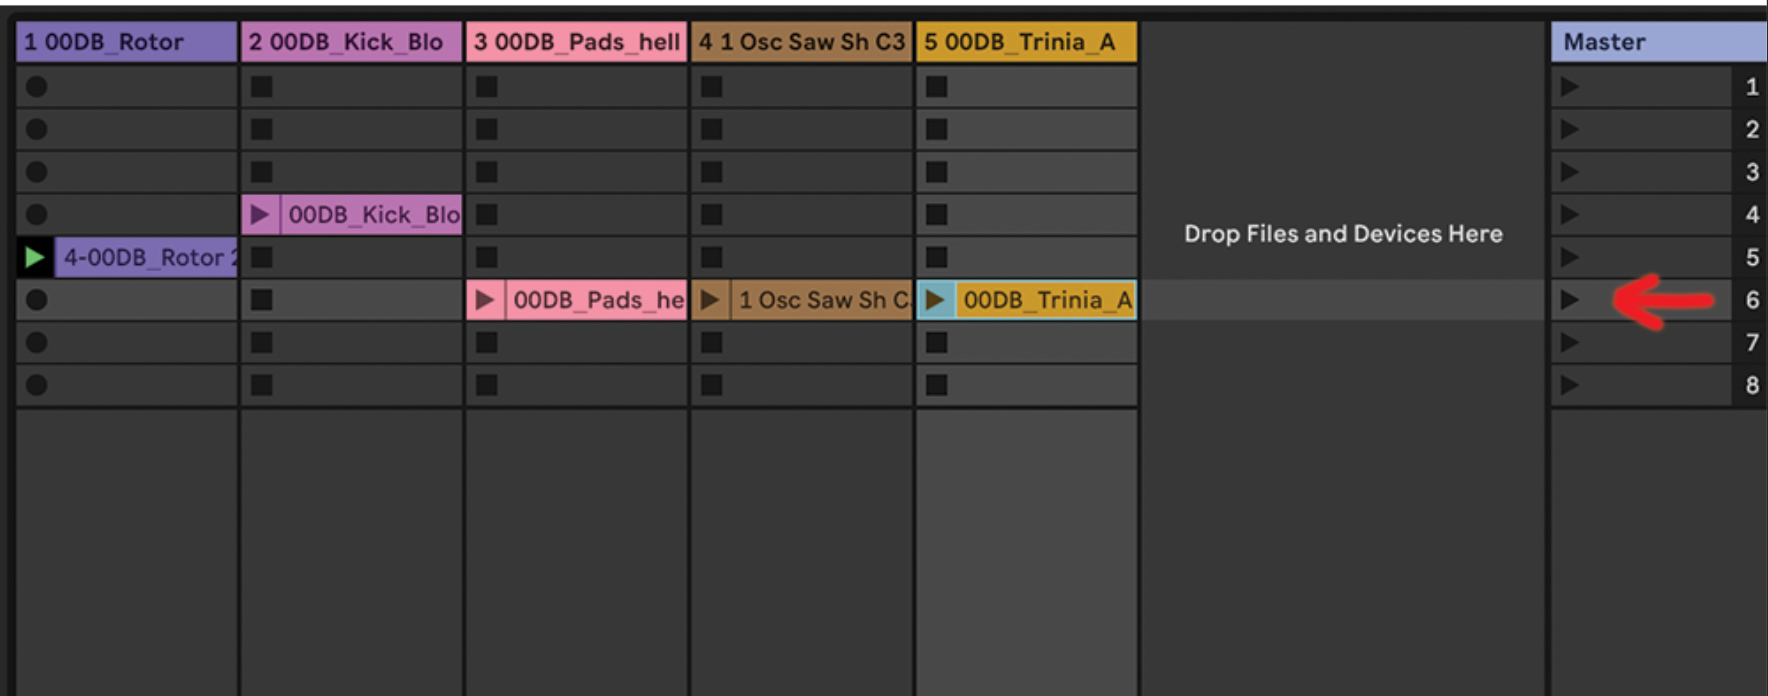
Ableton Live has some cool features that allow you to have a "scene" of clips that can be started all at once
-
Each horizontal row of clips is a scene. Click the corresponding play button in the Master track and all those clips will launch together
-
Launch Scenes. In Ableton 11, you can tell the program to switch to a particular tempo and time signature.
Expand the master track in the Session view by clicking on the edge of the pane and dragging, then you can enter this information.
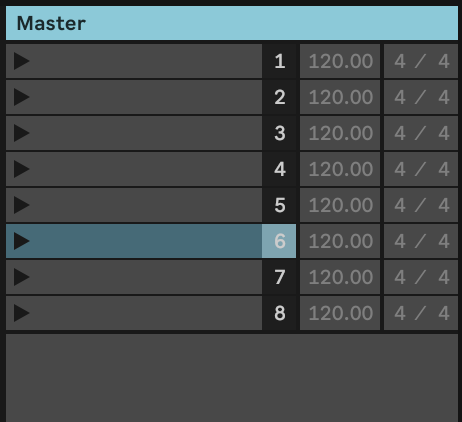
In Ableton Live 10 and earlier, it works a bit differently. You need to change the scene name and type out the tempo and time signature you want like this: 72 BPM; 7/8
-
Follow Actions for entire scenes. When you modify the tempo and time signature of a scene in Ableton Live, a dialog in the lower left corner of the screen will allow you to set what Follow Action you want and what it's probability is. This is a new feature only available in Ableton 11.
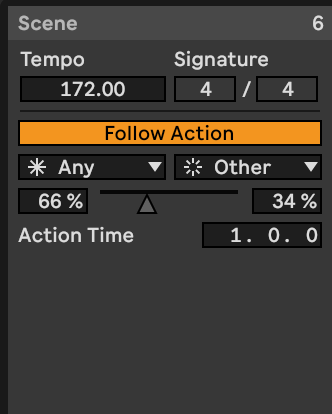
Hold on, what the heck is a Follow Action?
This one of those features you wouldn't think you'd want to have until you see it in action and in our opinion one of the really special things Ableton can do that other DAWs don't have an equivalent of.
We've talked about how you can load sounds from one of your sample packs in the session view and trigger them with a midi controller like the Ableton Push.
What happens when a clip plays? One of three things:
-
the clip play until the end, then stops when it runs out. This is often referred to as a "one-shot" sample.
-
The clip loops forever until you till it to stop.
-
The Follow Action decides to trigger another clip.
Follow Actions in Ableton Live are a way of programming a clip to trigger other clips in a probabilistic way.
Follow Actions For Live Performance & Idea Generation
If this still doesn't make a ton of sense yet, let's walk through an example that can be used to help you create new ideas or improvise live in a cool way.
-
Take a few different drum breaks, load them into clip slots on a track in the session view, warp them to tempo, and make sure they all loop smoothly. It's ok if the loop length is different, in fact this is usually more interesting.
-
Highlight all of them, enable Follow Actions, and click the Legato Button. Keep Quantize set to Global (will explain Quantization a little further down in the article).
-
Normally Follow Actions occur at the end of the clip with the default Linked Mode enabled. Change this to Unlinked. Now we can tell Ableton to engage the Follow Action after a certain interval of time.
-
In the Follow Action time control, we're going to set it to 0.1.0 which translates to every beat. These three numbers correspond to measures.beats.16th notes. So 1.0.0 would engage at the start of every measure. 0.0.1 would engage every new 16th note.
-
Finally set one of the Follow Actions to 100% probability with the slider and choose Other. This means to play any other clip other than the one that just played.
Here are each of the above steps demonstrated with video
This is a great way to mangle a bunch of sounds and experiment in the studio or improvise live. You can see in the video its still possible to trigger sounds with the clip play buttons, as well as fade between two opposing Follow Actions.
Be careful about overloading your CPU if you're going to do this live, but in theory this can be used to chop up as many drum breaks as your computer can handle, as long as you don't mind having a ton of clips in the same track.
Help! My clips are launching but everything is out of time!
First thing to check is that the clip is launching from a logical place and second that the loop markers are also in a logical place.
Usually the launch marker and loop marker will be in the same place, but you may not always want that, for example if you want to play a short intro, but then loop the clip only when there is a drum beat.

Also, double check for problems like this. See how the loop start marker is slightly off the grid? This will cause the loop to slowly drift out of time with everything else because the clip is slightly longer than everything else.
It's really easy to miss these when your zoomed all the way out if you were not editing with snap to grid turned on. Zoom all the way in an double check these points.

Global launch quantization in Ableton Live
We also recommend that you double check that all clips are set to global launch quantization and that the global launch quantization is set to something reasonable for the music. Usually this is 1/4 or or 1/8 but that is dependent on your music.
You can find this control in the upper left of the screen near the metronome control.
What can Ableton Looper be used for?
Ableton Live's ecosystem is built around being about to loop things, so why would they also have a dedicated Looper plugin? The short answer is simply because people asked for it! Why now?
One example is if you have the rest of your session view setup to manage audio tracks for a live performance that you also want to do some live looping inside of that, it might be more manageable to map your midi controller to the Looper device because it's laid out more like a guitar pedal.
Some people also will use Looper as a studio tool when doing sound design because it allows the user to quickly record, then re-record clips of audio.
There's a lot of overlap between the Looper and Live's native looping functionality to it's best to experiment with both, then just use the one that fits your workflow better.
Get some loops
All this sounds fun but you need some sounds to get started experimenting with Live's looping magic?
Be sure to check out our sample packs, virtual instruments, and Ableton devices to inspire you and create something that speaks to your style.


How To Sidechain FX Like A GigaBrain With Ableton Envelope Follower
It seems like all the YouTube influencer crowd of music producers ever want to talk about is sidechaining.
How do you make space for a kick? Sidechain.
How do you get that pumpy EDM synth sound? Sidechain.
How do you keep your dog from getting dehydrated on a hot day? Sidechain.
(Kidding do not do this, please make sure your dog has lots of clean, cool water to drink.)
But you get the idea. Today we will explain why this gets talked about so much for reasons that are legitimate as well as some silly ones. Then you will see (with video examples) how to setup a basic sidechain compressor, as well as how to connect pretty much anything to anything else in a sidechain-like way using Ableton Live's Envelope Follower instead of a compressor.
Let's dive in!

Pump My Ride, Sidechain My Heart
There are two parts to this article, the typical sidechain compression technique you see in tutorials with a compressor and sidechain input track, mostly to help a kick drum punch through a heavy bass track.
In the second part, you're going to learn how to sidechain anything to anything else with the Envelope Follower.
Really.
But first, let's look at the basics.
Why do people talk about sidechains so much? I keep hearing this come up.
"Sidechaining" is one of those music production and mixing techniques that people obsess over for a few reasons:
-
It used to be hard to setup on older equipment (Ableton makes it very easy now)
-
You need it to get certain sounds. Once you hear it, you notice it everywhere in modern music.
-
It sounds complicated and smart to people who don't know. Like you're really doing super technical hardcore engineer type stuff. People like feeling smart, so they talk about it a lot.
-
It can really make a big difference in a mix, especially in achieving low end clarity or creating dynamic-sensitive effects.
So what is Sidechaining?
Sidechain compression in ableton (or any DAW) is a "ducking" technique where you use the volume of one track to tell a compressor on another track when to compress something.
We'll explain later in the article how sidechain techniques are not limited to just compression, but usually when people talk about a "sidechain" they're referring to this explanation.
Say for example you want a guitar track to get a little quieter when a the lead vocal comes in, but get louder again when the singer stops. Or you want your synth bass track to get quiet for a short instant when the kick hits, but then goes back to normal level immediately.
Could you draw in a volume automation that creates space in the mix? Absolutely. But in a track with hundreds of kick drum hits or vocal entrances, that's a lot of manual labor. A sidechain compressor can automatically apply gain reduction when an external source triggers the compressor.

Create Space & Save Time
This can be used as a mixing technique to save you time and be more precise than automating a gain knob by hand. You can also use sidechain compression as a production technique to create a pumping effect, only apply compression based on a certain frequency range, or in more creative ways like automation reverb and delay "throws".
How Is Sidechain Compression Different From An Envelope Follower?
If we're going to define sidechaining as using one signal to trigger some change in a another place, we need to talk about the Envelope Follower in Ableton.
Think of it as a way to apply sidechaining to effects parameters. Any effect parameter you want! The envelope follower ableton has will track the level of a signal and turn a knob on whatever effect you map it to.
A basic "auto wah" setting works like this. As signal increases, a filter opens up.
But this is just the tip of the iceberg because we can use the Envelope Follower to change several effects parameters at once, to different degrees, and in opposing directions.
If you don't totally understand that last sentence, its ok! We're going to get into examples of both.
Let's start with reviewing how to setup a typical sidechain compressor on a bass sound trigger by a kick drum.
Part 1: Basic Sidechain Settings With Ableton's Glue Compressor
All the steps to do this are below, but if you're more of a video person and want to hear an audio track to get a feel for the sound, here you are:
Load Ableton's Glue Compressor onto the Track You Want to Compress
Below is a bass track and drum track. Load the Glue Compressor onto the bass track in this case.

Locate and enable the sidechain toggle button
You'll need to open the sidechain menu. Click the triangle icon in the upper left corner of the plugin, then click the button that says Sidechain.

Set a sidechain input signal
Under the Audio From dropdown menu, select the track you want to trigger the sidechain compression with. In this example, we will use the kick drum to trigger the compressor to turn down the volume of the bass synth track for the instant the kick drum plays, then it will recover back to 0 immediately after.
Enable the Sidechain EQ?

You may want to target the most resonant part of the frequency spectrum so the sidechained compressor triggers more accurately.
If you enable the EQ button, change the filter mode to the the shape that that makes the most sense (a lowpass for kick will work nicely because a kick is heavy on low end frequencies), then adjust the filter frequency and Q control (filter width), you'll be able to find the sweet spot where the compressor responds best.
We find this is best done by ear so use the blue solo button (look for the headphones icon) and listen to the sidechain input signal. If you're trying to recreate what we have here, you'll hear the kick drum when the sidechain input is soloed.
Set the Attack, Release, Ratio, and Threshold
Attack time
The Attack control sets how quickly the compressor responds. Since we're sidechaining to a drum sound, we want this to happen as fast as possible.
Optional: Lookahead
Some digital compressors even have a "lookahead" feature that can anticipate a sound before it actually happens to make the timing as tight as possible.
Release controls
The Release control sets how quickly the compressor recovers to zero. Another way to think about it is how snappy or sluggish the compressor behaves.
Generally, you will want the compressor to get back to 0 or close to it by the time the next kick plays but you'll need to adjust by ear until the timing feels good.
You can kind of control the swing of different elements by adjusting Release time, so this is an important setting on any compressor, not just sidechains.
Ratio
Compressor Ratio is one of the most important compressor settings. How much does the compressor compress? You can look up how many dB of gain reduction will happen at various ratios, but we always just work by ear. Just remember that a higher ratio number means more gain reduction.
Threshold level
Threshold controls at what level the compressor engages. You may want to re-adjust this after you have the other time based controls dialed in. A compressor with a fast attack and medium ratio has a different sound and character than a slower attack, lower ratio, but with the threshold turned all the way down.
Sidechaining For Mixing vs Production
The basic glue compressor sidechain previously mentioned is great for mixing. But what about getting that cool pumping effect we hear in so much modern electronic music, hip hop, and even rock music?
Applying Aggressive Sidechain Compression and Pumping Effects
The setup you're going to use for pumping effects is mostly the same, but we're going to to use more extreme settings.
There are a bunch of ways to do this.
The simplest methods are to crank the sidechain input signal, use a more extreme threshold level (make it lower so the compressor engages more quickly), or use a higher ratio for more gain reduction.
After you try this, you should also try using deliberately slow release times or even automate the release time, so it's less predictable.
MULTIBAND SIDECHAIN COMPRESSION

Now that you know the basics, look for the sidechain option in other plugins. This isn't limited to just the Glue Compressor.
Several Ableton Live stock devices have it, including Multiband Dynamics, which you can use to radically reshape a sound by triggering gain reduction in different parts of the spectrum with an external input.
Sidechain OTT
To start, try using the Multiband sidechain with Ableton's now infamous OTT preset. A little of this goes a long way!
Over The Top
We don't know what this stands for, but Over The Top is probably a solid description. This is a "New York" style of compression that absolutely smashes the input signal while using the EQ section to pump lots of highs and lows. Usually this is used in
parallel with the original, so you're Amount setting will only be at 10-20%. You can possibly go higher, but anything over 40% or 50% starts sounding a little insane.
Try the following settings to get started sidechaining OTT if you're curious.

Part 2: Enter The Envelope Follower

This is the second part of the article where we get into true Gigabrain territory. Why? Sidechain compression in Ableton is not a new thing. If you look at old school hardware compressors, some of them have a physical 1/4" jack that allows an engineer to feed a sidechain input track to the hardware so it can do its job.
The technique has been around for decades now.
Brave New Digital World
However, a digital envelope follower that we can map and adjust to all kind of things inside the DAW? This is a more recent invention and the good people at Ableton have made this very simple to do in Live.
It's certainly possible in other DAWs, but it can sometimes be complex or time consuming to setup. Nothing interrupts the creative flow like having to deal with some very left-brained, analytical IT task like audio signal routing.
In Ableton Live, just a few clicks and you're ready to go. It's easy to change things too.
The GigaBrain Way To Sidechain Kick, Bass, or Whatever Else You Want
Instead of using sidechain compression in Ableton which will lower the volume of the entire track, what if you wanted to only affect the part of the frequency spectrum where our issue is?
In our case the kick drum and bass are competing for low end space.
Look Mom! No Compressor!
Using only the Envelope Follower and EQ8 without any compression, we're going to duck out the frequency range causing issues.
-
Start by putting the Envelope Follower on the Kick Drum track. When audio signal hits the plugin, you'll see it trace the waveform like this. Since this isn't a compressor, the Rise, Fall and Delay controls take the place of attack and release settings. Honestly the easiest way to dial this in is to play with the settings until the waveform looks correct.
-
Now on your bass synth (or whatever bass track you want) put an instance of EQ8 with one band enabled. The low end shelf or a wide bell will work.

-
Go back to your kick track and click the square button in the upper right corner of the plugin to access the mapping menu. Set the first slider to 45%-50% and the second one to 0%. This will keep our sidechain moving in the right range.

-
Click the first Map button and it will start blinking. While it is blinking, navigate back to the bass track and click on the Gain knob of the the enabled band in EQ8.
Now when you play the audio, the EQ band should be creating a cut when the kick drum plays, but then returning back to flat right after the drum hit, totally automatically!
If you've never done this before, it's going to seem like magic.
Here's a video showing how quickly this can put together.
The crazy part is since the Envelope Follower allow you to control all kinds of Live devices like a reverb, a high pass filter, some obscure effect buried deep in a drum rack somewhere, etc. you can really dive into a whole world of sound design.
Sidechaining much more than compression
Know this you can sidechain basically anything to anything else now! This opens up a whole world of sound design that either wasn't possible or what much more difficult to setup in the past.
You may have already used this type of effect before.
Ever seen an envelope follower pedal?

An old school "auto wah" effect is simply and envelope follower circuit mapped to a filter. The filter opens up more as signal increases. So a refined guitar or bass player can control the wah-wah sound of the filter depending on how hard they play.
But in Ableton Live anything can be setup to behave like this, not just filters.
So take this knowledge and run with it! See what kind of problems you can solve or wild sounds you can make by mapping the envelope follower plugin around Live.
Do you want to learn more music production techniques?
Explore the blog or download some of our products and we'll keep in touch. We don't send a bazillion emails and blow up your inbox. Expect the occasional message with product updates or announcements whenever we have something fun to share.
Thanks for reading. Don't forget to check out our products or download a free set of sounds from us in the signup box below!


Do You Suck At Sequencing Drums? Let's Fix That!
One of the most common questions we get when working with new producers or musicians looking to get into production is how to start sequencing drums from samples and VST instruments.
Why would a person who plays an instrument already (even a drummer!) have the same problems as a totally green producer? The instrument is already doing a lot of heavy lifting to create that sound when you play a single note on a real drum.
When a great drummer plays even a simple beat, there is a lot more complexity going on under the surface that one might think. When you are working on a hardware sampler or computer you have to tell the machine one step at a time to do all the things real drums and real drummers do without much extra effort.
This article gets into the little subtleties that you need to program great drum loops in electronic music genres like house music, hip hop, and drum n bass, using sample packs or your own home brewed sounds
What is Drum Programming or Sequencing?
Sometimes people hear the word "programming" and think you're writing computer code. You can of course, but most of the time drum programming or sequencing drums means telling a sampler when to play back drum sounds with MIDI or using a hardware sequencer's internal software to decide when to trigger notes.
A lot of music production commonly involves placing notes on a MIDI piano roll in a DAW like Ableton, Logic, or Pro Tools.
How do the notes get there? You can record a performance using controllers or triggers, a producer can click on the piano roll where they want notes to occur, or you can use devices like arpeggiators to generate parts.
You can do this with any sound you want too. Can be a virtual instrument, free samples you found somewhere, special effects, literally anything. You can use normal drum sounds, or you can use really different samples to compose the rhythmic foundation of your tracks.
So don't be intimidated by drum programming. At its simplest it is just inputing a drum pattern. But that's where it starts. There is a lot of detail and subtly that goes into it as you become more advanced.
MIDI vs. Audio
There are basically two ways that a musician might go about sequencing drums:
- Programming a note which tells a sampler or plugin to play a note.
- Or you can just drag and drop audio samples from your device directly into the timeline of a DAW and not worry about using MIDI notes at all to create drum patterns.
These two methods have their pros as well as their cons. Most beatmakers and producers use a mix of both and have their personal preferences when sequencing drums. MIDI is more flexible and can be manipulated in interesting ways, but we find using raw audio is faster.
Audio Player Madness
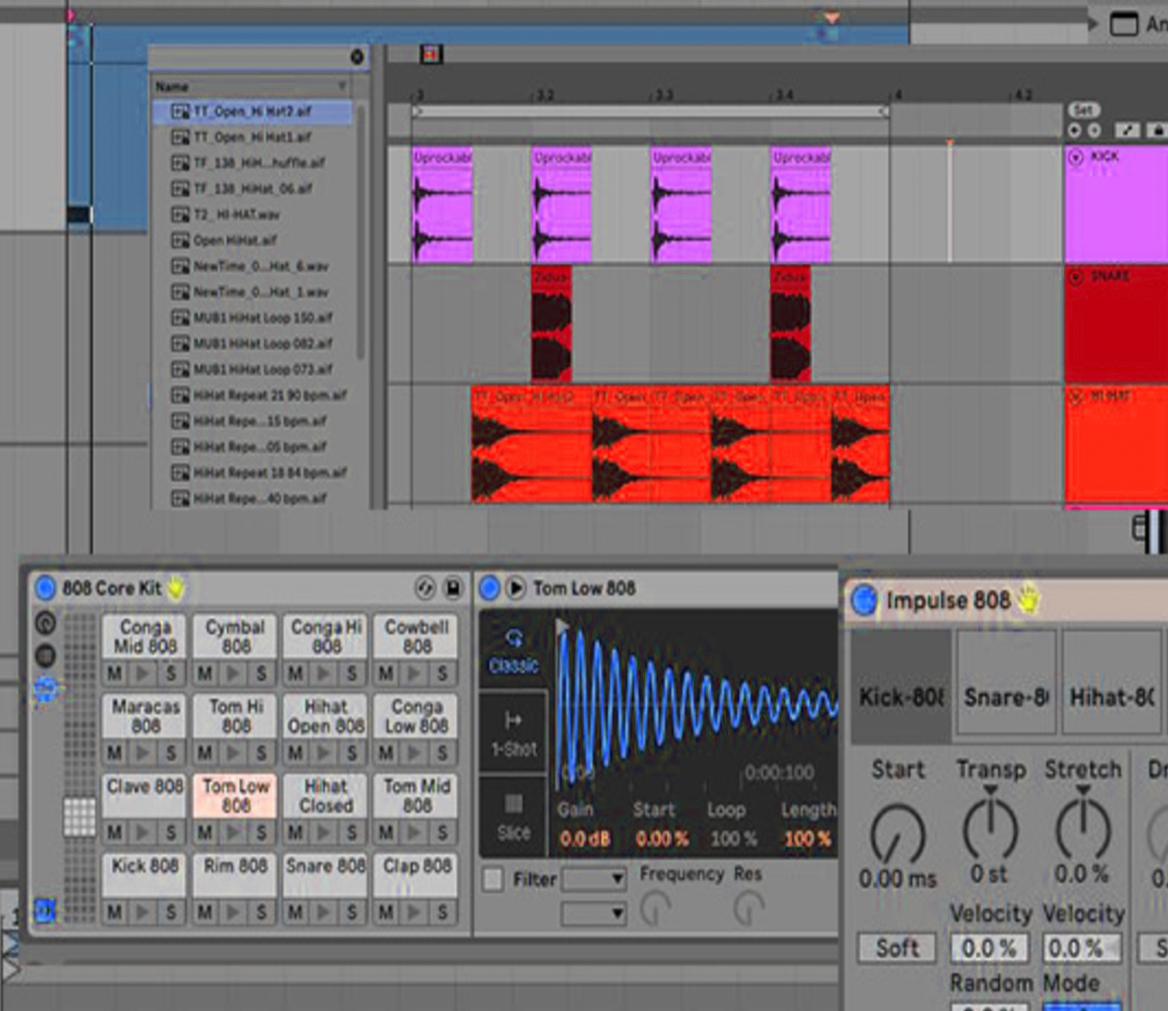
You can literally just start dragging stuff into the timeline and nudging it around until things sound right. Find a sample pack you like and start making drum beats right in the timeline! You can always flatten it to a single wave file later to make it easier to work with, or drag that new file into a sample and trigger it with MIDI as you would a drum break.
Drum Programming Basics
In genres like EDM, rock music, or hip hop the sounds used are typically rooted in what is available in a regular drum kit, like a kick drum, snare, hi hats, cymbals, and toms.
But!
In modern music, your percussion sounds can be whatever you want. There are literally no limits other than what your computer can keep up with.
Want to bang two sticks together and turn that into your closed hi hat sound? People do that kind of thing all the time. Also, it's pretty common to used sampled drum machine sounds that are interesting, but don't actually sound much like real drums. For example, a snare drum sample might just be gated noise.
The most important thing is to just keep an open mind about what a drum sample can be when sequencing drums.
Creatively, we find it helps to impose some limits on yourself. Having every available option at all times is usually more overwhelming than inspiring. Find a sample pack and make yourself figure out drum patterns using only that. Or limit yourself to a specific drum machine and see what you can make.
I know the basics, but how do I get better at drum programming?!
If your drums sound boring, bad, out of time, or you are stuck doing the same thing over and over again we have good news.
99% of the time it means you have one (or several) of the following problems when sequencing drums:
-
You don't know basic drum patterns or how to learn new ones from songs you like.
-
You don't understand syncopation, cross rhythms, meter or other basic structures.
-
You're trying to work with drum samples that suck or don't fit the genre.
-
You're trying to program everything "on the grid". If you nudge things off the grid, like the tutorials say, it sounds worse :(
-
You don't have an understanding of how real, human drummers actually play.
-
You're on the right track, but you don't know the basics of a drum good mix.
-
You see YouTubers or friends process a bad sound into just the right sound, but you can't do this yourself.
We're going to go through these one by one to help you be on your way to successful drum programming.
Don't try to learn everything at once
You need to focus on one component of drum programming at a time. If you try to learn everything at the same time, most people get overwhelmed and give up.
Don't chase two rabbits at the same time, that's a great way to make sure you catch neither. Pick one thing and focus on that for a while.
For example if drum patterns feel murky and confusing, spend a month of two just studying different patterns. A real drum set player spends a lifetime on this.
It might feel like you're not doing much at first, but once you've done the work, you have the knowledge forever and it stacks up over time. So dive in and trust the process!
Let's dive in and explore how to deepen your drum programming knowledge.
Problem #1: You don't know basic drum patterns or how to learn new ones from songs you like.
Lots of people will search around for "cheat sheets" of drum patterns stick to repeating 2-3 patterns they know.
We think it's a lot more important to understand why certain elements of a drum pattern are there to begin with and learn lots of grooves from different tracks that inspire you. Then, when you go about sequencing drums you will have a lot more creative freedom.
Instead of digging around on Google for a quick hack, we think it's really worth the time to study the music you're into and pick it apart.
Amen Brother
To start learning basic drum patterns pick a song you want to analyze. Start with the "amen break" by The Winstons if you have no idea what to pick. Its deceptively simple and serves as the rhythmic backbone to lots of music, so it's worth picking apart.
First you want to listen for how many drum elements you hear. Is there a kick drum? A snare? Hi hat? Some weird blip that's being used as percussion? Maybe there's two snares, a high pitched snare drum and a low pitched one.
Next, dub a few measure of the song into your DAW and arrange it so the beat is in sync with the project tempo (being able to turn the metronome on and off is helpful).
Now you're going to try to recreate the beat in a MIDI track below that with any sounds you have. Program a kick drum where the kick hits, the hi hat on the same beats, etc until you have every element covered.
Let it suck!
It's fine if your recreation of the beat sounds kind of simple at this point. It might not, sometimes it sounds pretty cool right away.
But if it sucks, let it suck! You're not trying to compose a finished beat, you're doing this to analyze the pattern. What beats do the snare and kick hit on? Do you notice any patterns that come up?
If you get yourself into the habit of doing this often, you'll start to intuitively "know" where things should go without thinking about it too much.
Doing this with 10-20 beats is a good start, but ideally this will become how you pick apart a new beat you don't fully understand. After a few dozen boom-bap hiphop beats you'll have a pretty good idea of how drum patterns work in that genre, but when you run into some crazy 5/4 trap drum pattern you've never heard before, you now how a system to pick it apart and understand what's happening.
Problem #2: You don't understand syncopation, cross rhythms, meter or other basic structures.
Basics of Meter
If you don't understand what 4/4 time means vs 5/4 or 3/4, what triplets are, or how to beat up a beat into smaller units, looking at the grid in your DAW will be confusing and you're not going to be able to reproduce more complex rhythms.
Let's understand the basics of that right now.
4/4 time means you have 4 beats inside a measure of music. A measure of 5/4 would mean there are 5 beats inside a measure (not as common, most commercial Western music is in 4/4)
The pattern starts on beat 1. Think of a measure as just a unit of time. You can string together a bunch of them to make more complex things later, but lets keep it simple.
In electronic dance music or techno, you might put a kick drum on every beat. Your DAW metronome clicks on every beat. These are sometimes referred to as a quarter note because they take up one quarter of a measure in 4/4.
You then can break up each beat into smaller beat. If you play 2 notes on every beat, you can make the basics of a simple hi hat pattern. These are called 1/8th notes. Each note is one eighth of a bar. Noticing a pattern?
But what if you played 3 notes per beat? Those are called triplets. What about a 16th note? Totally fair game. They're twice as fast as 1/8th notes so they mix will together.
These are just the basics. If you understand this, you have a decent framework for analyzing new rhythms that aren't yet in your vocabulary.
Cross Rhythms & Syncopation
Programming too many notes of the drum beat on strong beats (directly on beat 1, 2, 3, 4 in 4/4 time) sounds square and boring a lot of the time. The notes that make things groove and make you want to move are the things between beats. Or the notes that sometimes land on the beat.
If you want a good example of a basic cross rhythm, try this.
In 4/4 time, make a few measures of music with the kick playing only on strong beats. There should be 4 in every measure. Now with a hihat or other short sound, program a new note every three 16th notes. The way it works out it will sometimes line up with the beat, but mostly won't.
However the two elements co-exist and things start to groove more. Generally, interesting beats are going to have little piece of these kinds of cross rhythms that make you anticipate strong beats, or feel two patterns at once. This is what makes things groove unlike straight quarter notes.
Problem #3: You're trying to work with drum samples that suck or don't fit the genre.
This is obviously very subjective! What fits and what doesn't? A lot of that is beholden to the creativity of the producer. But generally speaking, if you're trying to make lofi hip hop with a sample pack of big room EDM risers, you're going to have to be really heavy handed to get those sounds to work in that genre.
Another common problem is trying to force samples that just aren't good. Yes you can do things like manipulate "found sounds" into almost any musical element, but if you have a snare with a resonance that clashes with the key of the song or an 808 that doesn't have enough bass, you're fighting an uphill battle.
Digging for samples is part of the production process so we encourage you to do it often. Get an extra hard drive and make that where you stash you sample library. That way, when you're working on a drum part and a sound just doesn't fit, no worries. Swap in some other individual sounds and move on instead of trying to force something that isn't meant to be.
Problem #4 & 5: You're trying to program everything "on the grid" and you don't understand how drummers actually play.
Nudging drums is an easy trick that sometimes makes quick a big difference, but remember that when you nudge a whole hi hat pattern for example, it's still "on the grid" you're just displacing everything a little. The relationships between the notes have not changed!
Instead you need to start experimenting with the "swing" of the beat. Proficient drummers all have a swing to the way they play, meaning they don't play on the grid, ever. If they play 16th notes, some of them will be a little ahead or behind where the grid lines sit in your DAW and they'll never be exactly the same twice.
This is defined by subtle differences of timing and velocity that add to grooves and rhythmic nuances of loops. Software like Ableton or hardware like the MPC allow a producer to apply a swing (in Ableton its called the Groove Pool) to notes that help capture some of the variation the a real drummer would have when they play.
Study the real thing
If you really want to get in the weeds and look at the details, get a drum loop of a real drummer playing, sync it you your project BPM and look at how the individual drum beats line up with the grid in your DAW software.
Do the strong snare and kick beats hit exactly on the grid lines? Hell no. They'll be close, but generally a little ahead or behind and never exactly the same. There will probably be even more looseness with ghost notes and anticipatory notes. Some drummers play looser than others too.
These subtle variations are what give a drummer their specific sound and groove, so if you want to capture some of this when you start sequencing drums in your own programmed beats, we strongly recommend getting it from the source!
Problem #6: You're on the right track, but you don't know the basics of a drum good mix.
When programming drums, you don't need to have a perfect mix, but if elements aren't generally balanced it can change how you perceive the groove of the music you're writing.
A common mistake is having sustained, high frequency spectrum heavy elements too loud, like ride cymbals and open hi hats.
Utilize the Pink Noise Curve
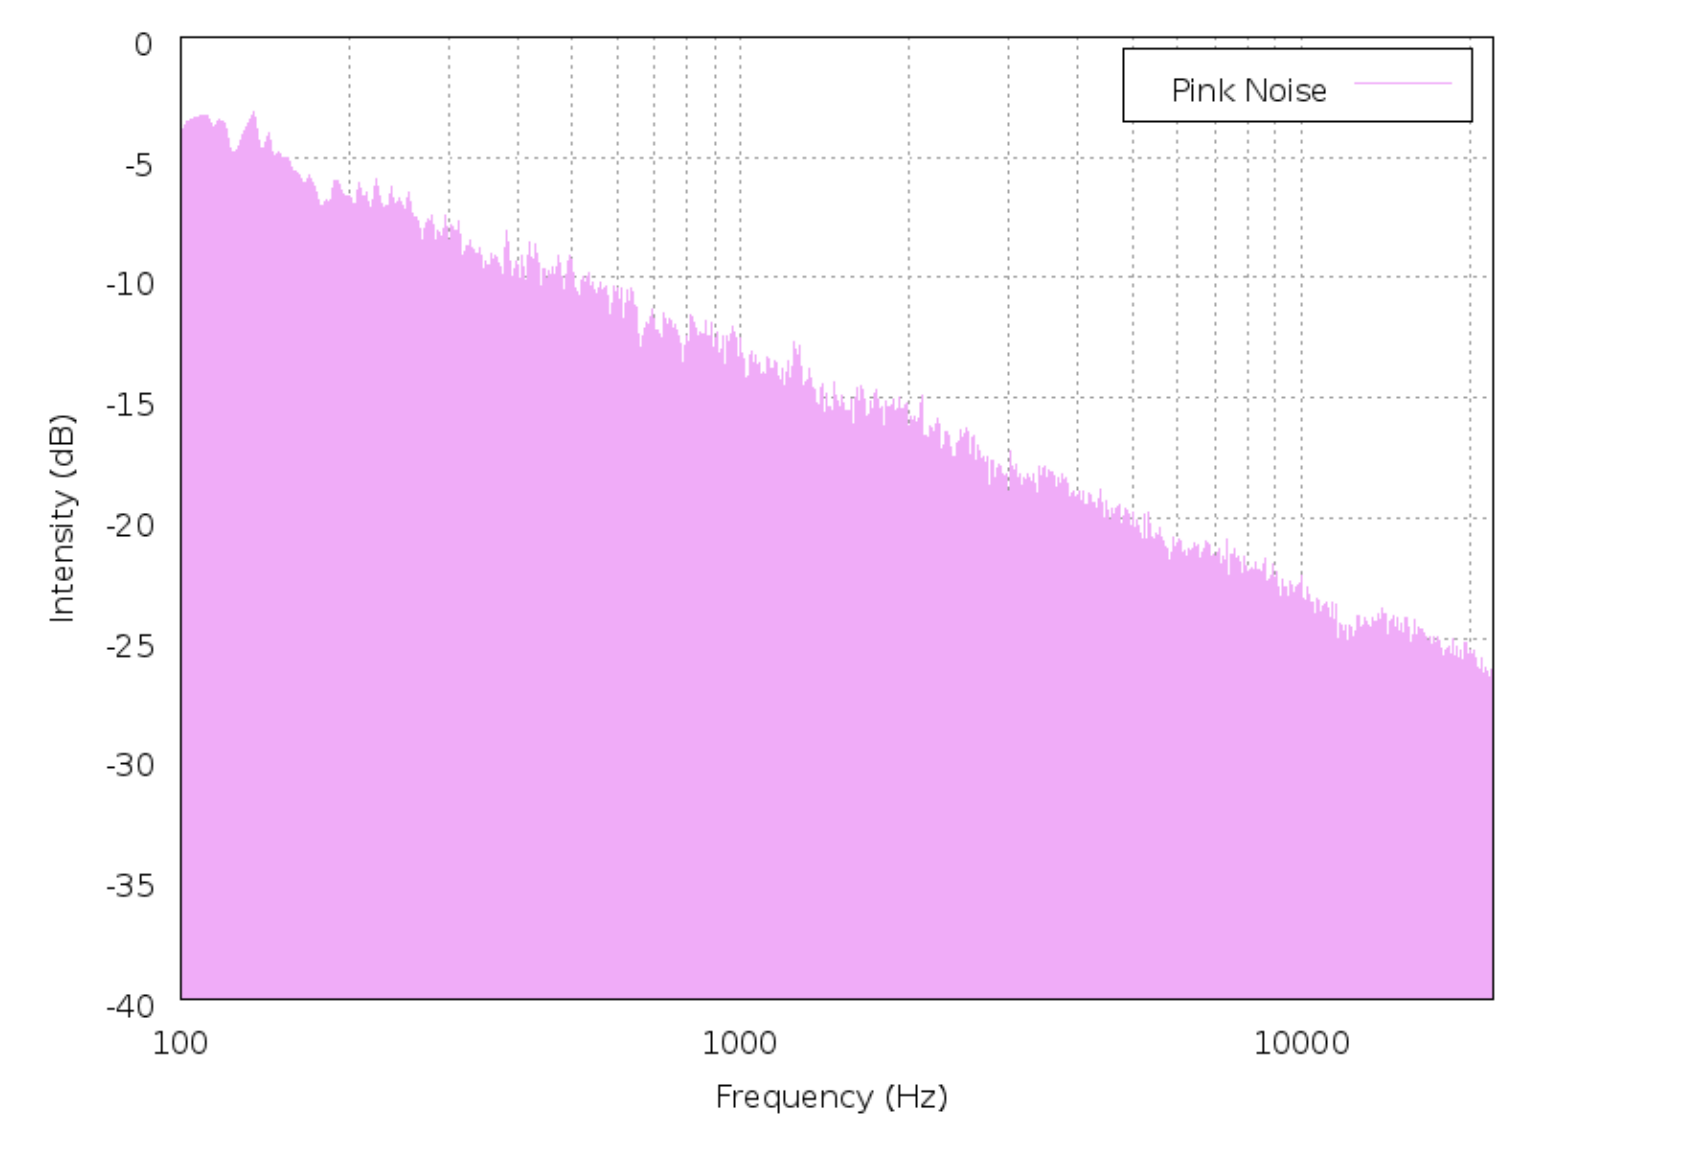
A good starting place to balance the drum mix when you're still in the programming stage are to keep the bass drum and snare drum elements balanced with each other—one shouldn't be dramatically louder than the other—and make sure nothing is clipping unintentionally. Then slowly bring up the high frequency elements like hats, cymbals, and auxillary percussive elements.
To help train your ears to hear the right balance, turn on the pink noise curve if your meters have it, or just pull up an image of one online. The gentle slope in the high end of pink noise makes a good reference to make sure the elements that live up there don't get too loud, which is a common problem for many people when they are starting out.
Problem #7: You see YouTubers or friends process a bad sound into just the right sound, but you can't do this yourself.
YouTube is an absolute goldmine and there are many people making videos that get into the nuts and bolts of how music works, including us. This is great.
However, we've noticed that a lot of tutorials are kind of like cooking shows. They have certain things pre-made ahead of time and they had to fuss with their examples to behind the scenes a lot for the sake of making a concise, clear video.
Or if they do sound design on the fly, they know exactly what they're looking for and how to get there. This is not their first rodeo. That quick, on the fly example has thousands of hours of reps and practice behind it.
So of course if you're still learning basics of sound design like using ADSR envelopes, filter envelopes, stereoizing techniques, learning the common DSP effects, you're going to struggle sequencing drums even with pretty basic tools.
Unfortunately, there is no shortcut here. Sound design is a huuuuuge huge topic. You need to just dive in and start learning if you want to get better at this component.
Just don't worry if you feel overwhelmed. This is a GOOD thing. Yes, sound design can be explored for a lifetime, but this means there's an endless fountain of inspiration there. Anything you can master and know inside and out after a few years will get boring eventually because there is nothing new to discover. Sound design isn't like this. There is always a new thing to discover
Sequencing Drums - Wrapping it up
We know this is a complex topic and there are endless tutorials out there explaining parts of the process. We hope that this was able to help you structure some of that learning and give you an idea of what to learn first before moving on to other components.
Every topic has pretty much been covered somewhere when it comes to writing music and understanding rhythm so coming up with a plan of attack to digest all of it is essential.
Let us know how we did and and don't forget to check out some of our sounds and devices to juice up your productions.


How To Change Velocity in Ableton Live and How It Can Empower Your Productions
MIDI Velocity is not simply like a volume control that adjusts how loud a note is. Yes, that's one way to look it, but we think it goes much much deeper than that.
Velocity is an entirely different thing because it isn't actually audio data. When you adjust velocity between 0-127, that can trigger effects, change samples, and a whole lot more. MIDI Velocity is a set of instructions.
And the way Ableton does things is different than other DAWs. You have MIDI tracks and MIDI clips like a lot of other DAWs. However, you have two different places to work with them: the session view and the arrangement view.
Most DAWs only have their version of the arrangement view and a piano roll.
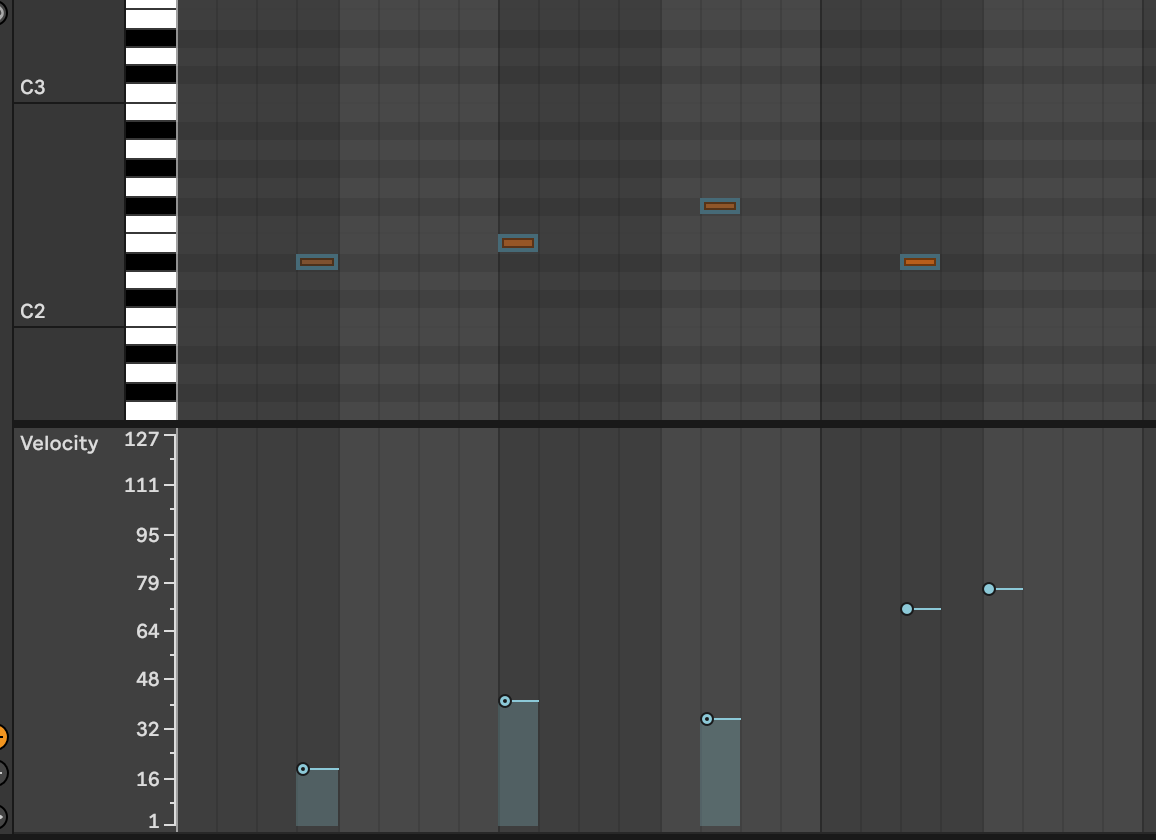
How Note Velocities Affect What You Hear
The velocity of a note usually programmed in a way that determines how "hard" the note is played. Again, MIDI is just instruction data, not actual audio, but this data affects what we actually hear in major ways. For example in most sampled software instruments, there are breakpoints where a MIDI velocity within a designated range trigger specific samples. Higher or lower MIDI values trigger different samples.
Note: If you're concerned that Ableton handles MIDI in different ways than other DAWs, don't worry! The MIDI protocol is always the same. It's kind of amazing we have this standardized protocol to get all out instruments talking to each other in the studio. However Ableton provides some unique ways of working with MIDI that we're going to explore.
When you play a MIDI instruments in Ableton Live, the velocity values can be routed and programmed to change all kinds of things beyond the playback volume of the sound, examples include the volume, brightness, and envelope characteristics of the sound.
A higher velocity value can be used to make the volume of the note to be louder, influence the shape or resonance of a filter envelope, or modify the ADSR envelope.
Every virtual instrument and synth is a little different in this regard. In Ableton's Sampler instrument, there is a velocity editor which can be setup to affect all kinds of things.
The velocity of a MIDI note can also be used to control more complex aspects of the sound, like the balance of different sample layers, the reverb wet/dry mix, or introduce changes based on what octave a player is performing in. You may not want the bottom of the keyboard to do the same things as the keys on the higher octaves of your MIDI controller.
This enables you to really be specific about how an instrument behaves.
MIDI note velocity is a big factor in any DAW. Ableton Live, Logic Pro, Pro Tools, they all have their own quirks of dealing with all these details.
Experimenting with programming different velocity value mappings can help you find the perfect sound for your music and add expression and depth to your performances.
How To Edit Individual Midi Note Velocities in Ableton
In Ableton Live, you can change the velocity (volume) of a MIDI note by editing the velocity value in the MIDI editor. Here's how:
-
Open your Ableton Live project and select the MIDI clip that you want to edit.
-
Click on the MIDI note you want to edit. In the Velocity editor below (you may have to expand it if its hidden) there is a velocity marker you can drag up or down to change it's value.
-
Alternatively, you can hold the command (Mac) or control key (windows) and then click and drag the mouse up or down to quickly change velocity. You can also change groups of MIDI notes this way even if they are not at the same velocity.
It's important to note that the velocity of a MIDI note can have a big impact on the sound of your music. Higher velocities will generally produce louder, more powerful sounds, while lower velocities will produce softer, more subtle sounds.
Its important to remember that even small adjustments in velocity or a single note change can make a big different in a track.
Chance Velocity Values In Ableton Live
Unlike other DAWs where you must program fixed MIDI values, Ableton allows you set a range of velocities on a note or group of notes inside a clip.
Simply select the notes or velocity markers and in the left pane of the MIDI editor change the Velocity Range value from 0 to a positive or negative number.
You can also click and drag on a velocity marker (not the note) while holding the Command or Control button (Mac and Windows, respectively) to set the range.
This setup will make notes playback at random values within the range you set in your MIDI Clips.
Why Do this?
For certain kinds of arrangements, this can save a lot of time versus editing midi notes one at a time in the piano roll. Instead of having to click and drag on 30 snare hits in a drum rack to make them play back slightly differently, you just set a range and let Ableton do it's thing.
Draw Mode In Detail
The Draw mode or pencil is a tool that allows you to create and edit notes in the piano roll and other events directly in the clip's timeline.
To enter Draw mode, you can either click the Draw mode button in the toolbar, or use the keyboard shortcut "B". If this shortcut isn't working, make sure the keyboard midi input is disabled. Hit the M key to toggle it on or off.
When you enter Draw mode, the mouse cursor will change to a pencil icon, and you can use the mouse to draw in MIDI notes and other events directly in the clip's timeline. To draw in a MIDI note, simply click and drag in the timeline to create a new note. You can change the length of the note by dragging the left or right edges of the note, or you can delete the note by dragging it out of the timeline.
Draw mode also goes beyond just MIDI, so it's a good tool to be familiar with. You can use it to draw in automation events and other events, such as tempo changes, time signature changes, and clip triggers. To do this, select the appropriate event type from the Event list in the toolbar, and use the mouse to draw in the events in the timeline.
Using MIDI Effects in Ableton Live To Change Velocity Values In Interesting Ways
There are a number of effects in Ableton that we can use to manipulate velocity values of clips in addition to the obvious one, the Velocity midi effect. Here are a few examples to get you started:
Velocity
The Velocity Midi effect allows you to adjust the velocity of each MIDI note individually, or apply a global scaling factor to the velocity of all notes. This can be useful for balancing the overall level of a MIDI clip, or for adding more expression to your performances. You can also set minimum velocity, use the random knob to introduce some unpredictability to incoming notes, or set compression-like curves to notes.
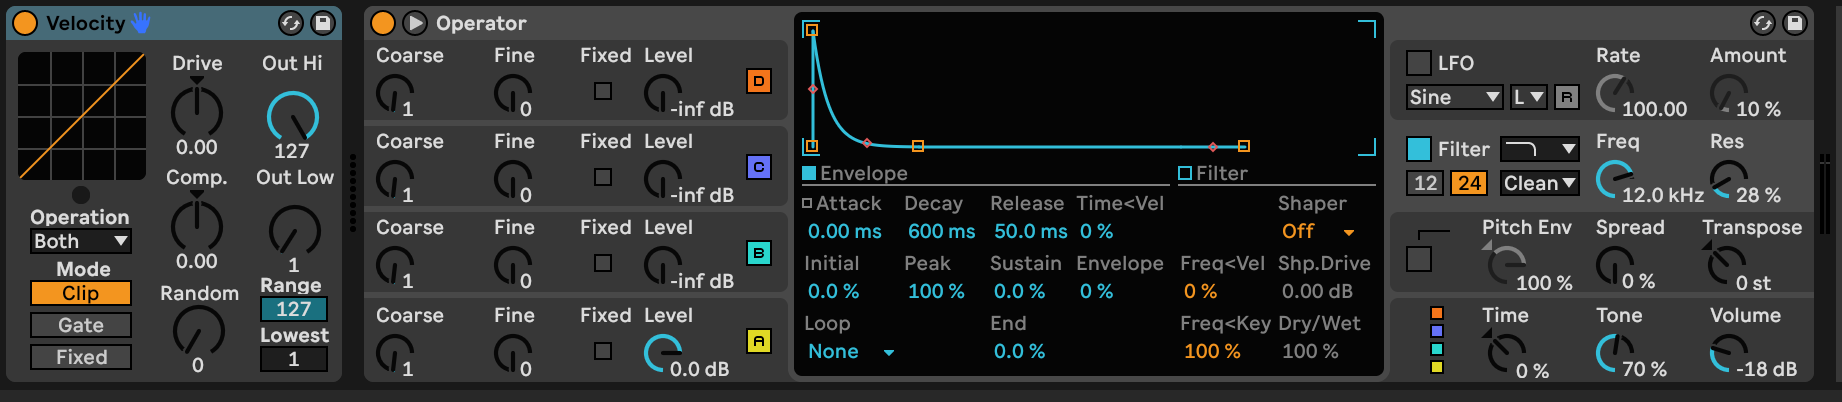
Envelope
The Envelope effect allows you to draw in a custom envelope triggered by incoming MIDI notes and map that to synth parameters. This can be set to be static or velocity sensitive. Utilizing velocity can be useful for creating more complex and expressive sounds that are more expressive to play and experiment with.
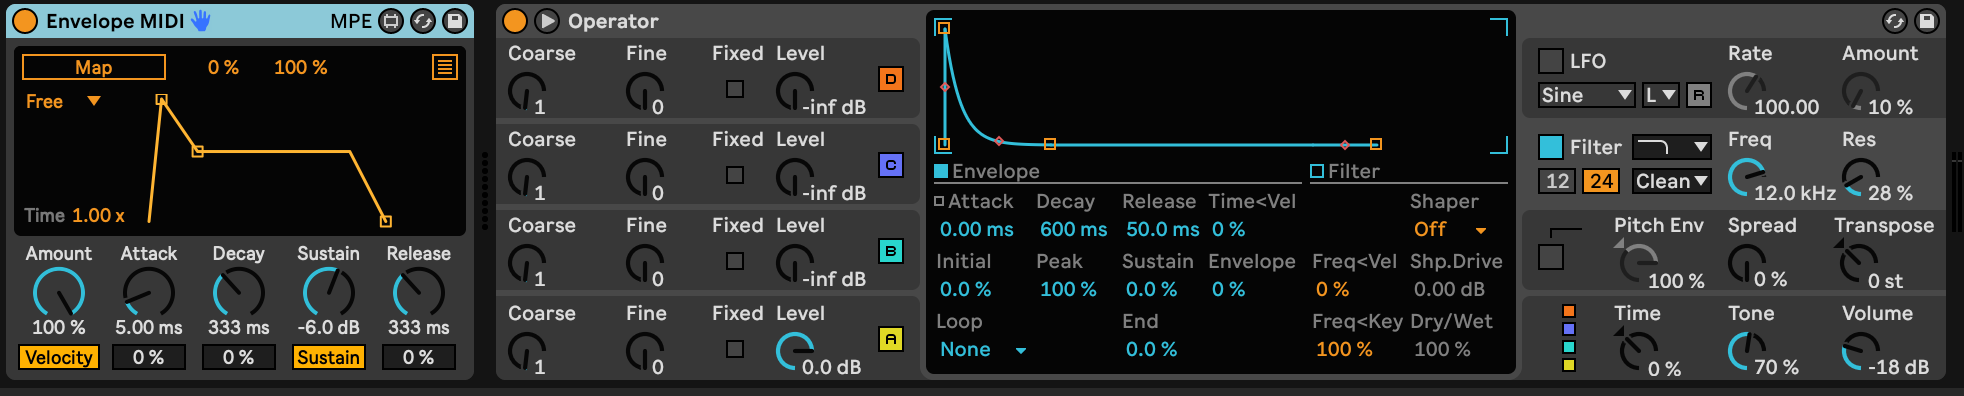
Arpeggiator
The Arpeggiator effect can be used to generate a series of arpeggiated notes from a single chord or note, with each generated note having a different velocity value. This can add movement and interest to your music, or help you to create complex and dynamic rhythmic patterns.

To use these effects to change the velocity of MIDI notes in Ableton Live, simply add the effect to a MIDI track or drum rack pad and adjust the settings as desired. You can use multiple MIDI effects in combination to create more complex and expressive velocity patterns, or use the Velocity control in the MIDI editor to fine-tune the velocity of individual notes.
The Randomize Function
In the piano roll, Live has a Randomize button in the left pane of the MIDI editor. You select one or multiple notes, then are able to randomize them in a given range with you set in the slider next to the button.

This can be used to add subtle variation or huge changes in the notes you apply this to.
Velocity Controls On Synths
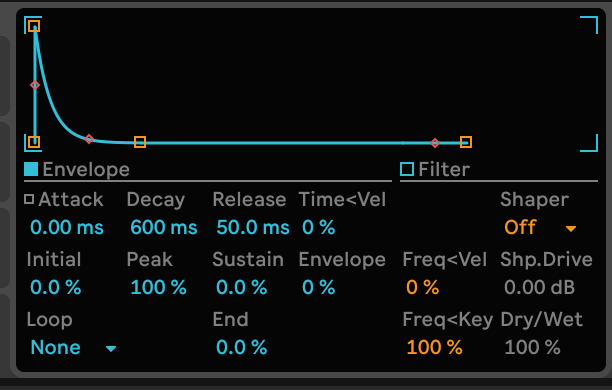
Many synthesizers and samplers have options to alter how velocity data affects the end sound.
For example, its a common feature to have filter or ADSR envelopes scale in proportion of velocity and in Ableton's Sampler you can adjust to what degree that happens all the way from being completely disabled to 100% or in between somewhere.
Always be on the lookout for interesting velocity mappings in synths because getting creative with these can yield interesting results. Mapping velocity to oscillator pitch might not make sense if you're taking input from a keyboard, but from a drum pad controller feeding a drum rack, this could be very expressive.
The Limitations of MIDI Velocity
MIDI velocity is a powerful tool for adding expression and nuance to your music in Ableton Live, but it does have some limitations that you should be aware of.
-
Dynamic range: The dynamic range of MIDI velocity is limited to a range of 0-127. This means that you can't use velocity to control sounds that are significantly louder or softer than this range. To achieve greater dynamic range, you may need to use other techniques such as automation of volume control or filters.
-
Sound quality: The quality of the sound produced by a MIDI instrument is largely determined by the quality of the sample or synthesizer being used. While velocity can affect the character and intensity of the sound, it can't necessarily make a low-quality sound into something better.
-
Dynamics: The velocity of a MIDI note can affect the dynamic character of the sound, but it can't fully replicate the subtleties and variations of human dynamics. To achieve a more realistic and expressive sound, you may need to use other techniques such as humanizing, round robin sampling, or deeper sampling.
If you only have a loud set and soft set of samples that split at a velocity of 50, you're going to have a crude result. Having 5-6 sets of samples for different velocity levels will have more dimension.
-
Compatibility: Not all MIDI instruments and devices support velocity sensitivity, or use the same velocity range or scaling. This can make it difficult to achieve consistent or predictable results when using velocity with different instruments or devices. To overcome these limitations, you may need to calibrate or map the velocity values of your instruments or devices.
How Ableton Handles Velocity Data Differently Than Other DAWs
In Ableton Live, MIDI velocity is controlled in a similar way to other digital audio workstations (DAWs). The velocity of a MIDI note is represented by a value between 0 and 127, with higher values indicating a harder attack and lower values indicating a softer attack. This value is used to control various aspects of the sound, such as the volume, brightness, and envelope of the sound, depending on the characteristics of the instrument or effect being used.
However, there are a few differences in the way that Ableton Live handles MIDI velocity compared to other DAWs. These differences may be more or less significant depending on your workflow and the specific features that you use:
Clip-based vs. track-based editing
MIDI velocity is typically edited on a per-clip basis, using the clip's timeline or the MIDI editor. This can be different from other DAWs, which may allow you to edit MIDI velocity on a per-track basis, using the track's automation lanes or other tools. This can affect the way that you approach velocity editing and how you organize MIDI clips in your project.
Velocity scaling
You can use the Velocity effect to apply a global scaling factor to the velocity of all MIDI notes in a clip. This can be useful for balancing the overall level of the clip, or for adding more expression to your performances. Other DAWs may have similar tools for scaling velocity, or you may need to use other techniques such as automation or MIDI mapping.
Velocity Ranges
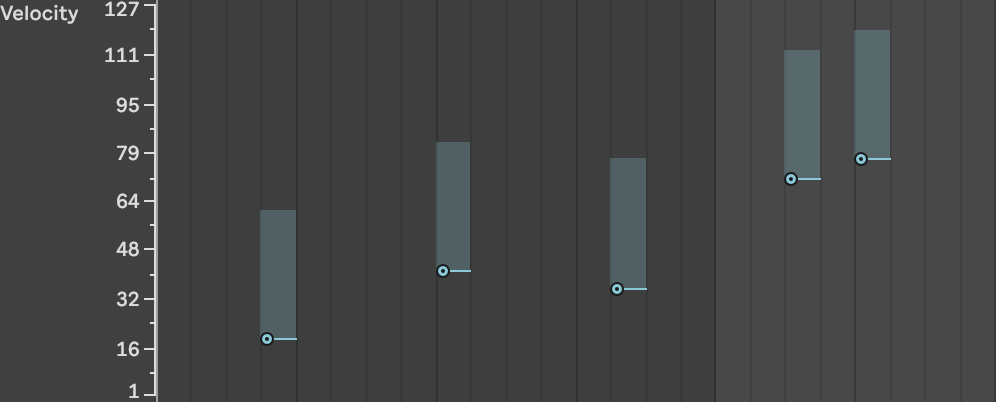
Most DAWs force you to assign a specific value to MIDI notes. This works, but if you have a lot of notes to edit, it can be extremely time consuming to set individual velocity values. Or perhaps you want to emulate the inconsistencies from take to take that a real musician would have. Ableton allows you to set a velocity range to address these issues. A given note will play back somewhere in the range you set and won't be the same every time.
Overall, the way that MIDI velocity is handled in Ableton Live is similar to other DAWs, but there may be some differences in the specific tools and features that are available. It's important to familiarize yourself with the velocity-related tools and features in your DAW of choice to get the most out of your MIDI performances.
Not A Boring Topic (We hope!)
It's really easy to dismiss velocity control in Ableton as a boring, after the fact kind of detail, but we hope that now you see that couldn't be further from the truth!
Because it is just a type of data getting passed around, we can not only use Velocity to control notes and how they play back, but all automate other kinds of behaviors in the DAW which affect what we hear coming out of the speakers.
If you've never played with some of the features we mention, try going through them one by one with the article open and see what new territory you can get yourself into. Throw the same data into drum racks, VSTs of acoustic instruments, your hardware synths, or anything else you have to get the creative juices flowing!


Learn To Make Hip Hop Drum Patterns: "Breath and Stop" by Q-Tip
Many of the articles and YouTube videos that teach music producers about hip hop drum patterns just aren't our cup of tea and we think you deserve better.
Hate to throw shade like that right away, but it's the honest truth!
A lot of the hip hop tutorials we found were either really basic, appeared to be written by a robot, used corny sounds, or was written in a very generic way that doesn't discuss the "swing" of the groove which is crucial to the entire genre.
Hip hop without talking about swing? It sounds like you clicked around randomly in the piano roll and called it a day. There's no soul in that.
But we're all about inspiring people and offering solutions so we put together something different.
Instead of a generic guide, we're going to be looking at an example in a lot of detail from "Breath and Stop" by Q-Tip because the beat grooves like crazy and has a lot more going on under the hood than it looks like.
The Beat and The Sample
This is a drum pattern where you can't help but immediately want to nod your head your head. Always a good thing!
The sample used for the drum kit part originally comes from a Kool & The Gang Track called N.T.
You can hear the original here, and the sample appears at the time 5:37:
If you want the exact sound, of course you can just sample the beat yourself.
But we're going to pick this apart and see if we can recreate something like it that captures the feeling of this hip hop beat without sampling it directly.
The Basic Drum Pattern
We imported the audio into Ableton Live, then used our GRITMATTER drum kit to get the basic pattern into a MIDI clip.

Lets look at where notes actually fall on the 16th note grid before we apply any swing here.
On the surface it's a pretty simple kick, snare, and a 8th based pattern with some ghost notes (more on that in a minute, they aren't pictured here yet) that leans on the 4th 16th note of each beat.
There are lots of anticipations on that 4th 16th note, which help give it a funkier feeling that makes you want to move.
Beats that have too much weight on the "big beats" like the downbeats of 1, 2, 3, & 4 of a 4/4 bar tend to sound kind of square and boring which is the opposite of what you look for when making beats in hip hop.
So what is an Anticipation?
Generally it means playing a note before the downbeat by one single 16th note, so it has a feeling of "anticipating" the next beat. It makes you want to lean into that next beat.
The opposite isn't always true though! Can you "extend" a beat by playing a 16th note after it? Not really, that just ends up sounding late if it doesn't fit into some kind of bigger pattern.
(Spoiler alert: we can kind of displace notes on a smaller scale after the beat. Keep reading and you'll see what we mean when we work on the hi hats.)
For whatever reason, anticipating the down beats feels more organic and once you know the sound, you'll hear it in hip hop drums all over the place.
Let's go part by part to really see how this mechanism works.
Kick
The kick part starts right on 1 and either anticipates another kick hit or a snare hit.
Snare
The snare hits on beat 2, but never on beat 4. It always dances around that beat instead. The snare anticipates beat 4 by a 16th note, then hits again on the upbeat of beat 4 (that's two 16ths after beat 4)
HI Hat
The hi hat is an 8th driven pattern with ghosted 16ths between them. It looks deceptively simple in the timeline, but there's a subtle groove to it that we're going to go into a lot more detail about.
Adding in The Ghost Notes

Adding ghost notes at about half the velocity on the remaining 16th notes of each bar (the 2nd and 4th 16ths of each beat) gets us closer to the feeling of the original.
Simple Isn't Easy
Conceptually, this is not too hard to wrap your head around. It's a fairly simple 2 bar drum pattern.
But of course if you play this as is, it sounds really basic and grooveless. There is no swing or funk in this at all yet, because this is just a basic pattern clicked into the grid with a mouse.
A lot of the magic in the feeling of hip hop is in the subtleties of the drum grooves. The solution is we need to slightly shift some notes around.
After all, this groove was sampled from a real drummer, not a machine, so it needs some of the imperfection that makes a beat feel like it's alive and breathing.
Get Off The Grid
If we compare the MIDI clip to the audio waveform we can see that there are a lot of moments where the audio version is slightly off the grid, but the MIDI is exactly on it.
If your programmed drum patterns sound robotic and sterile, take a look at your MIDI clips. There's a good chance you're having the same problem.
In general, most hip hop drum patterns are going to need a little massaging to nudge certain parts on and off the beat very slightly to humanize things.

Yes, you could painstakingly align each MIDI note with the audio to see where that gets us. Sometimes the hard way is the only way.
But before you do that..
Try Extracting Groove in Ableton Live
It is helpful to try Ableton's Extract Groove feature. We're going to use it to analyze the audio, then apply that feel to our MIDI notes to see if we can get some insight.
Many DAWs like FL Studio unfortunately don't have this feature to our knowledge, but we'll do our best to help you understand what's happening and work around it.

After the groove was analyzed and applied to our MIDI the general insight from this step that you can see on the timeline is certain elements like the kicks are often very slightly ahead of the beat.
This isn't a full 16th note anticipation, its a more under the radar feeling. You won't notice this as much and you still hear the drum hitting on the downbeat.
But if we straighten this out and put everything back on the grid, it looses all the feel.

Mixing Hip Hop Drum Patterns On The Fly
There is no rule that says you have to mix your drum patterns at the end. Get things as close as you can on the go without losing the creative spark!
We did some basic EQ and a light reverb on the snare at this stage, switched the kick from the "dark" sample in the kit to the the light variation to closer match the punchier kick on the track, and added a drum bus plugin to start dialing in some compression and saturation.
Refining the Drum Samples & Feel
At this point, the groove is coming along, but it still sounds very "on top" of the beat, like it wants to push ahead. The sample on the original Q-Tip track does the opposite—it lays back—which gives the beat a certain swagger that we aren't achieving yet.
Before we start dragging individual notes around or swapping out samples, we're going to try a trick that can help get us closer and you can use on nearly all your drum patterns.
Go into your MIDI clips, highlight the hi hats, turn snapping off, and drag all the MIDI notes slightly behind the beat. Like very slightly, maybe a few milliseconds.
In this situation we actually can get away with "extending" the beat. This is sometimes called Displacement.
It's subtle. We're moving the hi hats over by a few milliseconds, not by a full 16th note, or even a 32nd note.
There's no rule here either for what works and what doesn't. Just do it by ear. Move the hats over until they start to sound late and off beat, then go back a little bit and you should be in a good place.

Sound Design and Hip Hop Beats
Now we need to do a bit of sound design on our drum sounds or start swapping out drum samples. The hi hat sound is a little too pointed and still doesn't quite lay back enough despite doing some displacement and nudging them behind the beat.
The recorded hi hat doesn't have a lot of emphasis on the front of the note and has a smoother, mellower attack at the front of the note, almost like a shaker.
The snare is also drier, higher in pitch, and has less of a fundamental tone ringing out.
We can see on the analyzer that Q-Tip's snare has a fundamental around a C3 or 255Hz and we can hear a little pitch motion in the sample.

If you're using our pack GRITMATTER, tune the snare in the drum kit up +4 half steps, pitch envelope set to -3, attack of 0ms, decay of 20ms, and sustain of -3%. Repeat this for each of the 4 snare samples on that pad.

To get the fundamental tone to sit back, you will need to notch out that frequency with an EQ like this:

Or like this if you prefer a little more low end in the snare drum sample. Just open up the low end filter a bit.

Make sure the notch isn't too wide and that it's directly over the frequency that is sticking out too much.
This is the frequency that has a pitch you can hum to yourself. Having less of this will emphasize the crack and bite of the snare higher up in the frequency spectrum.
The Hi Hat
To dial in the Hi Hats and shave some attack off them, just move the sample start a little past the initial attack to mellow out the pointed click sound of the drum stick hitting the hat.
The GRITMATTER samples deliberately have a lot of stick click and attack sound in case you want that, if not you just shave it out like this.

You will have to do this for each sample in the hi hat pads. If you're using GRITMATTER, there are a bunch. It's a little repetitive, but the end result is worth it.
This mellows things out significantly.
You many want to also try nudging the ghost notes of the hi hat after this part. Same process. Do it by ear and nudge them a little beyond what they should be, then move back to find the sweet spot.
If you drag the ghost notes to sit more between the initial 8th notes we created, it will be closer to being on the grid and sound "straighter". If you do the reverse, it has a heavier swing.
Layer In A Shaker
We decided to layer in an actual shaker loop over the beat to help it swing like the original.
We found a loop we liked, warped it to tempo using the Beats warping mode, then applied the same groove that we extracted from the original audio of the beat.
Then we applied some basic EQ and compression to the shaker loop and adjusted the volume until we could hear it blend with the beat so the hihat and shaker were balanced with each other.
The Final Result
The final result of this is a drum pattern that blends very cleanly with the original and has many of the same qualities as the original, despite us using completely different drum samples.
Hopefully if you followed along with our samples or your own, you were able to learn a little more about hip hop production and improve your overall music production skills.
If you are interested in grabbing the samples we used for this deep dive, you can download the GRITMATTER sample pack here.
It includes the raw 24bit wav files that can be used in any DAW as well as pre-programmed drum racks for Ableton Live so you can recreate this exactly as we have outlined here.


Techniques For Sample Chopping In Ableton 11 With Drum Breaks (or almost anything else)
If you're anything like us, sampling didn't make a ton of sense at first. And once it became clear, it wasn't obvious how you use the technique to make music. The next stage usually involves being completely overwhelmed by possibilities and not knowing where to begin.
Today, we're going to fix that! This article is a general overview of different ways to think of samples in basic categories, give you some ideas to find good sounds in a variety of places, and start working with them in a way that's your own.
A lot of this is focused on techniques you can use with drums and percussive sounds, but the truth is you can put this knowledge to use with anything.
Let's dive in and look at the 3 kinds of sample you'll work with and how to work with them.

Types of Samples (and how to think about them)
As far as percussion samples go, it's helpful to think of them in terms of how you work with them and how they function as you approach sampling with Ableton.
Loops, one shots, and drum chops are some of the most common ways of breaking up your samples into some basic categories to work with. It may also help to think of an FX category and tonal or texture samples.
We'll go into each in further detail below.
Loops (also known as drum breaks)
A lot of the culture of sampled music begins with loops in one form or another.
Depending on the type of music production you're involved in you may literally have to wait for a "break" in the song to grab a bit of the audio track for use in sampling.
When experimenting with drum loops or any other kind of source material, we recommend trying different loop points to find ideas that work and using different durations of the the loop.
An 8 measure loop will feel quite different from a 2 beat loop and the start and stop points makes a big difference in how it feels.
One Shot Samples
Sequencing individual samples or one shots is a near limitless technique for creating music. Instead of experimenting with interesting places to loop a piece of audio, every single sample is isolated from one another.
You then fire them off in whatever order or pattern you want.
A practical example, you download a drum kit with kick, snare, hihat, tom, and cymbal samples.
Drum Chops
Drum chops are somewhere in between a one shot and a full loop. Generally, they are a loop cut up into slices that contain more than one musical event, which you then trigger in a new way that changes the original timing.
Ableton's Slice mode in Simpler is set up for this as is the MPC and many other drum machines.
Instead of a single drum hit, a chop might have half a second of a breakbeat or the hook of a song.
Much like how the start point of a loop is very important, drum chops can be thought of as a collections of micro loops that you retrigger when you program or play them.
Where Do You Get Good Samples From?
Now that you have an idea of what you're looking for, let's talk about where to get some quality sounds so you can start putting them together in creative ways.
Sample Packs
This is the most obvious place for modern producers to get samples is from sample packs. There are entire websites dedicated to supplying them (like this one!) as well as various forums where people trade them.
Sample packs tend to include one shot samples as well as loops. A good pack is already chopped up and ready a producer to use right away.
Commercial Recordings
The classic place to look for a new sample is on great records you're already familiar with. This also comes with the added challenge of being copyright infringement.
Many producers don't care if music production is just a hobby or they have the means to pay for sample clearance.
This is totally fine! Tons of our favorite music has been created this way. Just be careful if you have commercial aspirations with your music. You don't want to get anyone sued and it can cause problems if you want to license your tracks for TV or movies.

Any Other Kind of Recorded Audio
You can grab audio from absolutely anywhere. TV shows, old commercials, YouTube videos, Instagram, the orientation video from your job, sky is the limit.
A lot of the magic of sampling is recontextualizing sounds in a completely different way from the original form to create a new kind of music.
Field Recordings
You can use a dedicated field recorder rig or use your phone, but the idea is the same. You go out into the world and make recordings from what you find.
The leaves under your feet, people talking at the cafe, the jackhammer outside that woke you up, or anything else you find.
Then you bring that all back in the studio and see if you can process it into something musically interesting.
OK, You Have Some Samples You Like. Now What?
The fun really begins at this stage.
Regardless of the source of the sounds or the type of sound (loops, one shot, or a mix of everything) you want to start cleaning up the sounds and make them your own by putting your spin on them.
How to clean up a sample
-
You want to use a low pass filter and a high pass to get rid of any noise that isn't helpful musically. Low end rumble or excess high end needs to go. Good sample packs, especially if they cost money, should do this for you.
-
You may want to EQ or compress the sample a bit, but you can always save this step for later. At the least, make sure you don't have an extreme changes in volume that would make the sample difficult to make music with.

Processing Samples
Without getting too prescriptive (we can talk about making weird, trippy samples further along in the article) we will say it's a good idea to establish a sense of space and position with samples.
With chops and loops you don't have as much control, but this is something to think about when working with one shots.
And of course this is electronic music production so you can technically do whatever you want, but here are some good guidelines to start with:
-
Bassy material like kicks, 808, or low end focused thuds should be centered. Having some high end content is usually helpful to emphasize the attack of the sound, but otherwise it should be somewhat dark.
-
Having some brighter, drier sounds mixed in with some more reverbed and dark sounds helps give a collection of samples a sense of space.
-
Panning should be balanced, by not perfectly symmetrical. This helps create an interesting stereo image.
-
Support your primary sounds (like kicks/snares/hihats) with quirky percussion, field recording-based sounds, or heavily processed bleeps and bloops that are otherwise unidentifiable. This will help bring more of your personal character to things, even if you are using a stock sample pack.
Chopping Samples

If you decided to work with sample chops like we described earlier, you want to spend a lot of time trying different start points and end points.
Most producers will map the chops to a MIDI controller and spend some time experimenting with different chops, playing them, then adjusting until they get something that feels good to play.
One place to start with this it have some chops that being on big transients like the start of a kick or snare, then some less obvious places, like even in the middle of a phrase.
Sometimes having one or two pads on your controller that are set to a chop that's a little out can change the dynamic of how you do things in an interesting way.
Tips for "Flipping" a Sample
Usually when people talk about 'flipping' a sample, they're referring to the production process of taking a known song or sound, and re-contextualizing it in some way, often by adding an alternative beat or arrangement to the original sample.
Here's an example of 9th Wonder doing exactly that.
He spends a lot of time listening to recordings that might have some potential to flip well.
There's no way to know exactly how he thinks about it, but from what we see him doing, we can come up with a few general guidelines:
-
Listen for space. If you want to add rhythmic elements like drum loops, bass, and possibly a new vocal, you want a sample with enough room for those elements.
-
Melody. Samples with singable melodic elements are great to loop and layer over a drum break because they give the listener's ear something to hang on to.
-
Call and Response. Whether you create the call and response from two samples, the bass line and melody, or some other combination of elements, this is a timeless production technique that shows up different genres of music for a reason because it creates balance and interest that makes people want to listen more.
-
Vibe. This is a vague term but the best definition we can come up with is vibe is an emotional feeling the original audio gives you. It may sound nostalgic, spacey, distant, intimate, aggressive or anything else, but a good sample to flip always has a feeling behind it. If it makes you feel something, there's a good chance it'll have the same effect on other people in a new composition.
Processing Samples Creatively
Basic Effects
Effects like chorus, LFO, EQ, heavy echo or delay, flanging, or heavy filtering are all pretty standard to deploy when sample chopping.
The great part about Ableton specifically is you can have one or several of these effects in a chain tethered to one drum pad in Drum Rack.
And a Drum Rack pad can contain a one shot sample, a chop, or even a loop if you cut your samples carefully. Then load that chain up with whatever effects you want.
Some Ableton-specific effects worth trying on sample pads beyond the stuff built into a typical DJ mixer effects box:
-
Redux. A basic but very effective bitcrushing plugin. Great for creating crunchy chip tune sounding effects.
-
Auto Pan. Great for any sustained sound like a cymbal, dub siren, or pad hit to juice up the stereo image.
-
Shifter. Create trippy, swirling ring modulation sounds.
-
Resonators. If you need ambience around a sound, but reverb isn't doing it, this plugin adds a completely different feeling that can be tonal or totally non-harmonic.
-
Grain Delay. A granular delay that always gets wild anytime we throw it on anything. Can be kind of unpredictable, but worth the fuss.
-
Corpus. A resonator plugin that models physical objects and can be modulated with LFO. Especially great for making sounds feel more metallic and bright.
Weirder, Less Predictable Production Techniques
Extremes. It's completely fair game to take any effect you want to apply to a sample to some crazy extreme just to see what happens. Like the way the Glue compressor sounds on your snare? Why not try 28 instances of it and see how that changes things?
We'd never do this with hardware because it's impractical, so the brain d0esn't always think to go there in software even though a couple dozen compressors is basically another day at the office for a modern computer.
Warping. If you use Ableton, you've probably warped an audio sample or two in your time. If you want weird, glitchy, artifact colored sounds, set up a track below the one you want to do your warping it, arm it for recording, and make its input the output of your warp track.
Then, hit record and start changing the warp markers as it plays back so you can hear it get stretched.
You can repeat this process with different warping modes or try modifying the Flux or Grain size settings, which will introduce different flavors of aliasing to your new audio.
Novel Playback Techniques. Sometimes samples with no additional processing can lead you to interesting places if you find a new way to perform them.
A classic example of novel playback techniques is DJ scratching. There are not any special effects. They are technically just playing back exactly what's on the record, but in a highly manipulated, rhythmic way.
We now have a constellation of interesting effects and plugins to apply to audio, but we also have an equally diverse selection of controllers that can trigger MIDI notes that map to samples of basically any size.
You make a MIDI note trigger a 10 millisecond loop of audio or randomly choose a start point in a WAV file that's 4 hours long.
Artist Examples
We can talk about different techniques and effects for days, but its important to have practical examples of masters of the craft applying the knowledge to make music.
We've selected a handful of examples to discuss that we hope you find some inspiration in and better understand how the pieces all fit together.
J Dilla
This video is a bunch of side by side cuts of music J Dilla sampled to create new genres of hip hop.
To make the samples work together, you can hear he often would stretch and re-pitch sounds to get them to fit with each other.
But more importantly we notice is his source material is all over the place, so it's clear that he did a lot of listening.
JD was known for being able to pull a few records off the shelf and very quickly bring something together with the MPC sampler, so we recommend that you do the same.
Listen to a ton of music and keep your ears open for moments that might be useful for sampling. Part of the magic of his music was pulling together influences that many people would never think to combine because the genre or era in time was drastically different.
Flying Lotus
https://youtube.com/shorts/UvP1hAPU_KI?feature=share
This is a much more instrument focused way of working.
In this clip of Flying Lotus in the studio, he sequences some drum samples mapped to a MIDI controller by playing them in, then we assume doing what sounds like some light editing. Everything else he simply layers in by playing keyboard and synth parts over his drums.
DJ Shadow
Here Shadow talks about the qualities and process of digging for novel samples and what makes them great.
Deantoni Parks
In this example, Deantoni Parks uses samples as another percussion instrument in he drum kit. He uses one limb to trigger the samples rhythmically and everything else to add drums to the samples.
We're not sure how carefully planned the start and end points are of his samples, but we love this approach because it is very much a real time exploration of sound. It's a very jazz inspired approach that works in performance or in the studio.
El-P
This El-P feature puts a lot together. It's similar to the Flying Lotus example in some ways.
He plays in drums from a controller and plays in synth bass parts, however he spends a lot more time recording sounds from vinyl records into a digital sampler (which apparently isn't working all the way) and has some strong opinions on what does and doesn't make a good record to sample from.
Want Help Getting Some Sounds to Chop?
Thanks for reading and we hope you check out some of our sounds and consider using them in your projects. You can get get some free samples from us too, just check it out below this article. Stay creative!


Make Your Own Vinyl Drum Samples With The Teenage Engineering PO-80 Record Factory
Are you tired of getting takedown notices on your tracks because you used a sample from a vinyl record somewhere?
It is now possible to make your own vinyl samples at home with some effort and inexpensive equipment.
Yes, you read that correctly. The equipment exists to cut a basic record, then record that back into your sampler or DAW that you can then use to make beats with.
Read on to learn more about what you need to set up this kind of workflow.

Spending time to create your own vinyl sample pack solves a big problem
Lots of people love the vibe and character of old vinyl music.
Whether its old jazz, soul, funk, or reggae music, there's something about the warmth, hiss and crackle of vinyl sounds that resonates even with young people who grew up long after the glory days of vinyl records.
Many popular songs have been made by producers who chopped up disco records (or whatever genre they were into) and made their own one shot drum samples they could trigger and turn into their own beats.
The big problem is these sounds are not royalty free.
The invention of the sampler made the legal profession a small fortune from musicians and record labels suing each other for copyright infringement created by sampling.
Some people don't care and do it anyway.
However we now have a new, interesting solution from Teenage Engineering.
The PO-80.
What is the PO-80?
The PO-80 Record Factory is a rebrand of a Japanese product called the Gakken Ez Record Maker. Both are based on the same Yuri Suzuki invention, photo is courtesy of turntable lab.

It's a toy record cutter.
You to assemble it yourself and it's not the best quality (this might actually be helpful), but if you put it together with a modern DAW, you can make some great free samples that have the authentic vinyl surface noise and crackle.
Tip: This is surely going to be a very popular product. Very high likelihood the pre-order sells out and doesn't re-stock for a while due to ongoing supply chain issues. If it sells out, just go buy the Gakken version and you'll have essentially the same device, except the assembly instructions are in Japanese.
Can the PO-80 cut commercial quality vinyl?
No. The recordings it makes are monophonic and are going to have a lot of noise.
Get ready for lots of that "hiss sound" feeling. But that's not the point. We recommend that you embrace the imperfections for creative purposes.
The company also ships some kind of "mastering software" but that's most likely just an EQ curve and some dynamics processing to clean things up a bit.
You should experiment for yourself to see what you can come up with.
So what is the Teenage Engineering PO-80 useful for?
We think the PO-80 (or the original Gakken unit) is the perfect tool for creating your own royalty free vinyl sample pack.
You can record your own sounds, like one shot samples of drums, or compose loops in your DAW, record them onto vinyl with the PO-80, then dub them back into your DAW.
From there you can use it as it, load it into your sampler, chop it up again with AUTOCHOPPER, stereoize it with plugins, sky and your creativity are the only limits.
A Personal Sound Library
If you do this over time, you'll eventually have a large collection of vinyl sounds that are exclusive to you.


Build An Ableton Custom Drum Rack That Chops Drum Breaks For You
Cutting up drum breaks in Ableton Live is a big part of music producer's workflow, but it takes time and often becomes very repetitive.
Not only have we put together a custom drum rack in Ableton that helps automate some of the busy work and make chopping beats feel more fun, we're going to show you how we made it and even go a few steps further.
We're going to walk through the very basics for the beginners, build a beat chopping machine, then embed instances of the autochopper device into a drum rack in Ableton that you can pay and trigger with any MIDI controller.

First, a few definitions for the beginner producers
Advanced people can probably skip ahead.
But, if you're new here's a few terms you should be straight on before you jump in here:
-
Drum break - This is a term used interchangeably with drum samples that work as a loop.
You can of course program with MIDI notes or play an original drum part. The term comes from the practice of obtaining samples of drums from a vinyl record. You record isolated drums from the "break" in the song when the other instruments drop out.
-
Drum Rack - The drum device with an 8x8 grid you can assign drum samples and instruments(!) to in Ableton Live. You can even nest another drum rack inside a single drum rack in Ableton. (You need to do this to create 'round robin' sample playback which we explain in another article)
-
Instrument Racks - These are custom racks usually build from Sampler or Simpler instances, usually meant for playing pitched material.
Why you need all this to be clear
Easy to get confused once we get moving. We will be putting multiple instances of a custom instrument rack inside pads of a drum rack in Ableton.
The Basics of the AUTOCHOPPER Device
AUTOCHOPPER is an effects rack we've put together at Glitch Magic that lets you drag and drop audio in and it will automagically chop it up and apply effects. You can trigger it or let it run on its own, depending on how you set it up and the desired output.

How to use AUTOCHOPPER rack in a drum rack?
We'll get to specifics a little further along in the article.
But the basic idea here is we're going to spread out duplicate instances of an entire auto-chop device across the pads of a drum rack in Ableton. If you've followed our other guides on drum racks and drum programming, this is a twist on some of these techniques.
You will then have a useful tool for mangling the same break in different ways, mashing together different breaks, or mixing them with individual samples like kicks.
How does the AUTOCHOPPER custom rack save time chopping drum breaks?
Instead of having to manually manipulate samples one at a time, you can just run or trigger multiple parallel chains of auto-chop devices with drum rack pads and record the output.
It's more fun and playable than clicking around with the mouse and you can further juice it up but adding different audio effect racks after the chopper. This is the kind of production workflow Ableton Live was designed for.
Where To Download AUTOCHOPPER?
Want to skip ahead to the advanced part of this guide?
Download AUTOCHOPPER from us and skip ahead to the part where we get it setup and programmed on a drum rack pad.

Want to try building the AUTOCHOPPER from scratch?
This has a bunch of steps that may be a little tedious, but it's not too bad for Live users if you're already used to creating drum kits or building synths. Besides, it never hurts to learn how to create your own Ableton devices.
Just be patient and try not to build the drum rack when you're in a rush. If something doesn't work, go back and redo the previous step. It can be a bit tedious to do and it's easy to miss a detail.
-
Drag an empty instance of Simpler on to an empty Midi track

-
Set Simpler to Slice mode

-
Drag a break into the drop zone of the Simpler Plugin.

(If it reverts to the other mode at this step as shown here, just change it back to Slice at this point)
-
Change the "Slice By" menu to the Beat option and Set Division to 1/4 (Or try 1/8 later).

-
Trim the Start and End markers, then adjust the transient markers to land on the beats.

-
Turn Warp on inside Simpler and choose Beats. Set Preserve to 1/4 to start.

-
Add an instance of the Random MIDI effect before the Simpler. Set Chance to 100%. Choices should be one less than the number of slices you have. If you have 12 slices, Choices should be 11.

-
Add an instance of the Arpeggiator effect before the Random Plugin. Retrigger can be set to Beat or Note. A Rate of 1/4, 1/8, 1/16 can all work depending on the break samples you're using. Gate should be at 100%

How To Setup The AUTOCHOPPER Ableton Rack
You may be good to go at this point or feel comfortable tweaking to get smooth playback.
If you're having trouble with that part watch this video which explains some of the finer points of getting this right.
Make sure you don't skip this step.
If the timing of a single slice is off, it may not sound too bad on it's own, but if you're trying to mash together 4 breaks and the transients are all over the place, the samples are going to be fighting each other and will sound like a jumbled mess.
You'll have to manually fix all that which defeats the purpose of doing all this to give yourself an easy editing experience.
Also, this kind of defeats a lot of the point of using Ableton Live. It's built for fast audio manipulation so you might as well get this part right.
Tips for preparing all the samples and loops you want to use
-
If you're using a loop with heavy swing, like a funky hi hat loop, you may need to straighten it out a bit with warp markers first to get it to play well with other loops.
-
Straight quantized drums aren't everyone's cup of tea, so if you need to match the swing of a particular drum loop, use the Ableton Groove Pool to extract the swing and apply it to the sounds that need to match. Not a guarantee, but
-
Try different slice markers. You can generate them by transient, by beat division, or make them one at a time manually. Usually doing it by quarter note or 1/8th note works, but sometimes generating by hand is the only way to really get it right.
-
Match the volume level of samples! As you experiment and swap out other samples in the drum racks, you'll make better choices if you balance the playback level. Samples can sound brighter or darker depending on the level. Our hearing response changes as things get louder or softer.
Get the auto-chop device working on an empty pad of a drum rack in Ableton
At this point you should able to generate lots of auto-chopped drum sounds with only stock plugins all from a single MIDI note!
The cool part is if you do this once with a break like the Amen, you can save the effects rack and use it over and over again whenever you want to chop up that drum break.
Put the Arpeggiator, Random, and Simpler plugins in a Group and hit save on the instrument rack.
We're going to drop audio effects after the auto-chopper later on, but for now we're going to focus on getting it working inside a drum rack.
You can experiment, but we think the most practical setup is to have a drum pad trigger a few chops, then stop when you aren't playing the pad anymore.
To get this to work, drag the entire rack you saved as a group (or browse to the AUTOCHOPPER preset you downloaded from us) and drop it on an available pad in the drum rack pad view.
You will then need to add an instance of the Pitch MIDI effect before the auto-chop group. Set the Pitch effect to -24 steps.

Scale it up with more drum rack chains!
At this point you should have a single drum rack pad autochopping a drum break when you press it.
Pick 3-4 other loops that may work well with the original, or just use the same sample over again and add different effects

You can mix in individual samples too. Filtering some lows out of your breaks and layering an 808 or thick kick drum in on another drum pad usually mixes well.
You may want to try setting up choke groups on certain sounds as well. This depends if you want some of your chopped drum racks to play over each other or not.
Each choke group prevents more than one sound in the group from playing at one time. There's a time and a place for using up to all sixteen choke groups or using none.
Sometimes two full spectrum drum loops on top of each other can sound really cool, but more than that usually results in a pretty jumbled mess and generally requires a choke group to prevent them from stepping on each other, but you want want to send us examples to prove that wrong, please do!
Programming Your New Drum Rack
You now should have a few options for making crazy mashed up beats with this beast of a drum rack.
Don't forget to use the hot swap buttons to swap out samples often or try a slightly different layout of the drum pads. You will get very different sonic results, especially if you have an entire drum rack with different break samples to experiment with.
You can also build in some macro controls to manipulate global effects, add effects into the drum rack's return chains, or experiment with triggering the rack with different MIDI clips and influencing the input signal with MIDI effect racks.
We hope that this article helps you elevate your sound design and production skills in Ableton Live. If you followed along, you not only be able to use the same device over and over again with vastly different results, you should have ideas for other racks of your own design!