

Where To Get Percussion Samples and Percussion Loops
Today we're going to be talking about where to source percussion samples, percussion loops, and what to look for in percussion sample packs in general.
So much of being a capable producer is starting with the right raw ingredients. But there is also the added challenge of doing this without stirring up legal headaches or software problems that might limit how you distribute your music or monetize it.
We will be looking at common sources of samples for both professional and hobby producers and digging in to how to make the most of them, as well as when it makes sense to use each source.

Where do professional producers get their percussion samples?
This is a big question and if you ask 10 producers, you'll get 10 different answers.
Depending on the genre of music you work on and the circle of music producers you're interested in, some people are very open about their sources and others are very secretive.
There are basically 4 categories of sources we can think of where a producer might get their percussion samples:
Records
Internet Media, like YouTube videos or popular podcasts
Percussion sample packs for sample sites like us or our competitors
Musicians or DIY sources
We're going to examine each of these in more detail and we'd advise that you explore all of them. They all have pros and cons. Both from a musical perspective, a legal perspective, and a workflow perspective.
So let's jump in and see what each of these sources have to offer.

Digging for Gold: Percussion Samples from Vinyl Records
Digging for percussion samples in vinyl is a true art. Documentaries have been made about how various producers approach this, especially in hip hop and related genres. Going to the record store to dig is practically like going to church for a lot producers.
If you have an open mind, you can get every kind of sound you would ever need from just a record store if you have the patience to look and listen to many different kinds of recordings.
You'll find drums, cymbals, bells, congas, bongos, one shots, loops, textures, and many other instruments all at the record store.
When you hear something you think you can use, you need to dub the sounds from vinyl into your sampler or DAW where you can work on it.
The one drawback to sampling from vinyl: you might attract lawyers & repel money
These sounds are not royalty free!
If you do something like sample the surface noise of the record you're in the clear, but as soon as you start lifting drum breaks or synths or any of the copyrighted material, you invite legal scrutiny.
Some people don't care and just figure it out later. That works, but it can be expensive. Danny Brown did this on Atrocity Exhibition and later said in interviews he was in debt after the record came out because it cost him $70,000 to clear all the samples on the album.
I'm a small producer, it doesn't matter who I sample
For a smaller music producer, odds are pretty low that someone spends the money to sue you if there's no money to take. But it can still ruin your fun if the music gets taken down from streaming platforms.
A bigger concern for a smaller artist would be that you lose out on opportunities. A label might not want to deal with releasing an albums full of uncleared samples and it will make the music much harder to pitch for sync licensing, which can be a significant source of income.
Many producers make their first real money from sync well before they have a fanbase or reputation, so you don't want to wall yourself out of this in the beginning.
Creative Sampling from Non-Musical Internet Sources

Another approach that's become popular in recent years is to sample more unconventional sources that are not music. Things like podcasts, popular YouTube or TikTok videos, or sound effects like iPhone notifications.
These can but fun and more culturally relevant if you're trying to reference a viral trend that a lot of people are going to be familiar with. These also have a very difference sonic character because you are dealing with digital sources of audio, not analog sounds like you would get from vinyl or tape.
However, you're still dealing with potential copyright issues since you're still borrowing from sources that are not your intellectual property.
A key difference is if you are sampling from a YouTube creator, it may be easier to get in touch with the rights holder and get explicit permission to use the sample as well as negotiate a price if they want to be paid for the use.
Navigating Sample Pack Companies
This is where we work to help you. Sample pack companies ideally make the process of sourcing great sounds without a legal headache simple and easy.
These are some of the principles we try to incorporate in our packs like STONEWIRE, VISION MAGNET, GRITMATTER and the others. However, even if you decide to use a product from one of the many other sample pack companies out there, we think these are factors you should keep in mind.
Insist On Good Sounds
This should go without saying, but you should curate your sample library like your record collection.
Insist on quality sounds you can use in many ways. Samples should sound good and be well organized. If you find free sample packs that sound good to you, use them.
But don't fill your hard drive with mediocre sounds because they're free. A lot of people just hoard free stuff then can't figure out why they're having trouble finishing tracks.
A well recorded, versatile collection of sounds you can use over and over again is worth paying a few bucks for.

Think about cost per use, not cost.
The more you use a sample pack, the more the "cost per use" will decline. Say you buy a few percussion sample packs. One cost you $30 and you used it 2 times. Your cost per use is $15 ($30/2 uses).
But say one of your other percussion sample packs was $40 and more usable. So you end up making 60 beats with it that year. The cost per use of that pack is $0.67 ($40/60 uses).
The sample pack with the higher upfront cost is actually cheaper in the long run if you use it more often. So you should always consider how much you'll be using a collection of sounds as well as your immediate needs.
Look For Royalty Free Sample Packs Only
We think the royalty free model is the cleanest way to do it for everybody involved.
You pay for a sample pack, download it, then you're good to go. If we want to make more money we need to find more customers and make more sounds for you to use.
What To Watch Out For In Sample Packs
Hidden Royalty Splits
Not every company or producer who releases a sample pack does it in a royalty free way. Always read the terms of use. For example, many sample packs will actually require that you split royalties with its creator if you release anything made with the pack.
Don't assume anything, always read the fine print!
In our opinion, this undermines the whole point of a sample pack by creating another administrative headache to deal with, which frankly music already has too much of.
Stolen Sounds
There are plenty of subreddits and sample pack sites that either sell or give away pirated sounds that once again defeat the purpose of a good sample pack.
You want a collection of usable sounds that you can use without having to worry about, like you would an instrument.
Overused Sounds
Sounds that are widely available for free, made from stock synth presets, or ship with major DAWs tend to become very overused.
Even if you love the stock Apple loops that ship with Logic Pro for example, you have to remember that literally every other user of that software will have those loops so they're going to pop up in all kinds of other contexts. And this will include other types of media you probably don't want to be associated with outside of music. We're not going to name names, but use your imagination.
Rolling Your Own Samples: The DIY Way

Lots of producers get their samples the way we do at Glitch Magic. They make them! Either by recording things like foley sounds and manipulating them in the studio to fit their music or by collaborating with musicians they like.
This is something everybody should at least be a little involved in because it will help you to find your own voice. Think of it as curating a private sample library. Yes, use plugins you like and sample packs that inspire you, but you should also be using some sounds that nobody else on Earth has except for you.
Getting Started Making Your Own Samples
If you've never done this before, you can start by making a little bit of everything. Even if your first batch of homebrew samples isn't super usable, you will learn a lot about what goes into good samples and it will elevate your production.
Set a goal to make 30-50 one shots. Find some objects around the house you can turn into percussion samples. Make some "drums" out of thuds and taps against ordinary objects. Jingle your house keys to make some off kilter rhythms to sample.
Take all of those sounds and try to make some interesting loops or even full tracks with them.
Even if it takes you a few tries to really nail your own percussion samples, there is no way this doesn't improve your skills as a music producer if you've never done this before.
Something nobody talks about is this is also a great way to network with other producers. 50 sounds is not a huge collection of sounds so it might be tough to sell as a product, but if you meet a producer you want to work with this kind of thing makes a nice olive branch to hold out as a show of willingness to collaborate.
Percussion Samples Demystified (We Hope!)
Hopefully you have a better idea of where each of these samples will fit into your workflow as a producer in a way that helps elevate what you do.
And of course since we offer royalty free sample packs that we built for our own production needs, we hope you check them out. We offer percussion sample packs, foley sounds, synth loops and samples, as well as some other toys that we hope inspire you!


What To Look For In a Foley Sample Pack
Since there is usually some confusion about what exactly foley is, where is comes from, and what samples to look for or make for music production, we wanted to talk about it!
More importantly, what goes into a great collection or library of foley sounds.
In a music production sense, the short answer here is a solid foley sample pack is going to be fairly big, well organized, have a variety of identifiable and out there sounds, and most importantly interesting sounds.
But this is sometimes confused with foley sound effects for films and visual media, so lets explore why that is and how foley can enhance what you do in the studio.
What Are Foley Sounds & Where Did The Name Come From?
Since this is a topic with a lot of jargon around it that confuses people, we should get some definitions out of the way so you do not get confused when we talk about foley sounds in a music production context.
This is opposed to foley sounds in a film context which is really where it comes from.
Who and what is a Foley artist?
The term "Foley" originates from a guy named Jack Foley who invented a lot of the techniques a modern filmmaker uses to add sound effects to a movie. He would record sounds to picture using various props to enhance the film experience in post production.
What do foley artists create exactly? Most people would call what they do sound effects. Everything from the egg crackle of the Velociraptor hatching in Jurassic Park to the Luke Skywalker's footsteps and light sabre in Star Wars.

Foley In Film production Vs. Music Production
Now that you understand why foley is called foley, what about music?
Over time, recorded sound effects used in film started to become synonymous with recordings made from different types of objects or environments in general.
Sometimes foley sounds in music are referred to as a found sound or field recording. Basically anything counts, whether its the hum of a tube television, a crumpled ice cream cone, cars driving, or the sound of footsteps.
Unlike in a film where foley artists recreate sounds that match what they see on screen and often record with the film running and perform the sound to picture, in a strictly musical context, artists may or may not be recording in a studio.
In many cases its productive to get out of the studio, do your recordings and then explore those sounds in the context of the studio.
Why use foley sound effects?
You may be here wondering what all the hype around foley sounds is at all. Why would you want to use everyday sounds or something like breaking glass in your music?
We can think of a bunch of good reasons and this is why we went as far as making a fairly extensive foley sample pack ourselves.
Its cool.
A lot of music is about playing with expectations and referencing other things with sounds. So folding in recognizable sound effects can be a creatively exciting thing to do.
You can mix individual sounds with foley sounds in a variety of ways.
This can mean using foley as it's own musical element as a replacement for a traditional percussion sound, or layering it on top. For example, adding the crackle of footsteps on leaves or crinkling paper on top of a snare can add a bite and texture you may not be able to achieve any other way.
Ambient sounds.
Instead of using vinyl crackle or other commonly used noises for ambience, you can experiment with more unorthodox sources.
Synthesis.
Sometimes taking a foley sound and completely mangling it with effects or granular synthesis can be really, really interesting. Because you're starting with an odd, quirky sound source, this can sometimes lead to results that you'd never synthesize with a more traditional FM or subtractive synthesis method.

Foley Sample Packs
Since you now know that foley sounds are used in both music and film in different ways, it makes sense that you're also going to find foley sample packs that cater to both types of scenario.
From here on, we will be focused on foley sounds in a strictly musical context, but by its nature it will overlap into some of the film stuff.
That's not important. What matters most is what makes a collection of these sounds good whether its a freebie product, a paid download, or something you're building yourself for your own personal use.
Foley Recording vs. Regular recording
Usually when recording for film foley sound effects or recording traditional instruments, you're trying to capture sound that is realistic, high quality and low noise.
The modern listener expects a relatively high auditory experience.
However, when you're creating foley recordings, the standard of what is good audio quality can be different.
Sometimes high fidelity is good, but in our opinion it is much more important that it's an interesting sound because you're not creating a final product. You're creating an input that is probably going to be manipulated quite a bit in sound editing software.
So the important point here is a solid foley sample pack is going to have a reasonable amount of processing to get the sounds ready for you to use, but you don't want things to be overcooked.
For our STONEWIRE pack, we decided to do both! You get both the minimally processed sounds as well as plenty of loops and one shots with heavy processing and you can decide what you need as you work.

How to create Foley sounds
Often foley sounds are simply sounds captured as they are in their environment. This can be a great place to start from.
Alternatively, you make build dedicated noisemakers in a foley studio and record sounds that don't really exist in other places. We recommend having a mix of both on your sample drive because you never know where the next track idea might come from.
If you're determined to make these sounds yourself, the best place to start is with a field recorder or even you phone. Just start making sound with things in your environment, take the recordings back into the studio and see if you you can make something happen with them.
What are the different types of foley effects?
The real answer here is there is a infinite amount of foley sounds.
But for the sake of organizing your hard drive and being able to get to what you need when you need it, we find you really need some kind of labeling or tagging system.
Labeling might not be the most exciting topic, but its really important for having a usable library.
If everything is buried in an unorganized way, this really pulls back the momentum in the studio when you have an idea but need to flip into being the company IT guy to find the sound you're looking for.
Good Labeling
For STONEWIRE, we needed a system that would be compatible with everybody's computers so we chose to organize everything into folders with 18 categories.
Some of them are descriptive of the sound like "tone" "bump" "crunch" and others are are descriptive of the thing we made it with, usually the material. For example there are folders for wood, ceramic, locks, surface sounds, and metallic sounds.
Making The Best Foley Sound Library We Could
To wrap this up whether you decide to check out our pack STONEWIRE, try someone else's or take a crack at building your own the biggest qualities we look for in a solid foley sample pack are:
Variety of interesting sounds (not necessarily the highest quality recordings)
Good labeling system
A balance of realistic with uncategorizable sounds
Decent size. Having a lot of options to choose from can be helpful when you're looking for just the right sound or need a couple variations of the same thing for multisampling.
STONEWIRE

Of course we hope you check out our sample pack STONEWIRE!
We did everything we could to make it everything we would want in a pack.
It is a foley sample pack consisting of over 1,500+ individual sounds recorded inside a large American home improvement retail store and carefully sculpted in our studio. It also includes processed and unprocessed one-shots and loops with our sound design.
If you use Ableton Live 11.3 or higher, we even include the session we did all of our sound design in so you can see exactly how we approach doing sound design with foley in a hands on way. Everything is done using stock Ableton 11 Suite Effects and Max for Live patches so you can simply toggle on or off each step in the effects chain to see how things work.


How To Start Using A Foley Sound Library In Your Music
Do you keep hearing about foley sounds and and wonder what all the hype is? Or maybe you've seen them used in music production but are confused...is this a film technique or a music technique?
The truth is it is both and in this article we're going to demystify both as well as get into some things you can do today to start using recorded foley sounds in your music.
It will elevate your productions and help you stand out with a unique voice, so lets get into it!

What Are Foley Sounds In Music Production?
The term foley comes from the film industry. A foley artist is generally the person who records sound effects that enhance the film's experience, named after Jack Foley who invented a lot of the techniques.
Door creaks, the snap of a match lighting, footsteps, a big impact, the click of a lock, or the zing of someone sliding down a rope are all examples from movies where sound effects really enhance what you're seeing on the screen.
However, in music, foley tends to overlap with what some people refer to a field recordings or found sounds.
This basically means sounds of not traditionally musical things you record outside the studio in the world somewhere. The clink of a coffee cup, the ambient noise of an airport, the sounds of a contact mic pressed to your computers fan motor—really whatever you want.
Why Would You Use Foley In your Productions?

Now that you know what foley is in a music context, why would you want to use this?
Simple. These kinds of samples add a certain texture and vibe to a track that can be really really tough to re-create with traditional music instruments.
Many sounds that are "bad" by standard definitions can be really interesting musically in the context of other things. A bright, clean sound appears more pure if you put it next to something covered in dirt.
You could for example, use a foley sample of actual dirt. How would you synthesize that? Sounds like a pain in the ass. It's easier to just go outside where dirt is abundant and bring a microphone along.
This kind of sound effect can be deeply personal because no two people are going to approach it the same way. This is a great quality to fold into your work that makes it more you.
How To Record Foley Sound Effects
Need Free Foley Sound Effects? Making Them Might Not Be As Hard As You Think!
Can you use a beautiful high end tube microphone to capture your foley sounds in pristine, perfect form? Yes of course you can.
Can you instead use your dying iPhone that now has a very unique polar pattern due to it accumulating 6 years of pocket lint over the internal microphone? Also yes. Sometimes to greater levels of success.
The second option might actually be cooler because its more quirky and hard to reproduce. If you can make it work, it will help make your sounds more unique to you and your music. And don't forget that you can do a lot with modern software to remove noise and shape the tone of the sound.
Think Like A Foley Sounds Effects Artist
If you lookup video of how a film foley artist works, it's remarkably low-tech a lot of the time.
Need to sound like a bird flying away? Get some feathers. A gate opening? Get some other rusty metal that squeaks.
Where it gets more interesting is when foley artists need to create sounds for things that don't or can't exist in real life. They have to imagine what something would sound like if it did.
This video of the sounds used in the movie Dune are good examples of how this is put together, sometimes using or building odd objects to make sounds people don't typically hear in real life.
This help to create a unique sound world in the film to make fictional things feel believable and authentic.
Using Cinematic Foley Techniques in Music
You can use this same techniques in a musical context to build your own sound world. Some more cliché examples are things like sirens, various weapon sounds and "romantic" sounds.
We would encourage you to think outside the box here, even deliberately do the opposite of what is common in different genres of music.
Here is how to get started making foley sounds for your next project using only a phone:
Make a list of the common percussion sounds that are used in most genres of music. Kicks, snares, hi hats, pitched drum sounds are a good start.
Start experimenting with sounds around you that loosely sound similar. A low bump against an object for example can be used as a kick or short, higher sounds might work well as the basis for a hi hat or snare.
-
Record a few different variations of each sound, download your recorded sounds into your DAW and start sequencing them like you would with any other sound from a sample pack. See how they feel with more traditional instruments or as a layer.

If this first attempt isn't successful, don't be discouraged!
The act of putting this stuff together will teach you a lot and if you keep repeating this over time, you'll improve with every iteration.
Don't get it twisted, this is actually somewhat challenging work but its also a skill you're developing so it's supposed to be a challenge. Anything worth doing isn't going to be too easy.
The fun part of doing the work is by developing your own process for creating foley sound effects, this will help make your productions more individual.
No two people do this the same.
Over time you'll accumulate a collection of sound effects that are only yours. And you never know, sometimes a sound from a few years ago you didn't know what to do with will suddenly become useful as your skills grow.
Common Foley Sound Effect
Here are some more ideas for foley effects that you can try to incorporate in your next song:
Foley Textures - Beyond Vinyl Crackles
Its a cliché in many genres to incorporate ambient sound effects like vinyl crackles, nature sound effects, or crowd noises, but the musical principle behind it is not!
Using some sustained sound with an element of randomness has a lot of possibilities and can help avoid moments in a track where you want to avoid a complete silence but not fill things in too much.
Some ideas to get you started are:
Machines or small toys
Sounds that are very loud in real life, mixed very quietly. Like a jet taking off, a major city block during the day, the brakes of a train screeching.
very quiet sounds, amplified and compressed to be much louder than they normally are. Even something as simple as running your fingers along a surface can be musically interesting in the right context.
Wood, Footsteps, and more
Sounds that are clear in origin like ceramics, metallic, wooden, or someone doing something as simple as walking on an interesting surface like gravel or leaves can be compelling and add a distinct feeling to a track.
Odd Rhythms
Sometimes you can find interesting rhythms by looping a foley sample that on its own doesn't appear to have a beat to it, but it reveals itself when repeated.
Jingling keys or stirring a cup of coffee are both examples that often will work well. One production trick is to start with a looped sounds like this and program more traditional percussion around it to come up with rhythms that you normally would not think to write.
Pitched Sounds
As you go about your life, have your ears open to objects that have a clear, singable pitch to them.
Those tend to make great objects to sample because you can repitch them and write melodies or chords with them. Some people will even build fully playable Kontakt Instruments with things like this.
Free Foley Sound Effects vs. Paid Options
While this article has some ideas to get you started with foley sounds and making them yourself for free, we aren't going to dress this up—it's a ton of work.
Especially if you plan on making a large library like we have. Our foley sample pack STONEWIRE was recorded entirely inside a hardware store with a field recorder, which resulted in over 8,000+ raw sounds that we had to sift through, process, pick favorites, and organize.
Whether you decide to use our STONEWIRE sample pack or another company's collection of foley sounds, it is also sometimes useful to have examples of how to do things. This is why we decided to also include processed loops and the full Ableton Live 11 session so you can see exactly how we did the sound design.
If you open the session in Ableton you can literally just mute the effects until you get back to the original starting sound and study how we arrived at the final result.
Get Started With Foley Sound Effects Today
Hopefully you found this helpful and are inspired to start working with foley sound effects by making them yourself or using ours.
We use foley sounds to synthesize interesting new sounds every day, so its a very fruitful skill to add to your music production skill set. The possibilities with it are truly endless.


How To Make A Drum Kit In Ableton Live with Foley Samples
Want to follow along? You can download the samples from the STONEWIRE foley sample pack here
Video Transcript:
And welcome to the Hot Wobble YouTube channel. Today, I want to talk about how to build a drum rack in Ableton Live. And this isn't gonna be a basics kind of tutorial that's very well covered. Instead, what we're gonna be doing is building a drum rack using only Foley samples and seeing what we can do to just make it work, make a bunch of those kinds of sounds come together. And I'm gonna be using this sample pack that I just put out, it's called Stonewire. I'll put a link in the description if you wanna get it.
Basically, it's a big folder of samples in Ableton set and a bunch of pre-built stuff. I could show you that maybe at the end, but let's just get into it here. So I'm gonna open up the Stonewire pack here, which has a bunch of different types of sounds into folders, I have an open drum rack.
And the way I built all the pre-built drum kits in this collection and all those pre-built kits and stuff, it's the same process. I'm gonna show you the whole thing with no edits so you can see my mistakes and see me screw things up and have to problem solve because I think it's a good way to learn. So generally how I started this,
I usually try to build some kind of kick drum and the C1 pad down here But for my actual starting sounds, I'll just go through this and drag in a bunch of just kind of random stuff,
maybe like a couple of low sounds and then maybe this clap-like folder, I'll use sounds that I haven't really touched before. Anything without a check doesn't have an analysis file, but yeah, so that's gonna be cool. But yeah, I usually will just start by, actually, let me put this up here. I try to loosely organize these racks so there's like lower sounds here and then the higher upper percussion kind of sounds or towards the top, but I'm just not gonna think very hard about what exactly I'm dragging in
because we're gonna do a lot of stuff to make this what we want it to be, just as we go through. I took a stab at recording this last night and my streaming software did not deliver. So hopefully this time it does. I changed some settings, we'll see how it works But yeah, again, I'm not thinking too hard about what I'm doing here.
I'm just pulling stuff in
and just we're gonna make it work. That's the idea.
One of these might be good.
And then there is also a folder of one shots with all the sound design already done. But again, I wanna just show the process. That's the goal of this video here. Oh, one thing I do wanna grab is some of these tones.
It's nice to have a couple of pitched things in a kit
because then you could turn that into all kinds of stuff. I need one more. Let's go in this wood folder. Anything I haven't used, let's reuse something. That's fine. Okay, so let's see what we have here (keyboard clicking)
Turn on my volume a bit.
(keyboard clicking)
Okay.
All right, so it sounds like a bunch of Foley. Let's see.
So let me just make sure my stream's still going. We're still good. Okay.
So let's go with this or this I think that'll be my kick. That's closer to what we want this to be. Making a kick not super tricky. One thing I'll often do,
I will counter intuitively high pass
and just crank up the resonance to get some low end
happening in that kick range, like 60, 70 Hertz is nice.
Yeah, okay. Now, this needs to be shorter.
This sound more kick-like.
Not that short.
Let me make this a sampler actually.
Closer.
All right, so now what else can I do to make this more kick-like? I can let me change this.
Cool.
I'm gonna want some more EQ here.
Just to be able to control what's happening.
And also, let's get it resonating more.
Cool, and then for kicks and drums in general, I like to use the pitch envelope.
Make a quick pitch drop at the front of it.
Cool, I'm gonna roll off some high ends.
And now I need a little bit more bite at the front of it. So to do that, I'll often turn snapping off
and start right in the middle of a waveform.
Find a good spot.
I like this one.
All right, and then to get something transient, like I'm gonna add some FM.
Not that much.
♪ That sound didn't count like a kick ♪ No, okay.
Let's turn this up a little bit.
Yeah, okay, I can live with that.
What can this be? Ooh.
I like to always play with the transposition and the warping in here.
Just because you never know what this could become.
Let's see here.
Let's see what the filter can get going here.
I'm actually not, I'm just gonna high pass.
Got a bunch more sounds to do too, so keep it moving. What if we just do this?
Eh, lame.
Instead, let's do something like this.
I like to just get heavy handed with effects, to be honest.
Yeah, I could have lived with that maybe Yeah, I could come back if I want Would be cool if, hmm, what else can we do here?
That's nicer.
Something about that I like more.
Let me just throw some more EQ on here.
Yeah, okay, I can deal with that. Actually, let me try some. Is there anything cool on the sides?
Let me widen this up.
And then this is a fun trick. I'm gonna put an envelope or envelope follower on the frequency.
And then we want to put this up higher.
And I want more motion, so I'm gonna turn the gain up.
And maybe turn this gain up.
Let's flip around the range. So I'm gonna put this at 50 something and this at 100.
Yeah.
Cool.
Yeah, okay.
And then what if I do, I go back to the mid field,
hit map and put this on the frequency of
of this.
Yeah, this is interesting.
Just turn it up so you hear more.
Something like that.
Keep that from going all the way to 100.
And then start at lower. Yeah.
Yeah, okay This is a thing.
I like this before.
The higher value. What if I stretch it?
Nah.
We're leaving it right there.
Cool So we have a kick and this thing. Let's keep going. Try to move a little faster here.
So this is a tonal thing. How's my stream doing? Still good. Okay. I do not want this to fail as it did last night.
We're gonna do this.
And then I'm gonna bump up the gain.
Let's see what we got. What can manipulate this in a fun way?
Where's my green delay Sometimes I know what I'm looking for, but it takes me a second to find the word Does that makes any sense?
You go with a shorter delay time.
This texture.
Or it.
Okay.
Yeah, that's kind of cool.
And then I'm also trying to, this kind of fits the bill. I'm trying to make stuff that has like a varied stereo image.
All right. This is almost the same kind of sound. This isn't super different. I'm just gonna change the start time.
And let's try to do something really different with this. So maybe instead of it being like a high-endy sort of thing I'm gonna put an EQ on it. With this little behave.
I'm gonna roll off some high-end. If I transpose this down.
Yeah. Okay. This is cool.
And then I'm gonna go with a very modulated echo.
I love that sound.
Maybe not that much. I'm actually gonna compress this together.
I don't want notes, not dotted rhythms.
That could be cool.
Okay. I'm gonna live with this. Next sound. That can be just a shaker. We want.
But let's high-pass this.
All right. Let's play with the texture again.
I'm actually gonna change this to this sampler. And I'm gonna slightly modulate the start point of this. Need to turn retriggering off. Make this random.
And then sample offset.
Excuse me. So sorry.
Anyway.
Yeah.
Yeah. Okay. So that's just not, I just don't want that starting at the exact same place every time.
Sounds more interesting that way. And now I'm actually gonna, I'm gonna do a little bit of a re- And now I'm actually gonna FM this a little bit. Just put this.
Maybe not that much. Or maybe put it higher.
Just add some at the start of it.
Let's just see.
Oh wait, no it's not. No, it needs to. I'll show you that in another sound. Something longer.
Okay.
Maybe this.
Maybe this is the one to try that trick.
Oh, I'm gonna do this.
And then let's say filter.
Loop. Oh, let me loop the sample too.
No, it's too much.
Where's my transpose?
I actually like that better.
Nah.
I'm not gonna do this.(...) Sorry.
Yeah, that was just about it, yeah.
Do this instead.
Could I make that more of something? What can this be? No, I could use something.
Slappy like that.
How about this?
Try it here.
This might work better.
Nah, I'm just gonna go a totally different direction here.
No, I will try to get that trick in here somewhere. But what can we do instead?
Transpose.
Cool, let's try the shifter. Just totally change it.
Cool.
And then I'm gonna use the envelope follower to modulate that.(...) Because I liked what I was hearing as I was turning this.
So we're gonna move this here and then just flip the range again.
That's cool, okay.
I like what that's doing.
Alright, so let me just try these other modes.
Now this is cooler.
Do we do this?
Nah.
Now we're leaving it. Alright, let's keep going.
This is... We could go a couple directions with this.
If we do this and then loop over it.
I'm gonna get rid of this.
Oh god, sorry, sorry.
Alright, it's not quite so bad. This is not sustaining.
Maybe we try this trick here.
[tapping]
Take an LFO,(...) put that here, map it to the decay.
[tapping]
Let's see what we can get out of it. [tapping]
And then let's go back here.
Then maybe something like this.
My stream's still going. We're at 22 minutes, okay. Thanks for hanging in there, folks.(...) If you're still watching, you're a real one.
[tapping]
[tapping] [tapping]
That's cool. That's cool.
Alright, yeah, I'm just... I mean, the way I like to do this anyway is I'll just... I'm just looking for something that's musically interesting.(...) [tapping] [tapping] [tapping]
[tapping]
Cool, and I'm going to roll a little bit of high-end off that just because it's a little... a little grating.
But I like what's happening there. Come on. This Apple mouse is kind of killing me. It doesn't behave very well. Don't get the Apple mouse. It's not great.
[tapping] Yeah, okay, cool.
Nice.
[tapping]
[tapping]
I guess I could do it here too.
I wasn't thinking.
That's better.
I like that better.
[tapping] [tapping] [tapping] [tapping] [tapping] [tapping] [tapping] [tapping]
[tapping] [tapping] [tapping] [tapping] Actually, since that's interesting in a couple of ranges,(...) I'm going to try another LFO.
I'm going to map this to the frequency and make it random.
[tapping] [tapping] [tapping] [tapping]
Maybe not that high.
[tapping] Maybe not the very lowest.
[tapping] [tapping] [tapping] [tapping] Hmm. [tapping] [tapping] [tapping] [tapping] [tapping] Yeah, that's cool. Okay. [tapping] [tapping] [tapping] [tapping] [tapping] [tapping] Yeah, I like it. [tapping] I already got that. Let's keep going. Oh, there's this sound.
[tapping] Let's go with a big reverb. I want to use the hybrid reverb. [tapping] Cool. And then maybe springs are fun.(...) [tapping] And then for the algorithm.
[tapping] [tapping] Let's do this.(...) We'll use this trick. Expression control.
And then random. Then map. And then map this to the algorithm.
So now.
Every time we play,(...) the algorithm changes.
( thumping )
Do I want to change something else too? Probably.
What would be cool?
Umm...
( thumping )
I like this up high. Can I map this to the pitch? Yes.
Sick. Alright, I just don't want this to go super low. ( thumping )
I also want to filter out some of the lowest frequencies just because...
( thumping ) Those are crowding things.
( thumping ) Umm, let's put an arpeggiator on this too.
( thumping )
I put this before this though.(...) ( thumping )
Yeah.
There we go.
( thumping ) So every time a note comes out of this arpeggiator, it's going to change... It's going to hit this expression control which changes stuff.(...) It's changing the pitch and the algo for the algorithm for the reverb. ( thumping )
That's cool.
( thumping )
Alright, nearly there. Okay, this video is getting kind of long, but I want to get through all the sounds and then program them. So, let's see if I can just pick up the pace here. ( thumping )(...) This sounds like a contender for warping.
Texture.(...) Double it.
( thumping )
Can I map this grain size to stuff? I don't think so.
Umm, I'll try it anyway.
Let's see.(...) Come on. Map. Grain size. Won't do it. Sucks. Okay, never mind.
( thumping ) I will use a grain delay instead. Close enough.(...) Alright.(...) Grain delay.
( thumping )
Do this.
( thumping )
Now,(...) let's modulate the grain delay.
Map time.
( thumping )
( thumping ) I'll leave that. I'm cool with that.
( thumping ) This can be...(...) I'm gonna make this shorter.
Do I?
Yeah, okay.(...) This can just be one of my short sounds.
( thumping )
And then I'm gonna modulate the filter.
( thumping )
So it's not the same every time.
Yep, okay, another one of these.
So, uh...
( thumping )
Okay, I'm gonna put that there. What would be interesting? Ah, Corpus, why not? Why not? This is gonna totally change things, but I'm okay with it. ( thumping ) Now what would be good? A tube.
( thumping ) Okay.
( thumping )
Maybe if I take the expression control again,
map this to something.(...) I'm gonna try some of the other modes here. Membrane.
( thumping )(...) That's more interesting to me. ( thumping )
Maybe, I don't know. What else we got? Plate.
( thumping )
Let's go back to tube.
( thumping )
Maybe let's do that.
Um...
Let's do...(...) We'll slide get it. We want to change the radius.
( thumping ) No.
( thumping )
Let's go to...
( thumping )
Maybe, I don't want to do random.
( thumping )(...) No.(...) ( thumping ) Alright, let's do...
No, let's do incremental.(...) ( thumping ) I'm not the radius.(...) ( thumping ) I'm gonna turn up the amount.(...) ( thumping ) We started high and we're gonna go low.
( thumping ) ( thumping )
( thumping )
Maybe if we go over a bigger range and do it linearly.
( thumping ) I just want to hear change. That's really it.
( thumping )
I got interesting, quickly.
( thumping ) Um...(...) ( thumping )
That's cool, I just don't want it to be that loud.
( thumping )
Okay, why not? I'll rock with it. I can always come back and change it.
Let's get to my last four samples here. This will just be another...
short sound. I'd need to do basically nothing with this. That works as like a hi-hat kind of thing. Just as is. Okay.
Dream is still going.
( thumping ) Same trick as before.
Except...
Let's modulate pitch a little bit. Filter a bunch.
And panning.
( thumping ) It moves around.(...) That's an effect I always enjoy. ( thumping ) I'll turn this off so it doesn't switch around on me.
( thumping ) That's basically the same sound.
( thumping )
How can we do something different? Maybe this is finally when I get to use this modulation trick. ( thumping ) This looping envelope thing.(...) ( thumping ) Finally.(...) We will loop over it. ( thumping )
So I am going to modulate the time that decay for sure. ( thumping ) Whoa.(...) ( thumping )
No one. All right. And we're back. Live just totally dropped out on me.
Might do it again. We'll see.
( thumping ) But anyway,(...) we'll see if OBS keeps behaving. It appears to be... Okay. ( thumping )(...) I was trying to roll off some high end.
( thumping ) Okay.(...) Do this.
( thumping )
Let's throw some resonators at this.
If it will load,(...) let's go.
( thumping ) I want to also map this to probably pitch.
We'll do it. There we go. ( thumping )
Weird thing. Okay. I'll allow it.
This is fine.
( thumping )
Nice.(...) And the last... I don't know what this is.
( thumping )(...) It's a wood block.
( thumping ) All right. Let's just roll with that. I'm going to program something quickly so you can see all this in context.
One thing I like to typically do is I'll try to program a beat and use every sound at least once just so you can get an idea of what that's like. ( thumping ) Okay.
( thumping )
And if it sounds like this,(...) like these hi-hat things, sometimes I'll just do this and then turn down the probability on some of them so they don't always happen.
That's one of the cool things that live can do.
And let's just see how this sits.
( thumping )(...) Okay.
( thumping ) ( thumping ) Ooh.
( thumping ) ( thumping ) ( thumping ) ( thumping )
[drumming] [drumming] That's funny.(...) I don't know how usable that sound is gonna be. I might change it. We'll see.
[drumming] [drumming] [drumming
What haven't I used?
[drumming] No.
[drumming] [drumming] [drumming] [drumming] Move here.
[drumming](...) What if I do this?
[drumming] Or instead maybe just one long one.
[drumming] There we go.(...) I'm gonna put that here.
[drumming] [drumming] [drumming] [drumming] [drumming] [drumming] [drumming] And then maybe this.
[drumming]
Okay, so let's fix some things here. This wood block I want to change something. I want the pitch to change, so I'm just gonna LFO it. [drumming] [drumming] [drumming] Maybe not go quite that low.
[drumming]
Yeah. [drumming]
Alright, what other sounds have I not used?
I got that.
This one I'm not loving.
[drumming] [drumming] [drumming] Let's just make this weirder.
And also have a spectral resonator.
[drumming] [drumming] [drumming] [drumming] [drumming] [drumming]
[drumming] Maybe that.
[drumming] Make these longer.
[drumming] [drumming] [drumming] Okay.
Let's just drag a couple of these down here.
Maybe the way to do that.
[drumming] [drumming] [drumming] Mmm.
[drumming] [drumming] That sucks. That's just not good.
That's just not working.
[drumming] [drumming] [drumming] [drumming] [drumming] That's better.
[drumming]
Let me start the sample earlier. [drumming]
[drumming] [drumming] [drumming] [drumming] [drumming] [drumming] [drumming] Okay. Better.
I think the sounds are still being used. Yes. [drumming] [drumming] [drumming] [drumming] [drumming] [drumming](...) Okay.
I use this.
[drumming]
[drumming] [drumming] [drumming] [drumming] [drumming] Put this over here.
[drumming]
All right. That's something. Not like the greatest beat I've ever written, but the next thing I will usually do, and then we'll wrap this up, is I like to put a drum buzz on it.
[drumming] [drumming] I should turn this down.
Open this up mostly.
[drumming] [drumming] [drumming](...) The other thing I like to do is you can use this boom as like a faux 808 kind of thing.
[drumming] And the way I do that is you go here, or excuse me, you go into the clip and then you go into the envelopes and then boom, frequency,(...) and you can automate.
See here.
[drumming]
Something like this.
[drumming] [drumming] [drumming] [drumming] [drumming]
Yeah, and there we go. There's a beat made out of fully sounds. I'm not sure if, like I said, that was the greatest thing I've ever written, but there's the whole process from start to finish. Let me hit save.
If you want to get the entire pack, I'll show you where that's available.
Stonewire, yeah. If you get this collection of sounds, glitchmagic.com,(...) let me just open up the,(...) oh, the set.
Okay, there we go, yeah.
You will be able to get this whole thing and then there's some built-in lessons that take you through some of the devices, how to save stuff.
Just a couple of suggestions. This Karplus Strong rack I built, it's pretty cool. There's a lot of tools for that.
If you have questions, comments, feedback,(...) hello at glitchmagic.com or DM us on Instagram at glitchmagic.
Until next time, you can do the YouTube stuff, like, subscribe, leave comments. That's all great things.
I'll see you the next one. Cool. Peace.


STONEWIRE - Foley Sample Pack walkthrough
STONEWIRE is a foley sample pack consisting of over 1,500+ individual sounds recorded inside a large American home improvement retail store.
Here is everything included in the pack:
- 1,300 Raw Foley Sounds. Ready to Drag and drop into the DAW.
- 223 Processed One-Shots with Our Sound Design
- 20 Ableton Live Drum Racks built with the sounds
- Ableton Set with our sound design racks
- 54 Audio Loops Made With the Sounds
- 54 MIDI Clips

VIDEO TRANSCRIPT
I worked really hard on them.
So, you know, I have a little bit of an attachment to it.
But anyway, let's dive in. So what is stone Wire?
It is a big pack of foley samples that are recorded at a large American hardware store, we'll call it.
I went walking around and just started hitting things together and seeing what interesting sounds I could get out of the place.
So what that got me was the core sample pack.
When you download this, you're going to get four different things.
You're going to get the main sample back.
You're going to get an Ableton session for the Ableton people, because that's what I use a lot of.
You're going to get a pack of loops and a pack of one shots, and I'm going to walk you through what each of those look like.
So the what I would call the core part of the sample pack is all the Foley sounds that are unprocessed.
So if you open up these folders, you can take a listen to them.
Like I said, there's just some different categories.
Is the rhythms.
One, this is all metallic sounds.
This is crunchy sounds, for lack of a better way to describe them.
And I really love working with these kinds of sounds because they add so much texture to things very effortlessly.
And that's something that it always feels good using it in a loop just on its own.
Or you can layer it with like a synthesized kind of sound from a drum machine or, you know, or just a different Foley sound.
You can stack them up and things will get just a lot of texture and very thick very quickly.
And like a lot of people, I love the how organic they feel.
Something about it is just different than when you're working with synthesized types of sounds or even traditional drum sounds for that matter.
The Foley stuff is really its own, its own thing.
And it's it just is awesome.
Now what I then went and did is I took all those sounds and I pulled them into an Ableton session that I'm going to walk you through in a second for the Ableton people.
But I composed a bunch of loops which you can find here.
And you, like I said, you can do whatever you want.
You can just drag them into your DAW of choice.
It does not have to be Ableton and you can you can use these as is.
You can chop them up.
You can really it's really your question or really your your choice, not your question as to how you want to use these because they're all royalty free.
So go nuts. now some of the since I made these in Ableton there were some concerns like,
oh well what about the people who don't have Ableton?
So what I did is I actually took all of the kits I had and all the sound design, and I rendered those out as one shot samples.
I had some fun with the file names to so it's just a few of them from the alien folder of course.
So yeah, there's, there's just this one shot folder is like 220 something sounds.
The core sample pack is 1300 Foley sounds.
So just in terms of WAV files, there's a ton to work with right here.
But then, okay, so for the people who do have Ableton, if you open up the session here, which I believe this is the right one.
Yeah. No, no. Excuse me.
That's the lessons which you’ll see in a second Okay?
So if you open the Ableton session that comes with this thing, there's a couple of built in lessons.
First of all, so this all just takes you through the pack.
It shows you where things are.
This one has some suggestions as far as how to save them and how to organize them.
If that's something you haven't
really done before, if you're newer. and then there's also you see here there's some things about the drum racks just where they're stored.
There's the Karplus-Strong device made.
I'll show you that in a second.
All the controls for that.
But yeah, so there's some built in lessons that just help you get the most out of it.
But I'm going to also walk you through that.
Obviously it opens up with the track and all the loops I just showed.
You are loaded up and ready to go if you want to do something with that or save them somewhere, whatever you want to do.
But also if you come into these folders, there's also a folder with these audio loops as Ableton clips So there quick to grab next time you're looking for them.
Then there are these drum clips which if you drag one of these in, you will be able to see.
First of all, let me just show you this.
You'll be able to see the MIDI and have access to the MIDI that I used to make all of these audio clips.
But then also you'll be able to see how the sound design was done.
So if we come here, you can see this is the original sample, the short metal toe, short metals, 25 that came out of the core, the library.
And then you can see all the devices.
I'm using to process it and you can look around inside the sampler and see all of my settings so you can see how the sound design was achieved.
So yeah, these, all these loops give you that you have MIDI and then the actual drum racks.
Let's give it a second open.
Then you just have a blank drum rack
that you can, you can sequence or map to a controller or whatever you want to do.
And then This is the device.
I wanted to show you this Karplus-Strong thing.
And if I click over, there's a lesson that explains that Karplus-Strong is just an algorithm for synthesizing stuff so you can hear.
And basically what's happening here
is we're using Karplus-Strong as synthesis and we're exciting.
It works off of a feedback circuit without getting too deep into it, but we're exciting that feedback circuit with the stone wire samples.
And if you want to swap out that sample for one of your own or one of the ones from the pack, what you can do is you just drag one and where it says, drop a sample here.
Except don't do this.
See how the whole sampler device is highlighted that will replace it and break a bunch of the macros.
So that's just an important note.
But then if you come over here and you want to play around with the different settings, you can change how much of the sample gets blended in with the Karplus-Strong sound and how powerful the Karplus-strong responds by playing with these two in particular, the pitch time and pitch filter that can really do a lot.
And if you want to know more about what each of these macros do, yeah, it's on the sixth page of the lessons there's an explanation for each of the controls so you can see what stuff is doing and you can poke around and see what is mapped to what and get an idea of it.
So anyway, that about wraps it up.
That's what you get with Stone Wire.
Like I said, it's four basically four folders.
There's a bunch of one shots, there's loops, there's the Ableton session for the people who want to get really deep under the hood for how we made this stuff.
And then of course, there's the giant foley pack of the core samples of this thing altogether.
It's I believe, over 1500 sounds.
And then there's the Ableton Devices and stuff.
So have fun with this. If you have any questions or feedback.
Our information here, it's at the end of the lessons.
You can send us a DM @GlitchMagic on Instagram or you can email us.
Hello at GlitchMagic.com.
So let us know what you think and have a lot of fun with this.
Thanks.


How To Chop Drum Breaks Automatically
How This Works
We made a pair of Ableton devices that automatically cuts up drum breaks and glitches them out using stock Ableton 11 devices.
Basically whats happening is you put the Simpler device into slicing mode and chop a warped beat. You can also use transient mode, which sometimes works better.
This lets you trigger slices of the beat via MIDI notes and play them with a keyboard or pad controller.
Except instead doing that, your going to trigger the Simpler device with and arpeggiator, then use the Random MIDI devices to make the note skip around.
You can of course manually chop the beat up beyond that or simply record the output of the Autochopper devices and move on to other things!


The Most Common Questions About Ableton Live 11
We get a lot of questions both from users as well as friends in the production world who are curious about Ableton in general since it is our main DAW and we make sample packs specifically for Ableton.
And of course any time Ableton decides to release new updates or a major version, there is tons of chatter in the production community about all the cool new things that the latest version can do.
So, we decided to put together a guide that answers all the most common questions we get about the software, as well as some of the latest and greatest features that were released with Live 11, including the most recent 11.3 update which happens to include an entirely new instrument for us to experiment with.
Let's start with the basic questions.
What exactly is this software and what makes it have such a strong following?
What is Ableton Live 11?
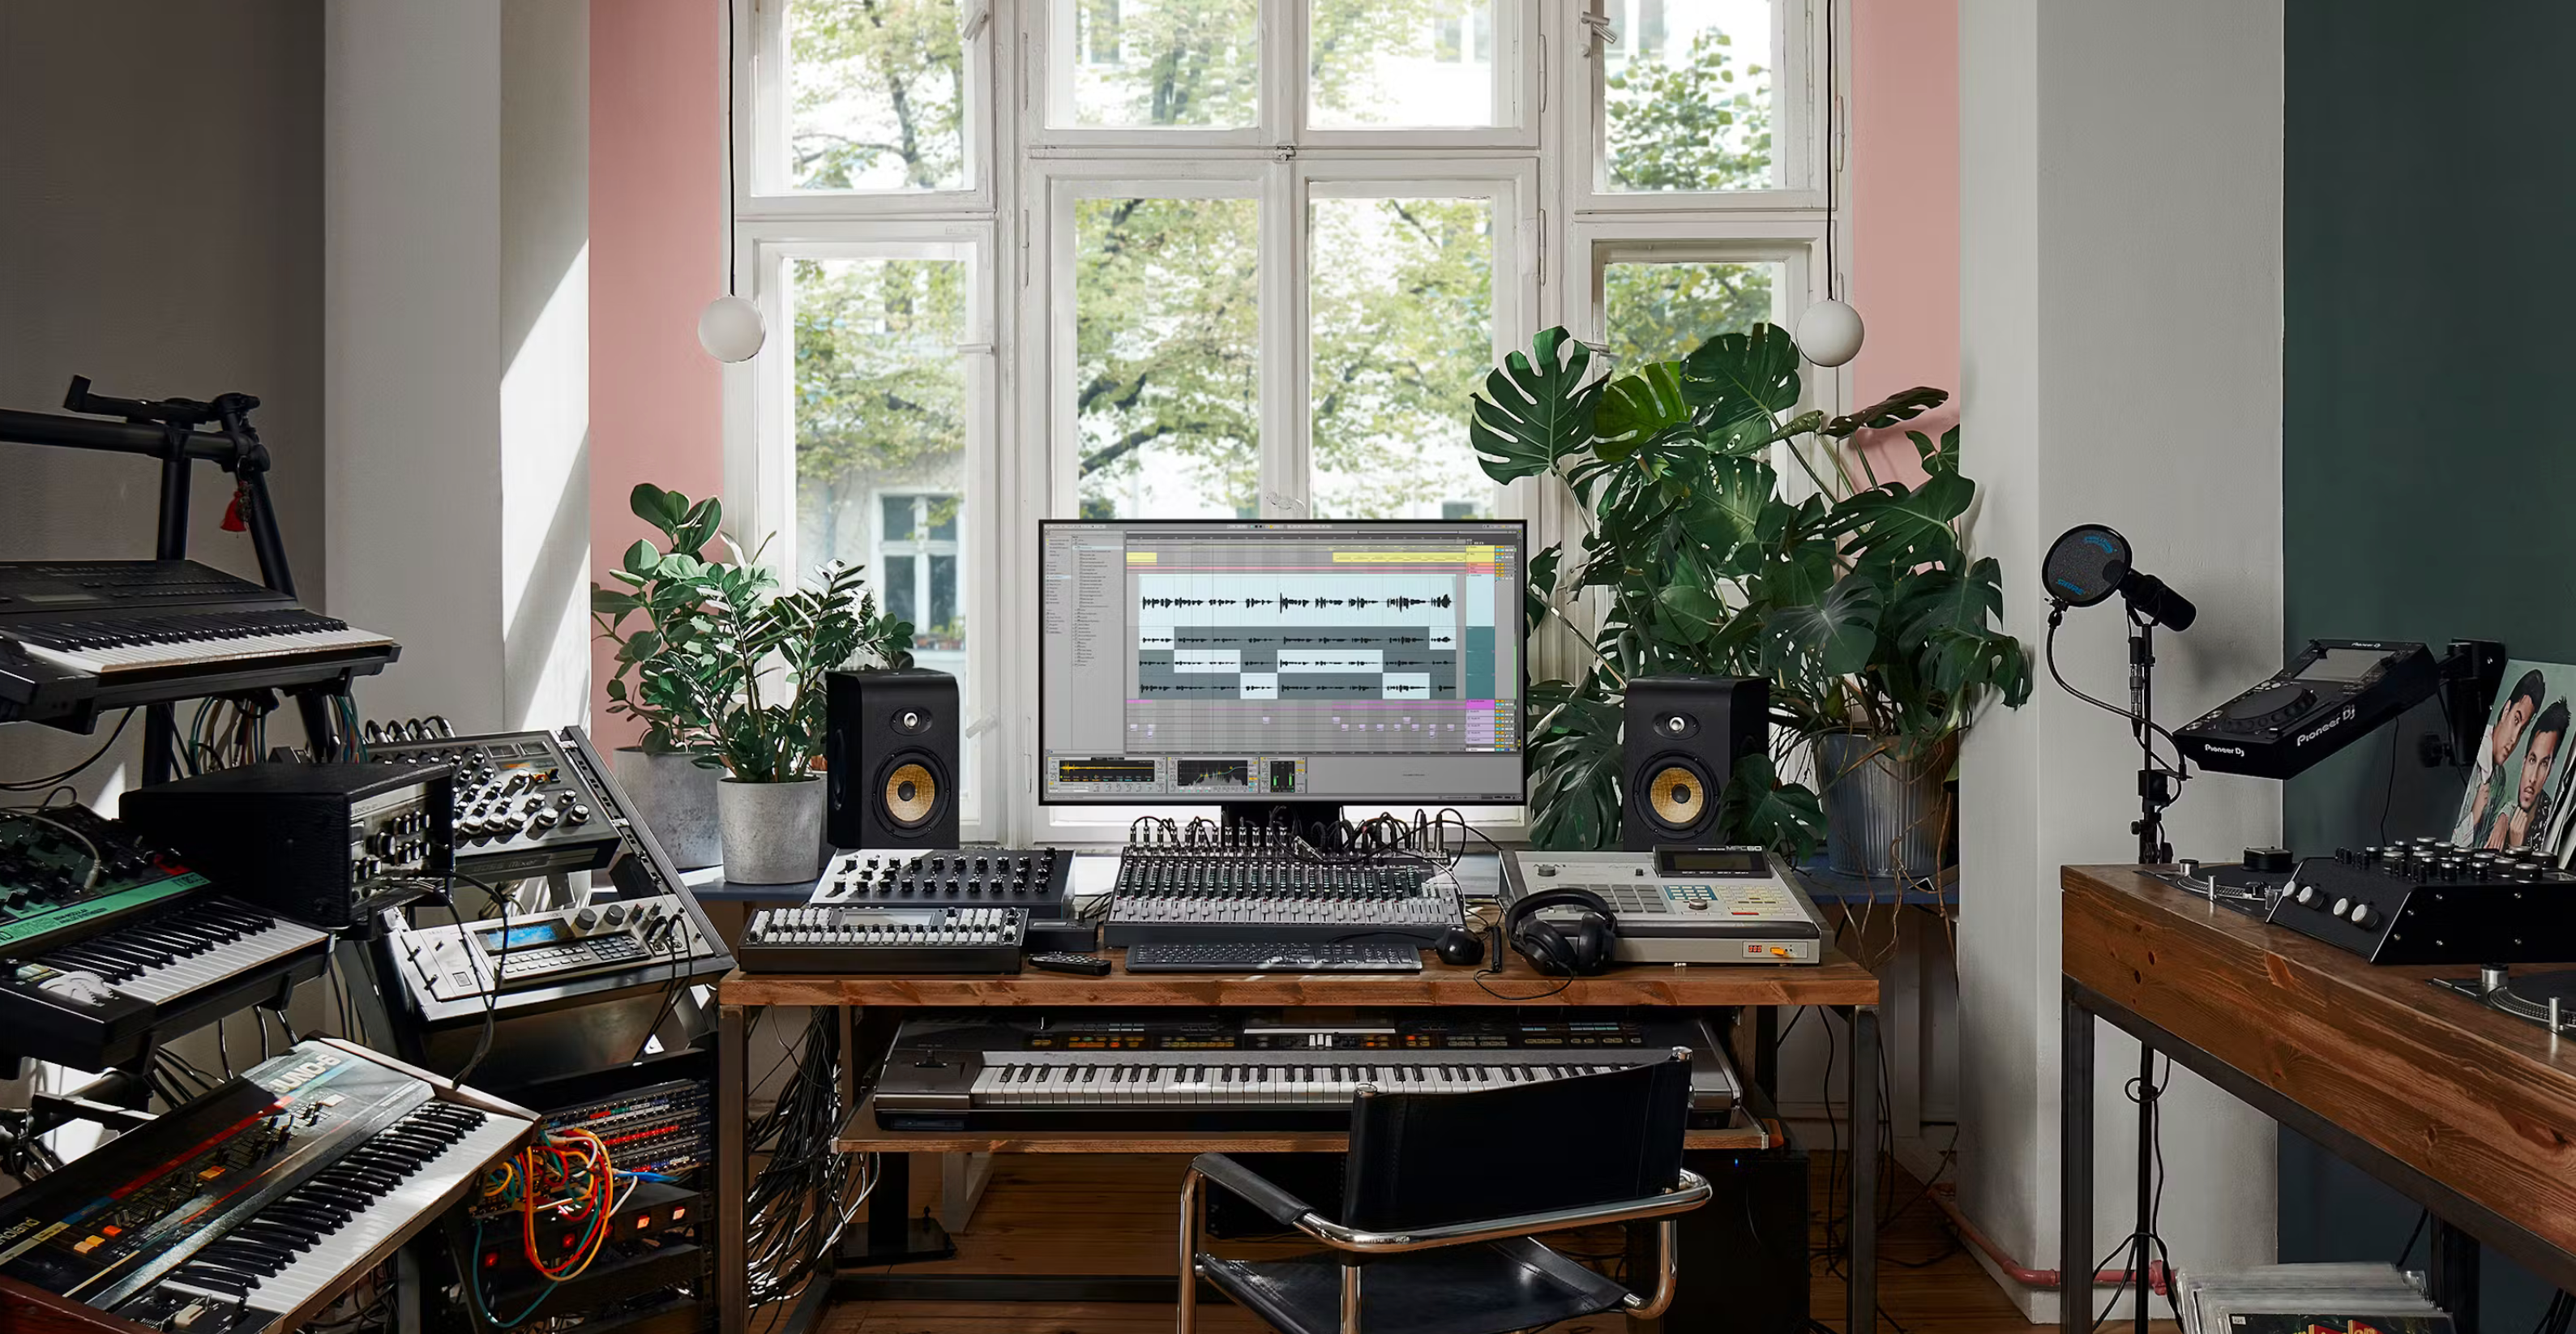
Ableton Live is a DAW software that was originally released in 2001. It is currently on version 11. Over the years, the Ableton team has improved it with each release to make it more competitive with other more established DAWs like Logic Pro, Pro Tools, Cubase, and others.
The thing that makes Ableton different is it has a traditional arrangement view like most DAWs as well as what they call the Session view.
The Session view was designed for live performance of electronic music at a time when bringing a laptop on stage was a very bold maneuver. It effectively introduced a non-linear way of working in a DAW that has uses in the studio as well as on stage.
Since Ableton takes such a different approach to what a DAW can be, other elements of the software are dramatically different than what most other DAWs feature.
A good example of this is the user interface. Most modern DAWs have very crowded UIs with lots of buttons and menus that go several levels deep. They're generally pretty crowded at best and a clunky mess at worst.
Ableton Live is instead designed with a very minimal user UI and it is easy to hide the elements you don't need at the moment with keyboard shortcuts. We're convinced this alone is a big part of Ableton's cult following. It looks like a DAW designed by aliens in the best possible way and the joke is that it kind of was.
What comes with Ableton Live 11?
Ableton Live is deep software with a lot of secrets, but the short answer is this: pretty much everything you need to make music!
A full license of Live 11 includes software instruments, a powerful Sampler, a substantial library of sounds that includes a brass quartet, string quartet, and curated collections, as well as an entire suite of quality audio effects.
Live 11 is also very easy to configure with live instruments and the hardware you may already have.
Perhaps the most powerful features of Ableton Live is that a full license includes Max for Live. This is a version of the programming environment Max/MSP that is bundled inside Live.
You can use Max to build entirely new features and plugins for Live if you're willing to roll up your sleeves and do some programming.
What is new in Ableton 11.3?
In a nutshell, some new toys, MPE everything, and full integration with Push 3.
Live 11.3 includes some powerful new features. The most notable one is they have released an entirely new synth device for all versions of Live, including Live Lite. It is called Drift.
You can now also play more of your automation data in and have Live's native synths react to it! Analog, Collision, Electric and Tension all now support MPE. If you have a controller that with MPE support, you can modulate these synths in a variety of new ways.
The MPE device itself inside like has also been cleaned up on the UI side and has a lower CPU usage than before.
They have also have updated their core library with more content that supports MPE.
Additionally, the Auto-warp featured has been refined and is now more accurate.
What is a new standout feature in Ableton Live 11.3?
We think the new Drift synth is the most exciting part of the Live 11.3 update.
Having MPE support in more places is a lot of fun, but the new Drift synth sounds fantastic and we find it very easy to use.
This doesn't apply to everybody, but we also think the new Push 3 integration is a big deal. If you have an Ableton Push controller with a processor, you have a hardware version of Ableton now! You have the option of using the Push with a computer as people would traditionally or you can use it in standalone mode like an MPC.
The Push 3 can be upgraded as technology improves (this is a beautiful thing, we love future-proofed technology) and really helps Ableton stand out from the other DAWs that are more "in the box".
What new features were introduced in Ableton Live 11?
Ableton Live 11 was a major upgrade from version 10.
Here is an overview of the major additions to the software.
Comping
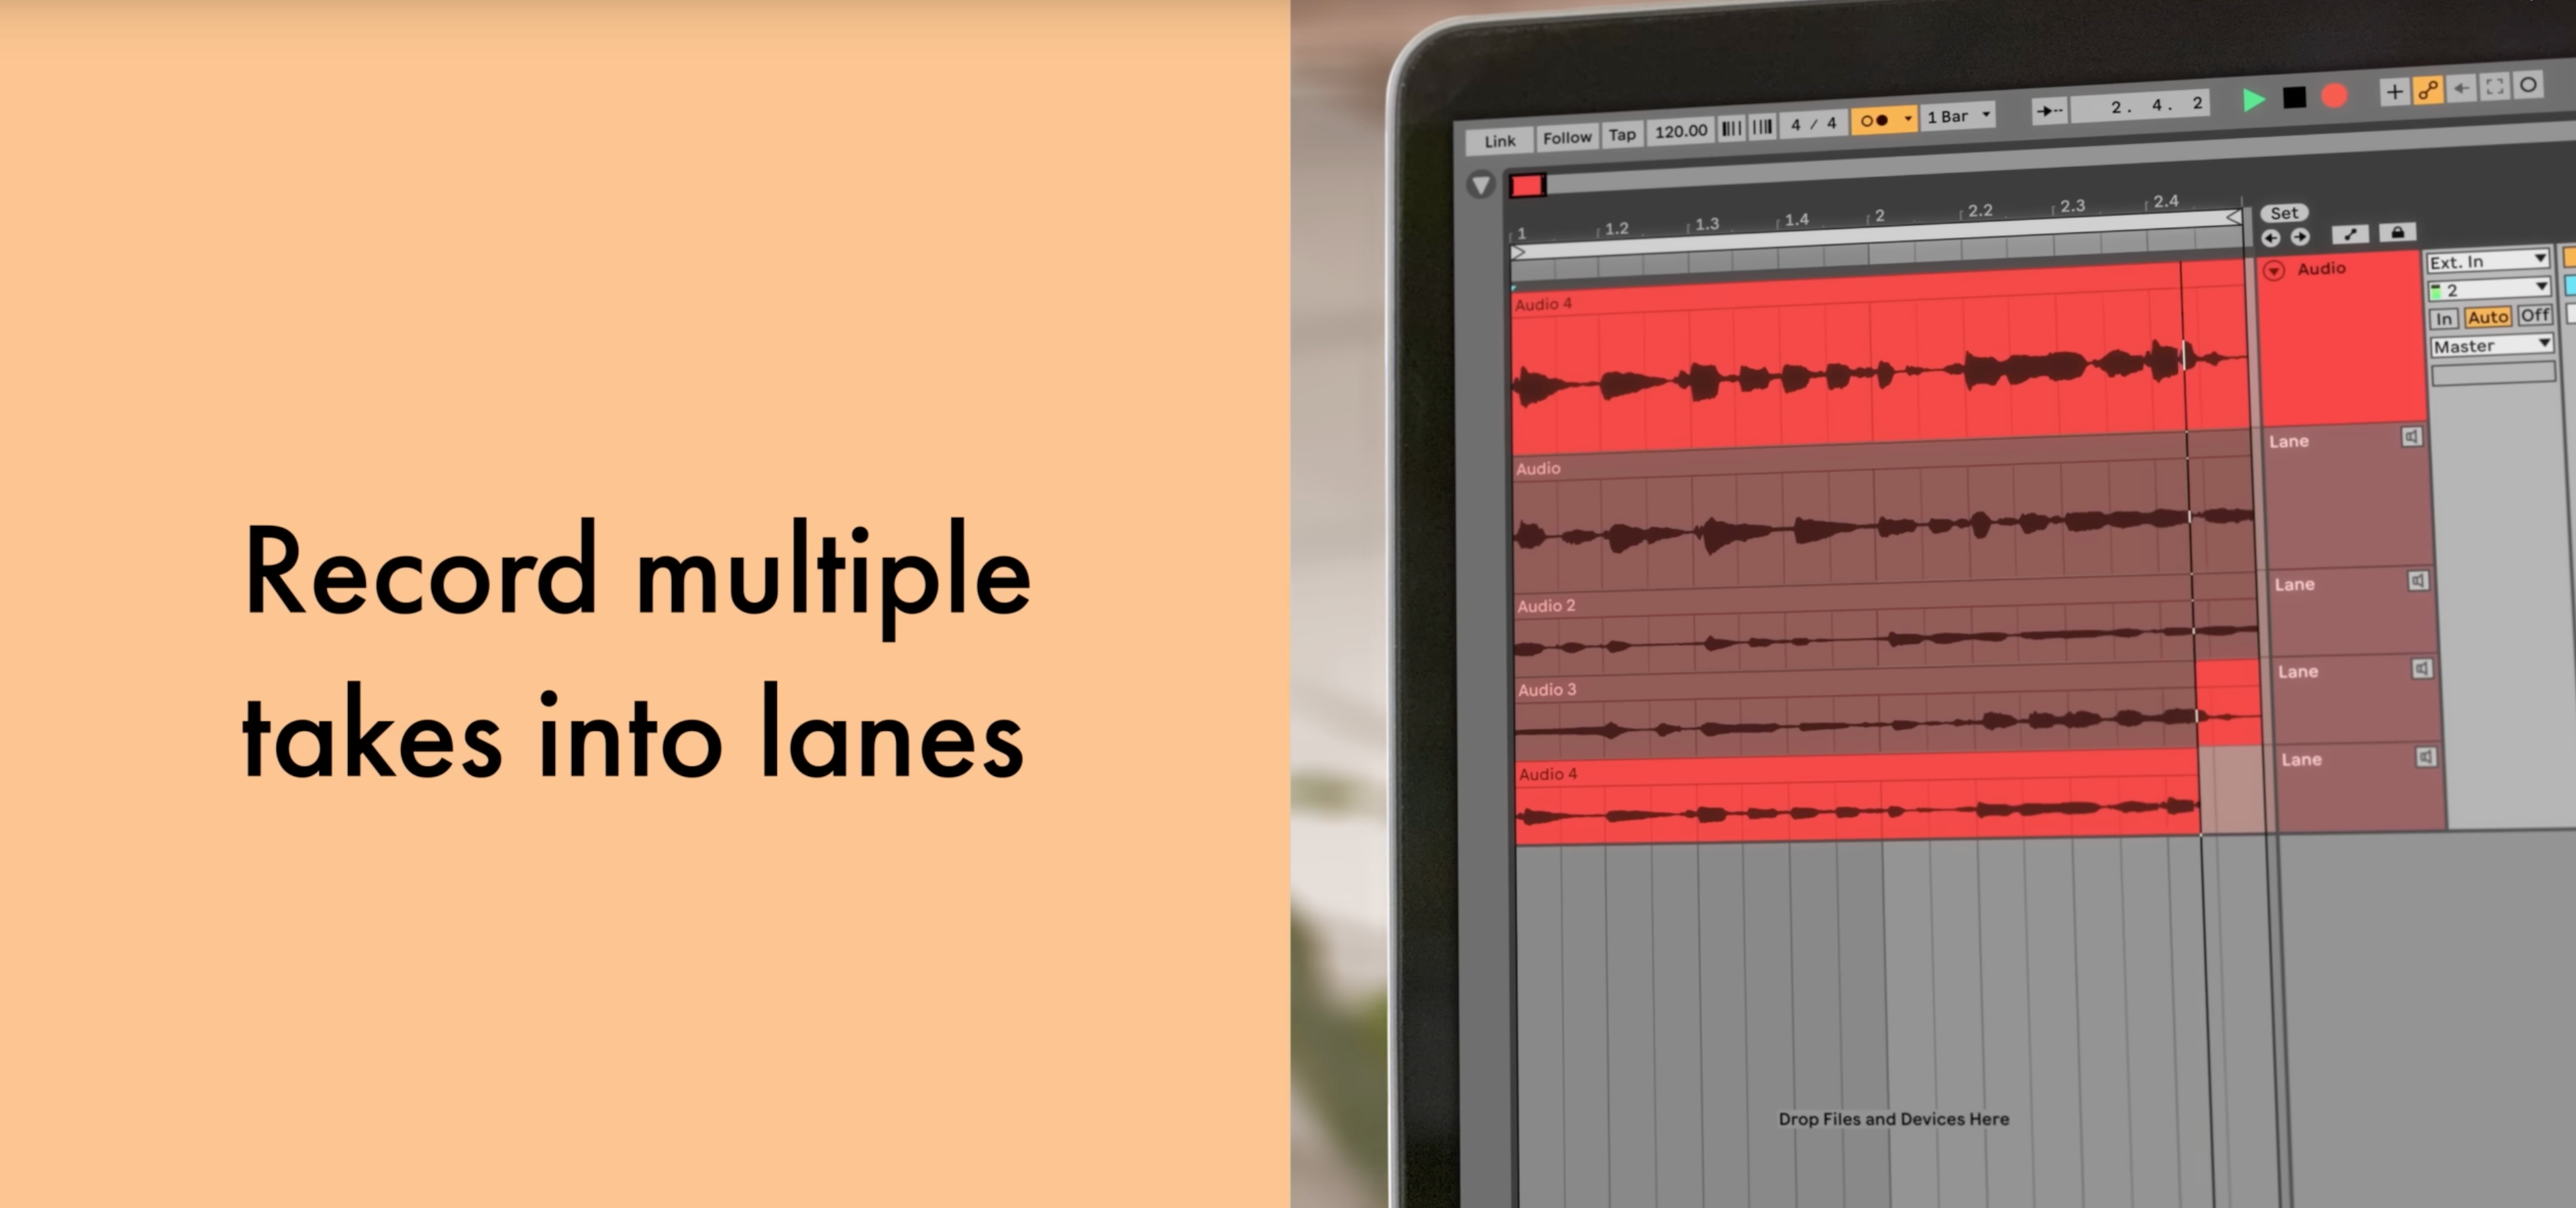
Comping is a similar feature to what is available in Logic Pro. Instead of recording different takes to new audio tracks, you can record to "take lanes" embedded in an audio track that you comp together into a complete take using the pencil tool.
Also, easier track editing is available with linked track editing. You can simultaneously edit two or more tracks.
MPE
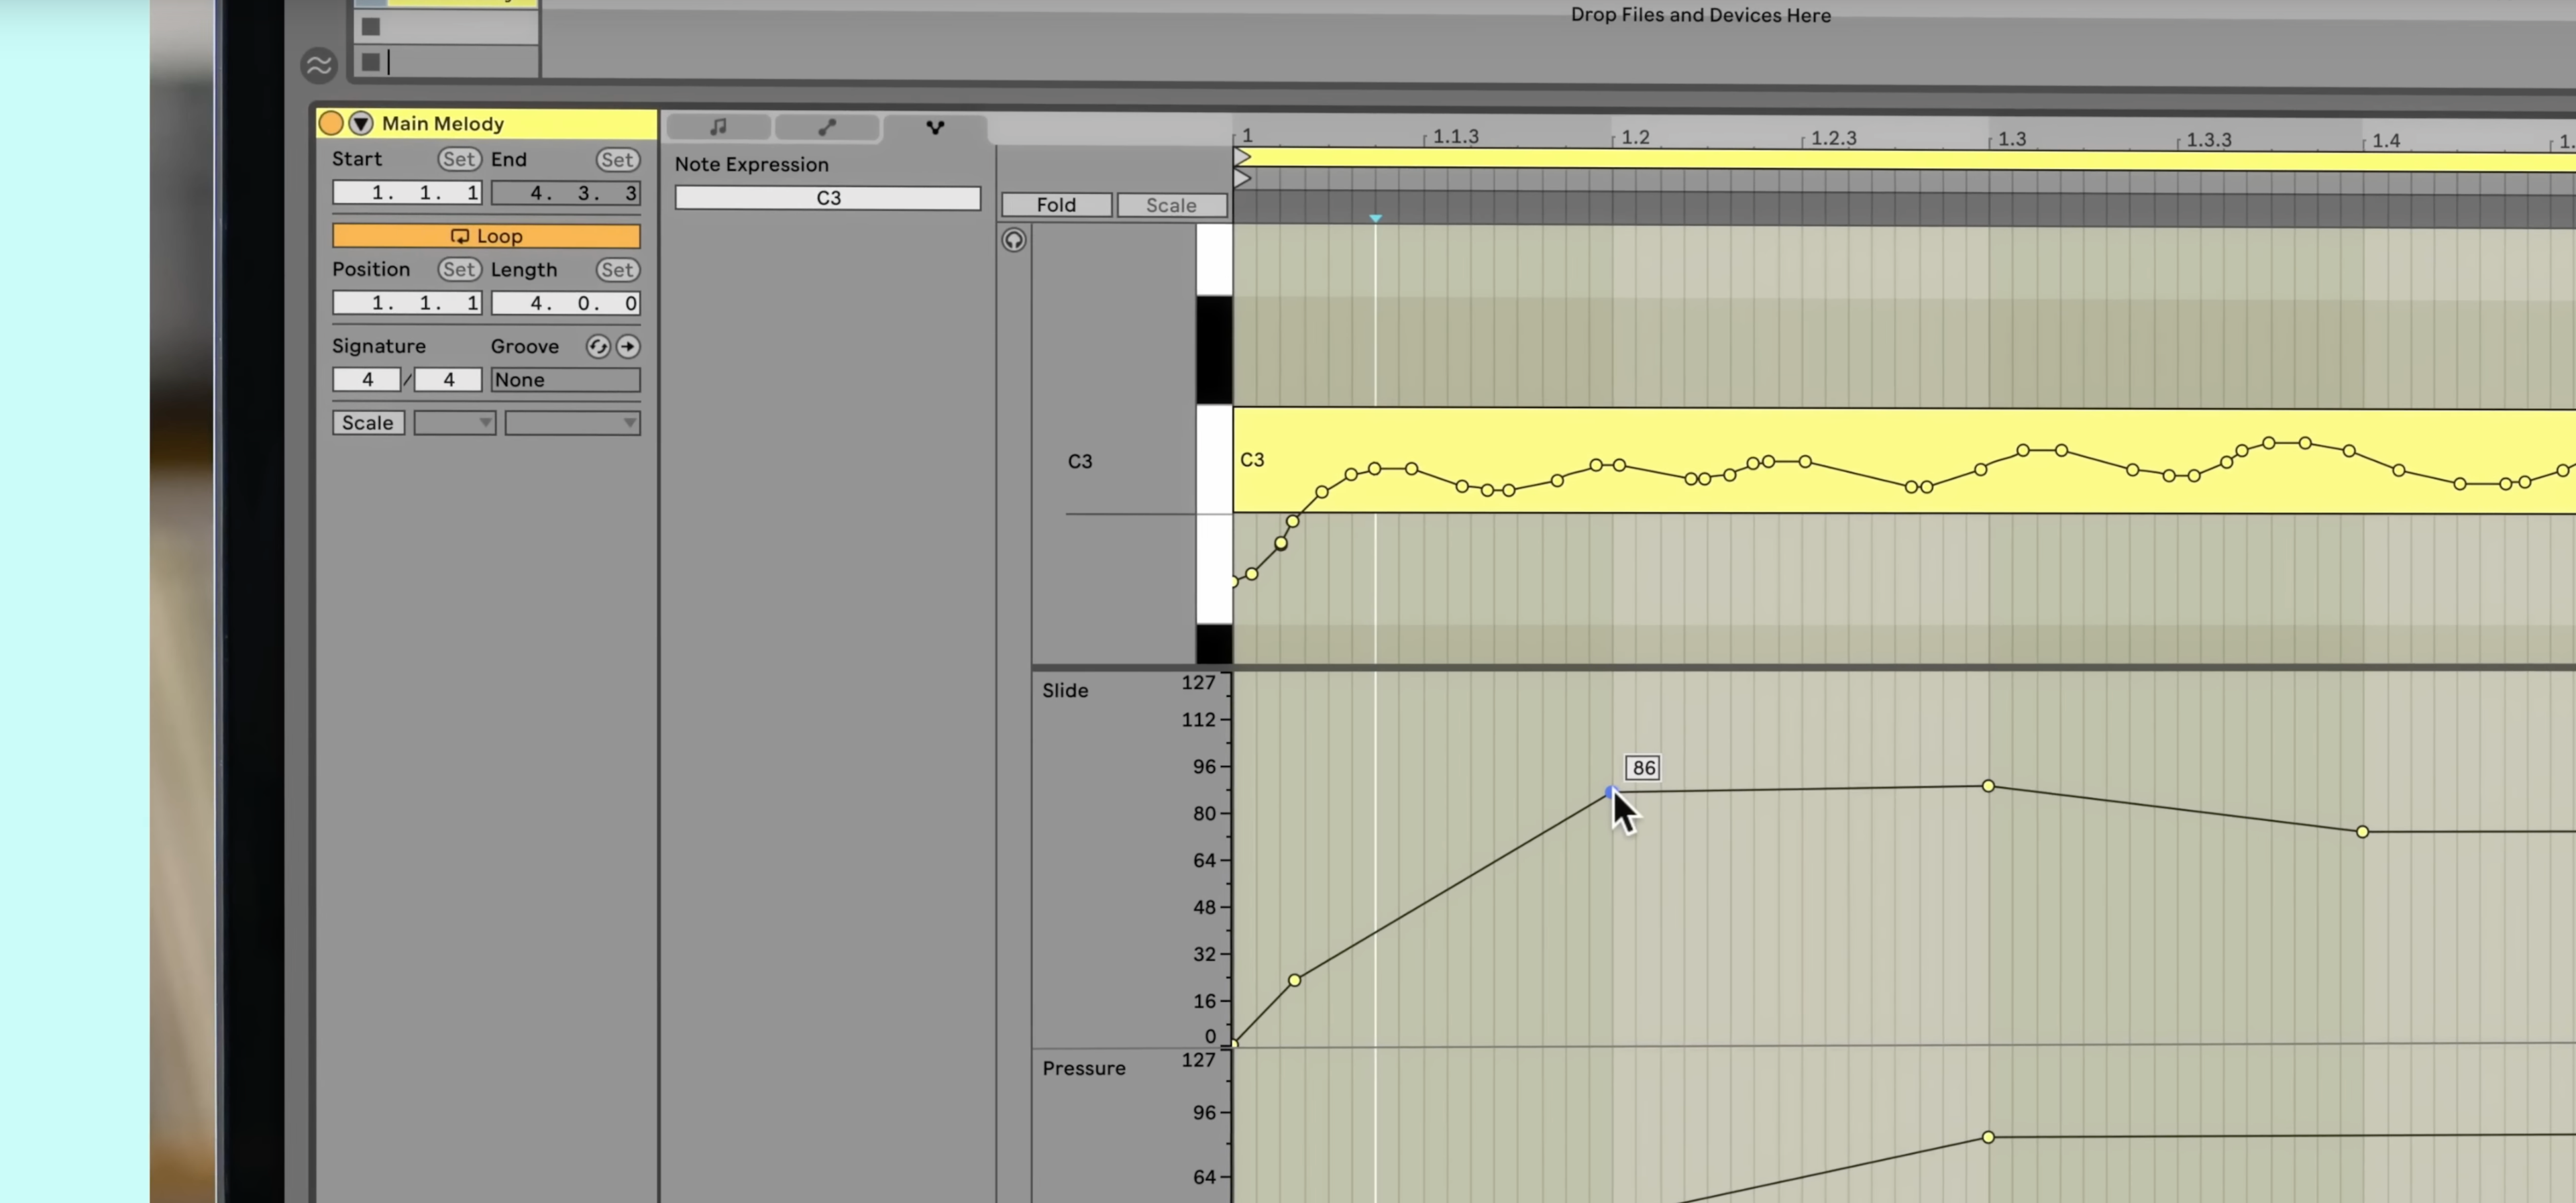
MPE allows you to use a whole range of new expression controls and physical MIDI controllers that allow for interesting bends and slides between pitch, velocity, and controller values.
New Devices
Hybrid Reverb
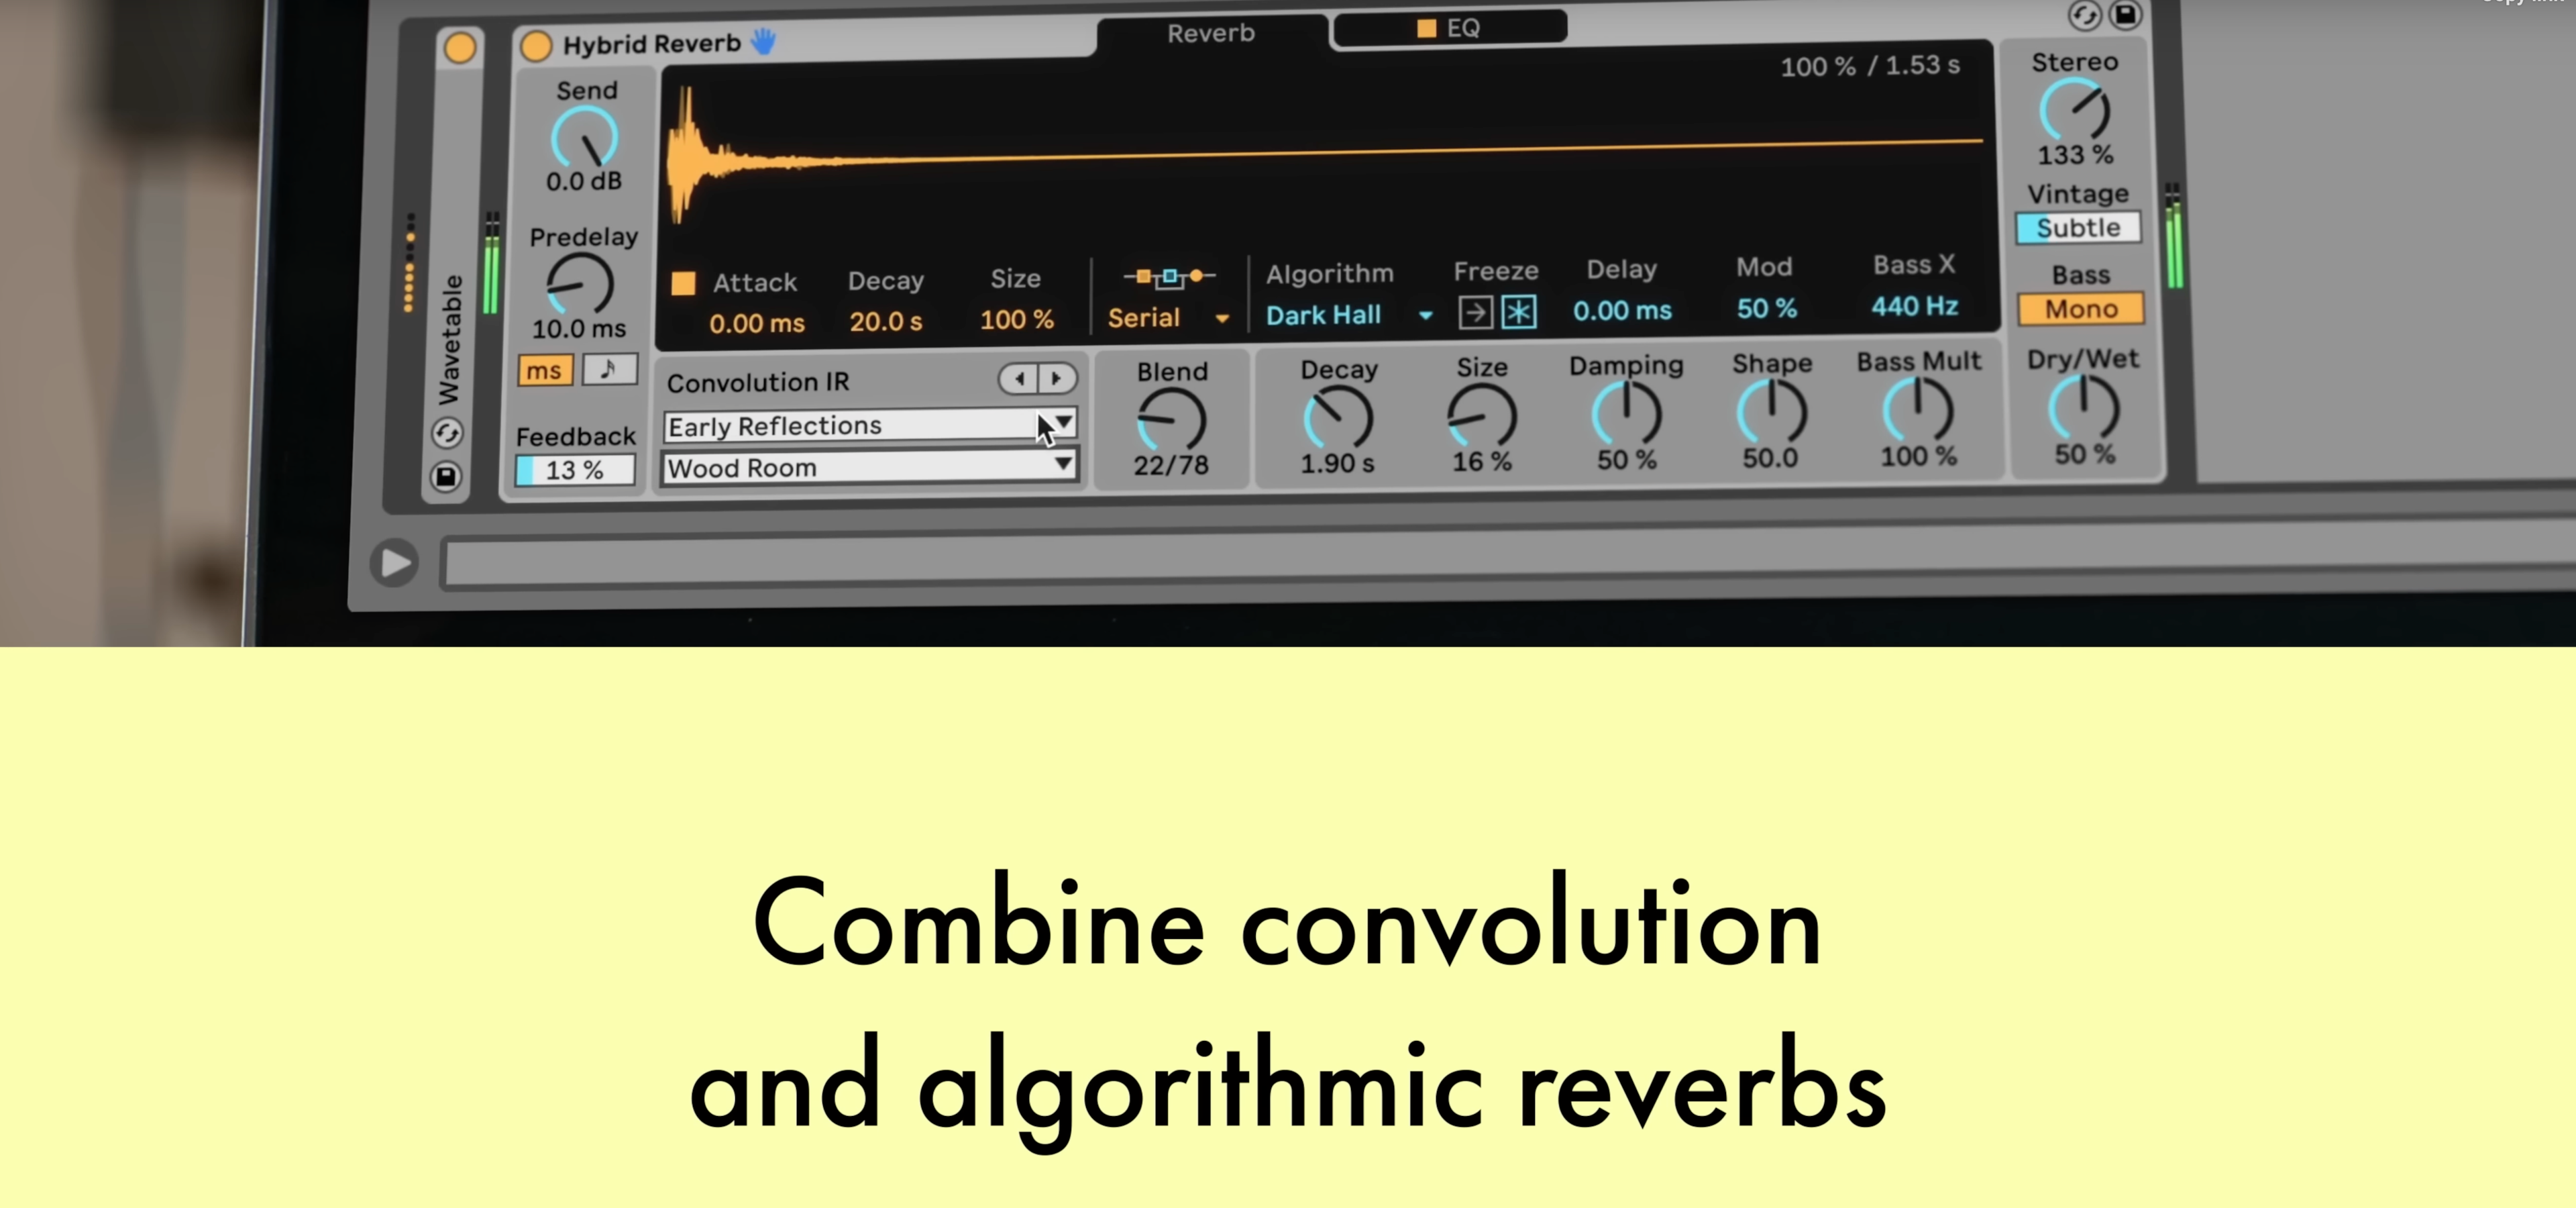
A new reverb device that combines convolution reverb with an algorithmic reverb.
Spectral Resonator
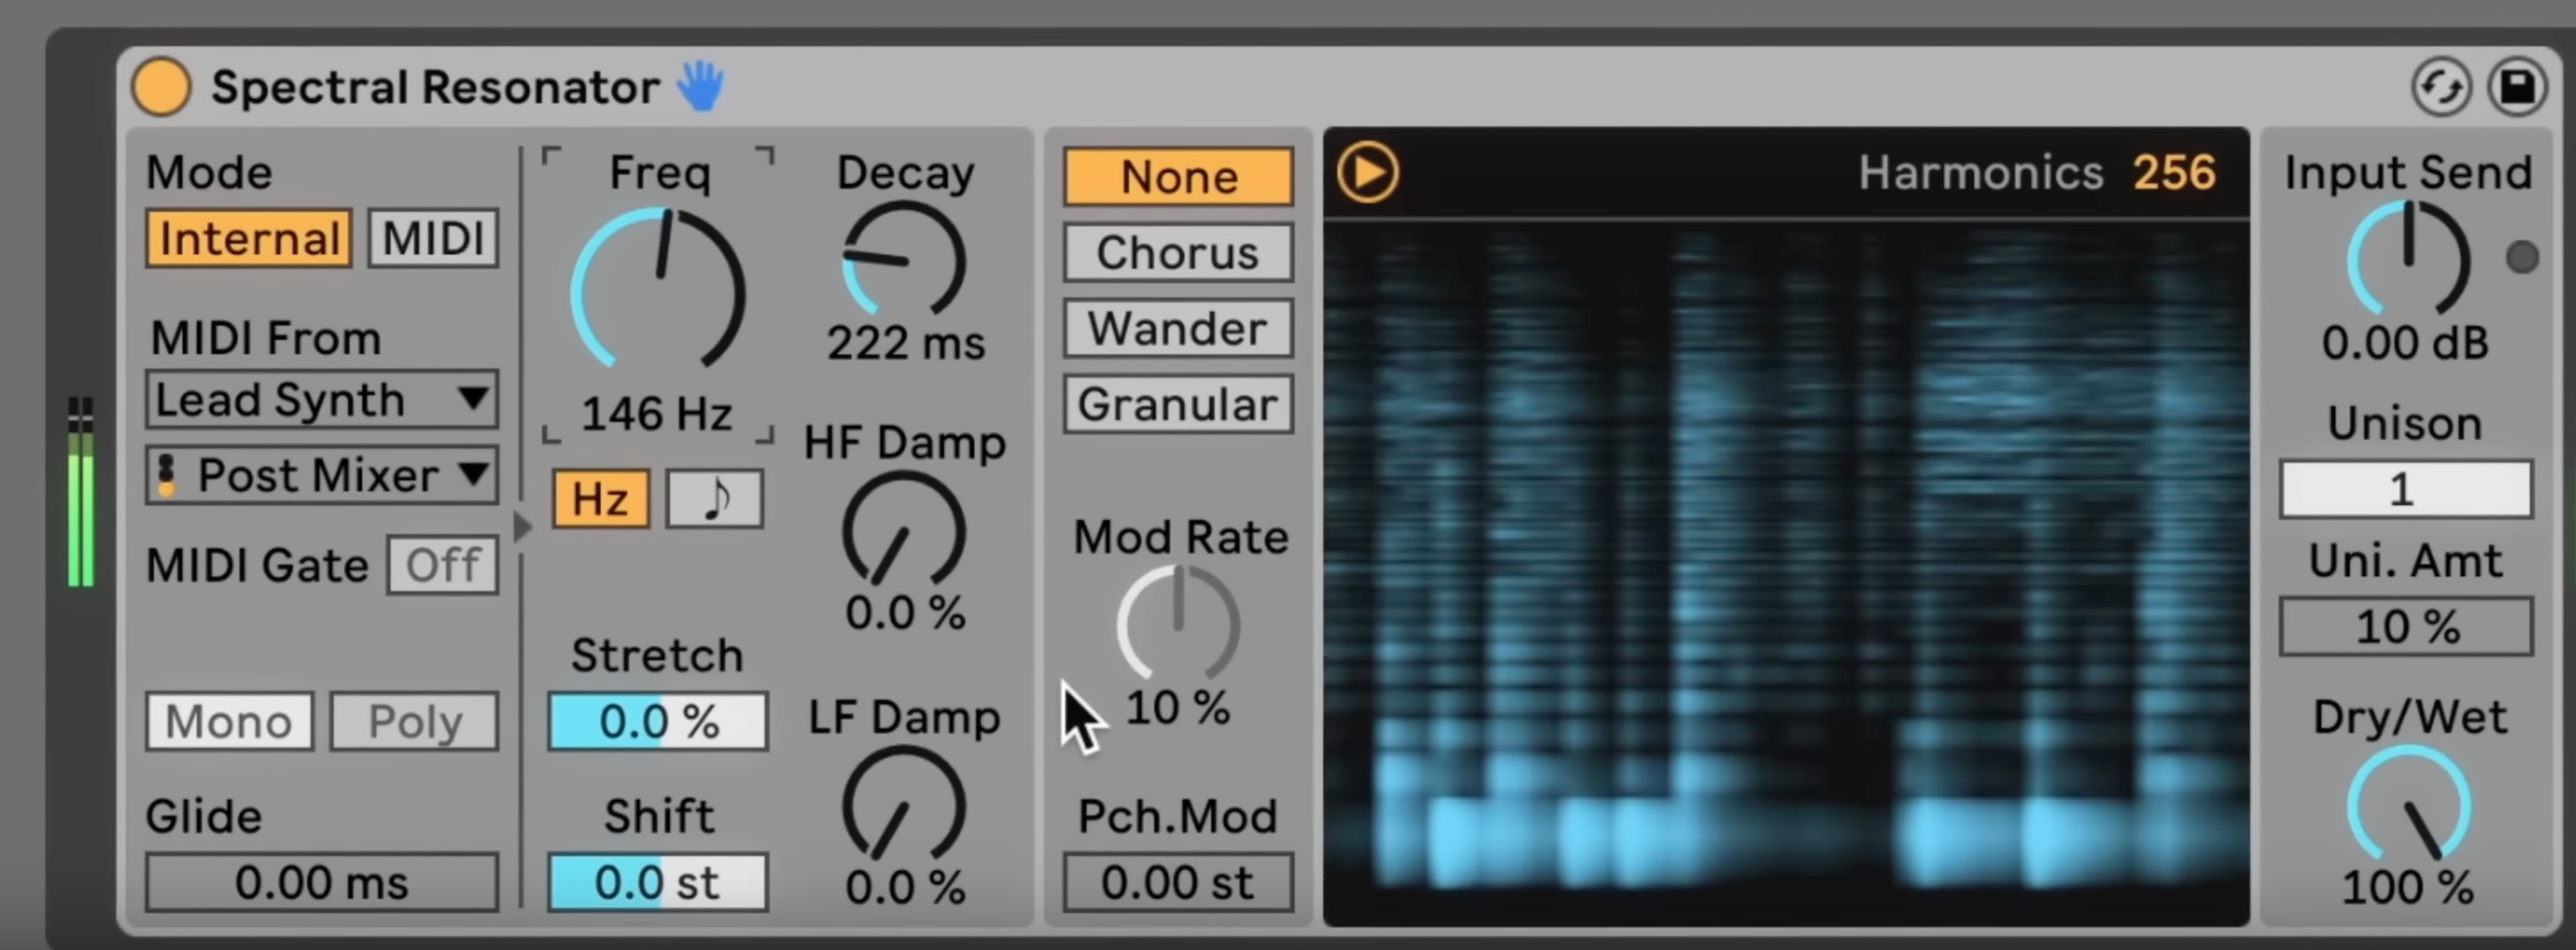
A playable spectral effect for creating new kinds of resonances.
Spectral Time
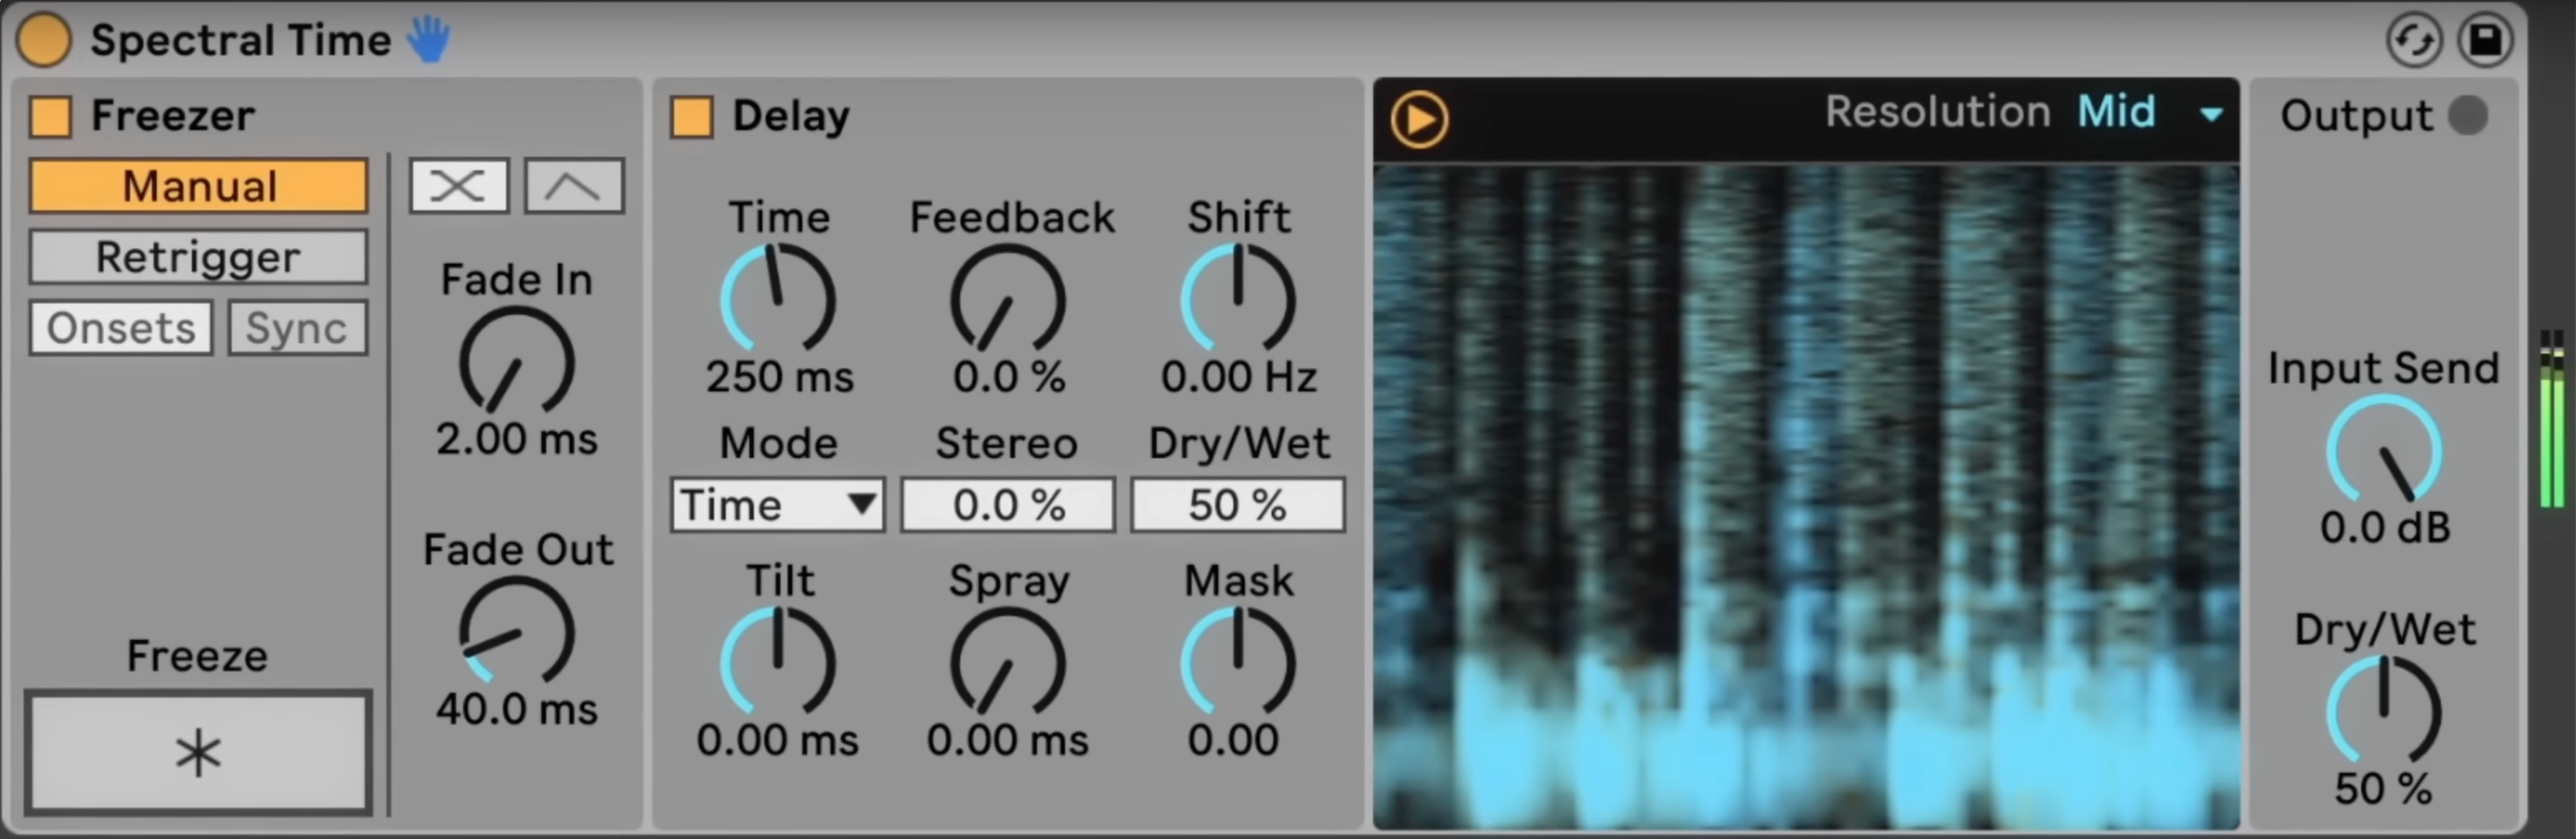
A time based delay effect that performs spectral analysis on an incoming audio signal.
PitchLoop89
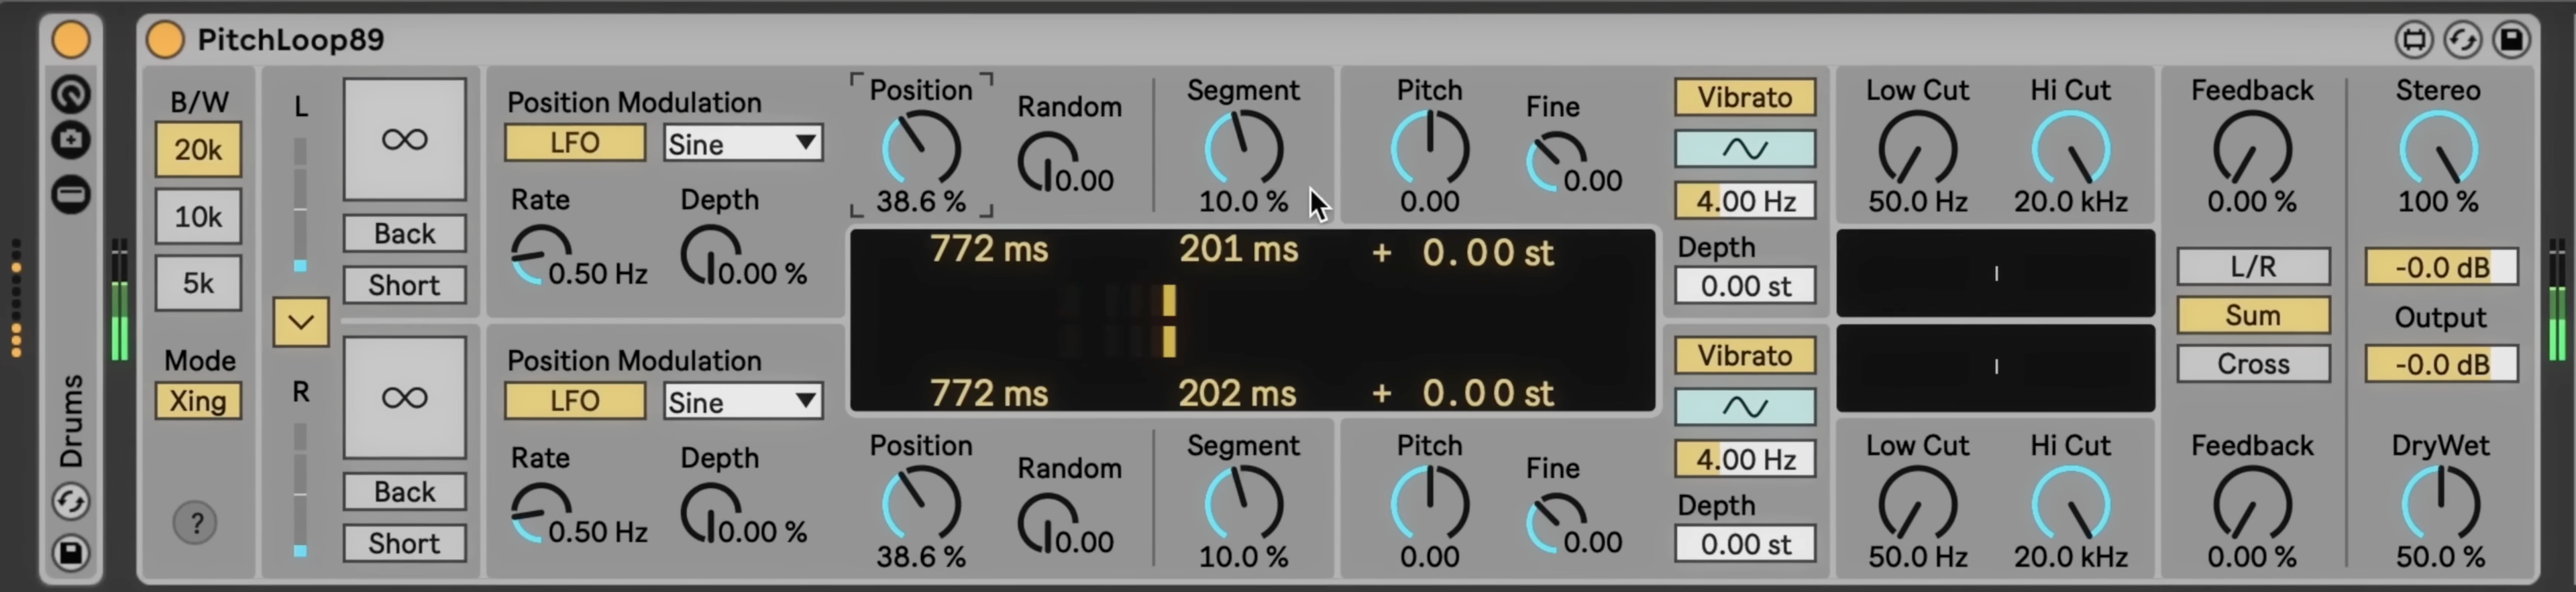
A new way of adding modulation effects that goes far beyond the chorus ensemble plugin.
The Inspired by Nature Series by Dillan Bastan
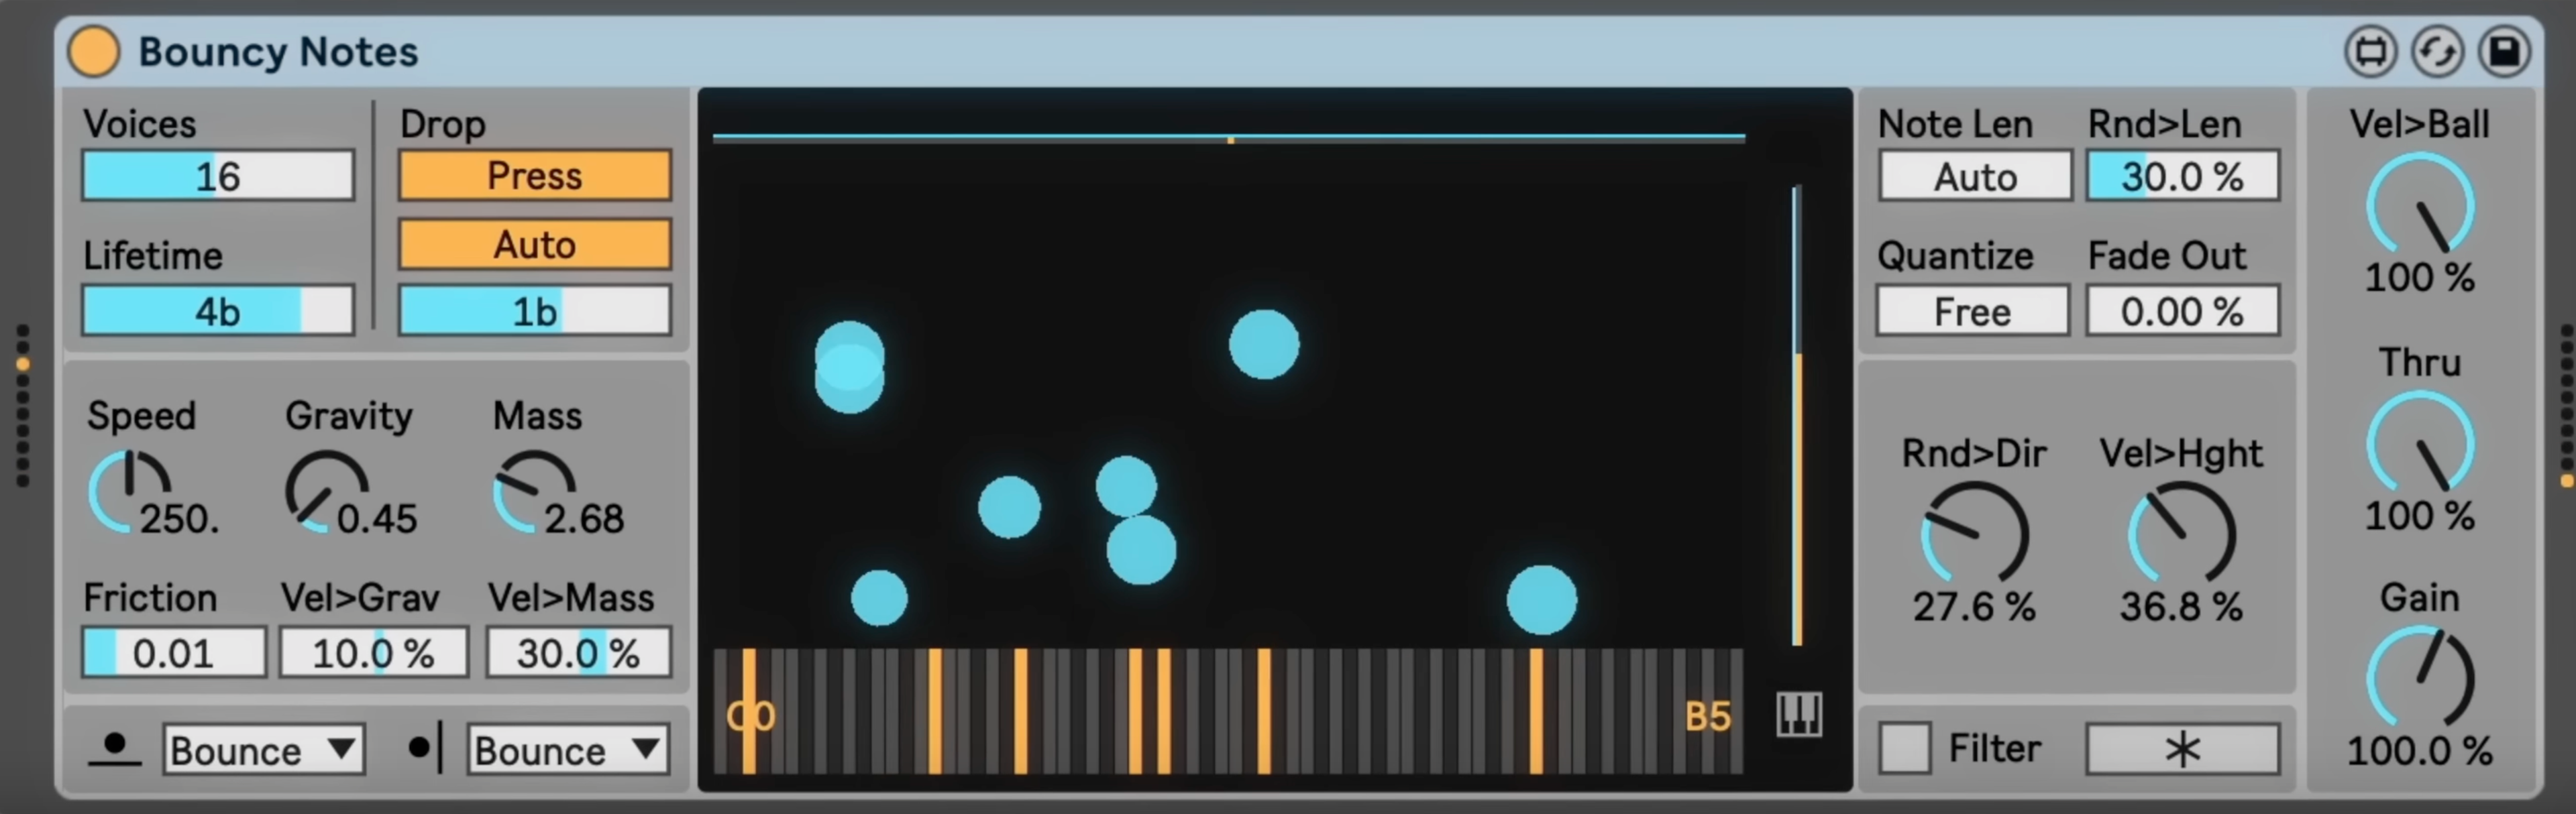
These max for live plugins are literally inspired by structures in nature to stimulate your creativity.
Native Tempo Follower
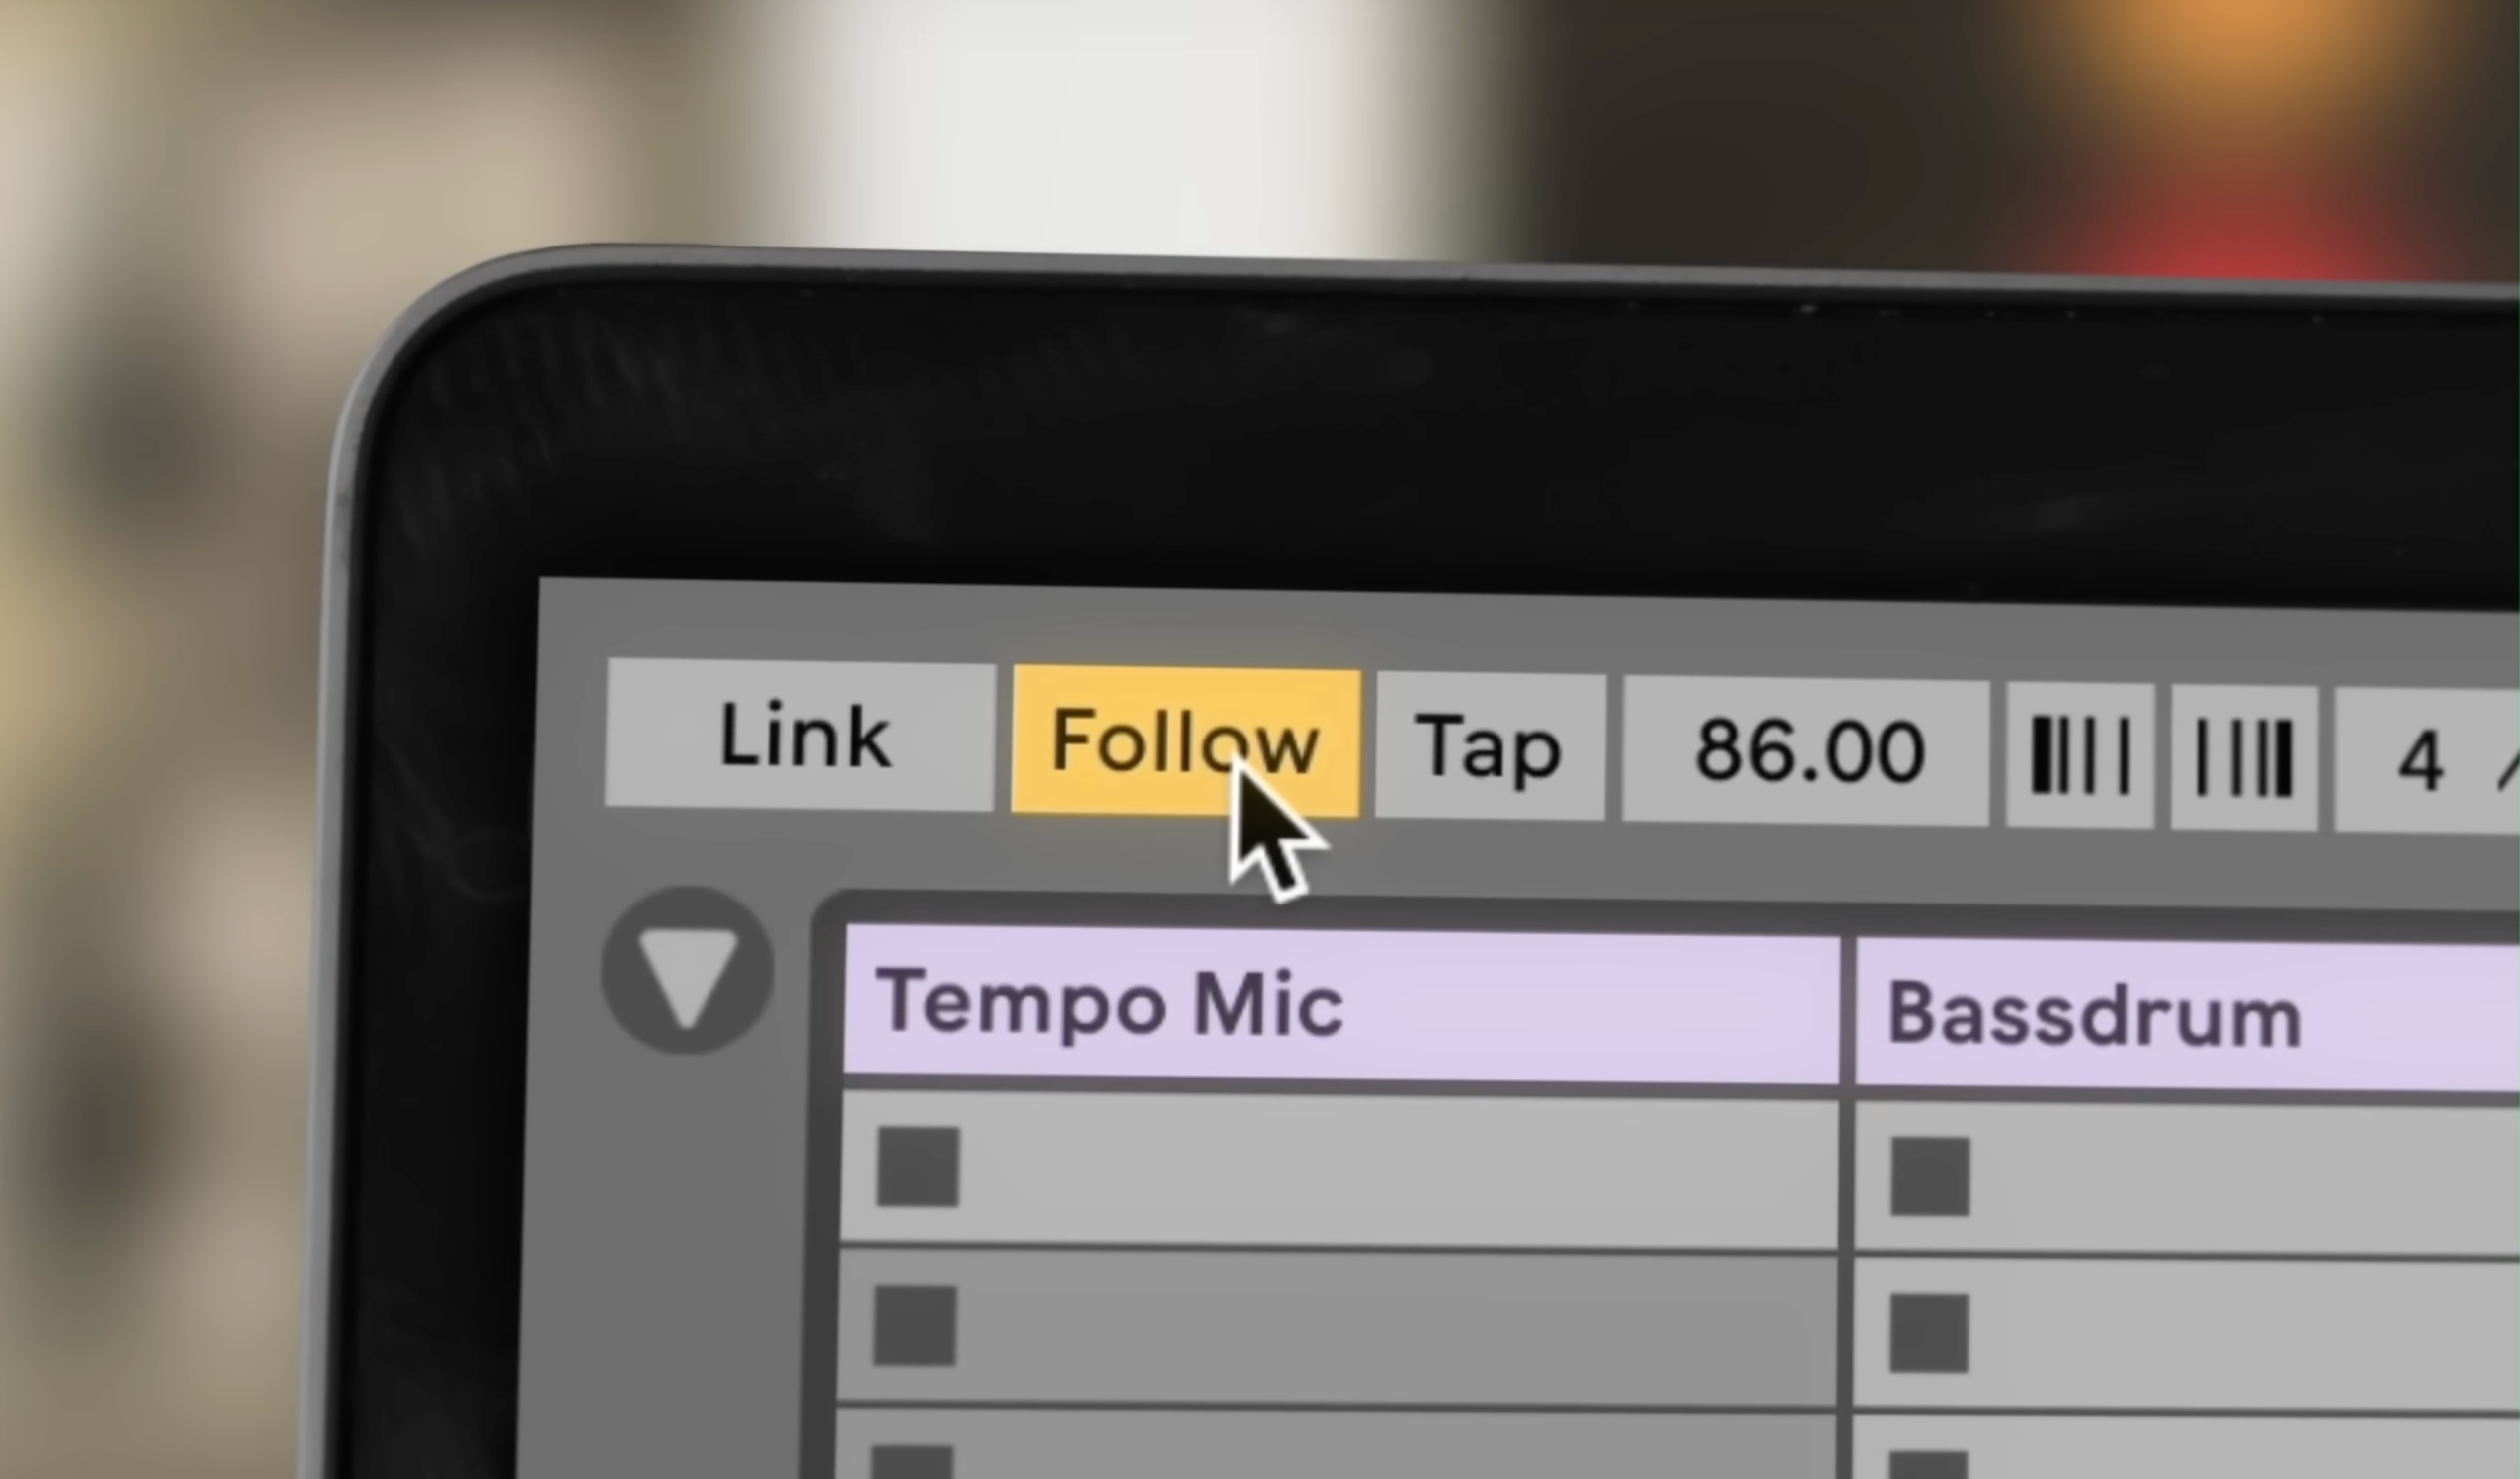
Using external microphones, you can setup Live to follow the tempo of a performer. This usually is intended to work with a drummer by placing mics on the bass drum, snare, or hi hat of the drum kit.
Upgraded Macro Controls
Value Randomization
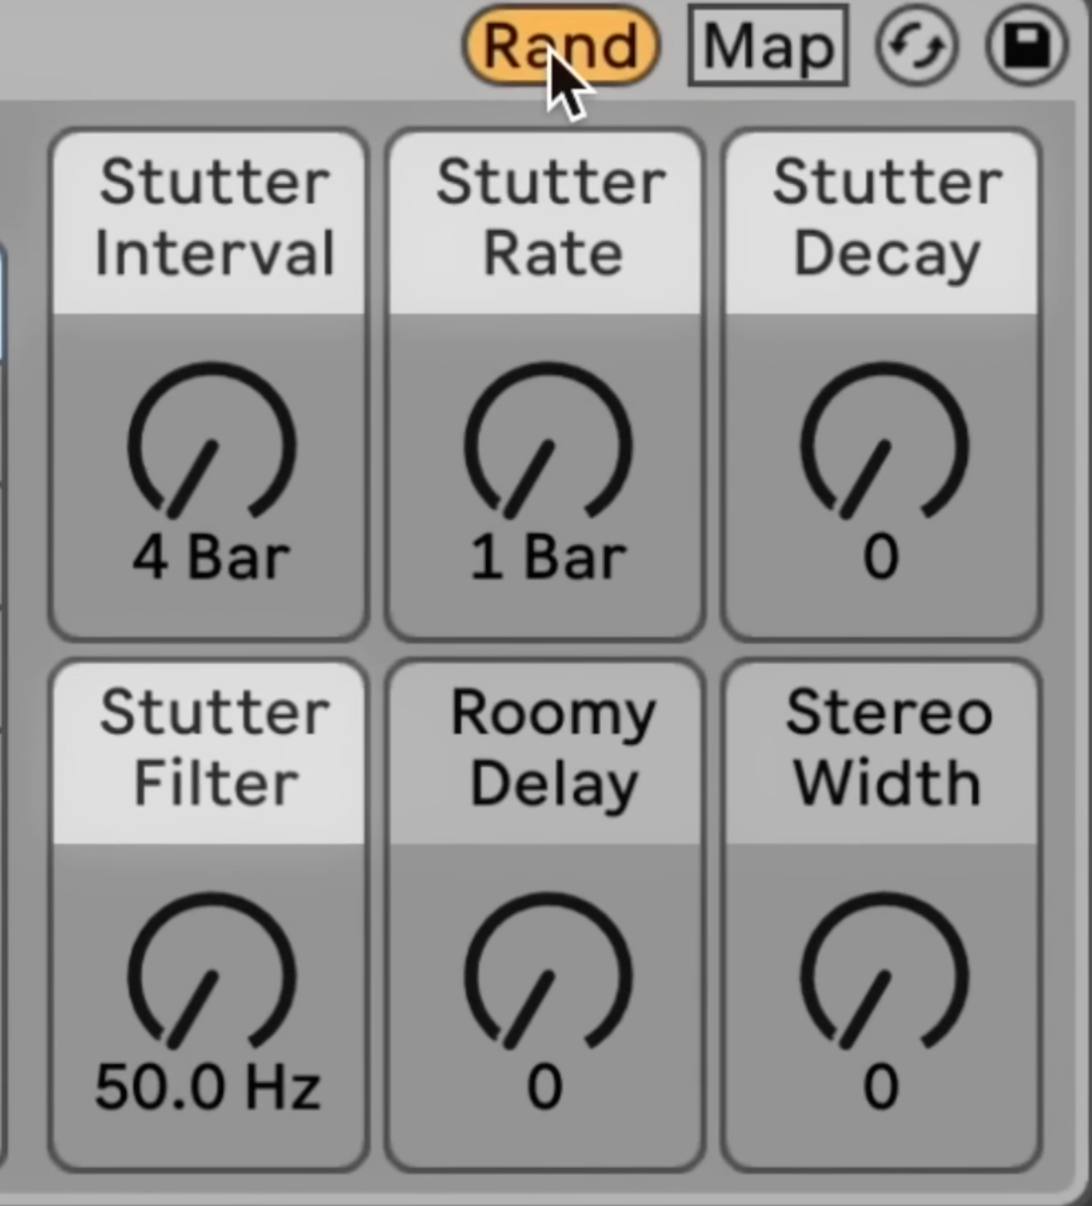
You can hit the random button to randomize the values of you macro controls.
Macro Snapshots
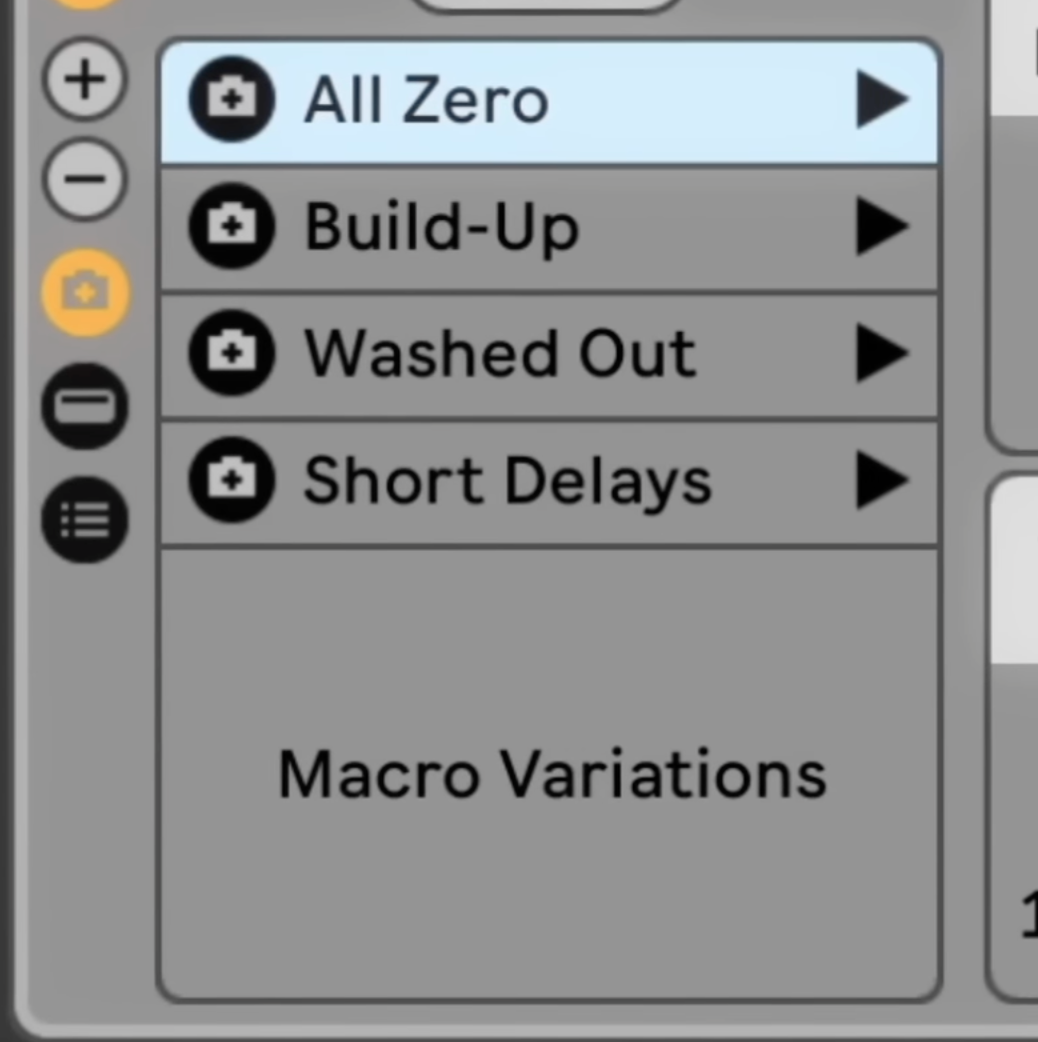
If you want to save several very different macro states, you can store them as a Macro snapshot, then snap to them by hitting a button.
Support for Up To 16 Macros
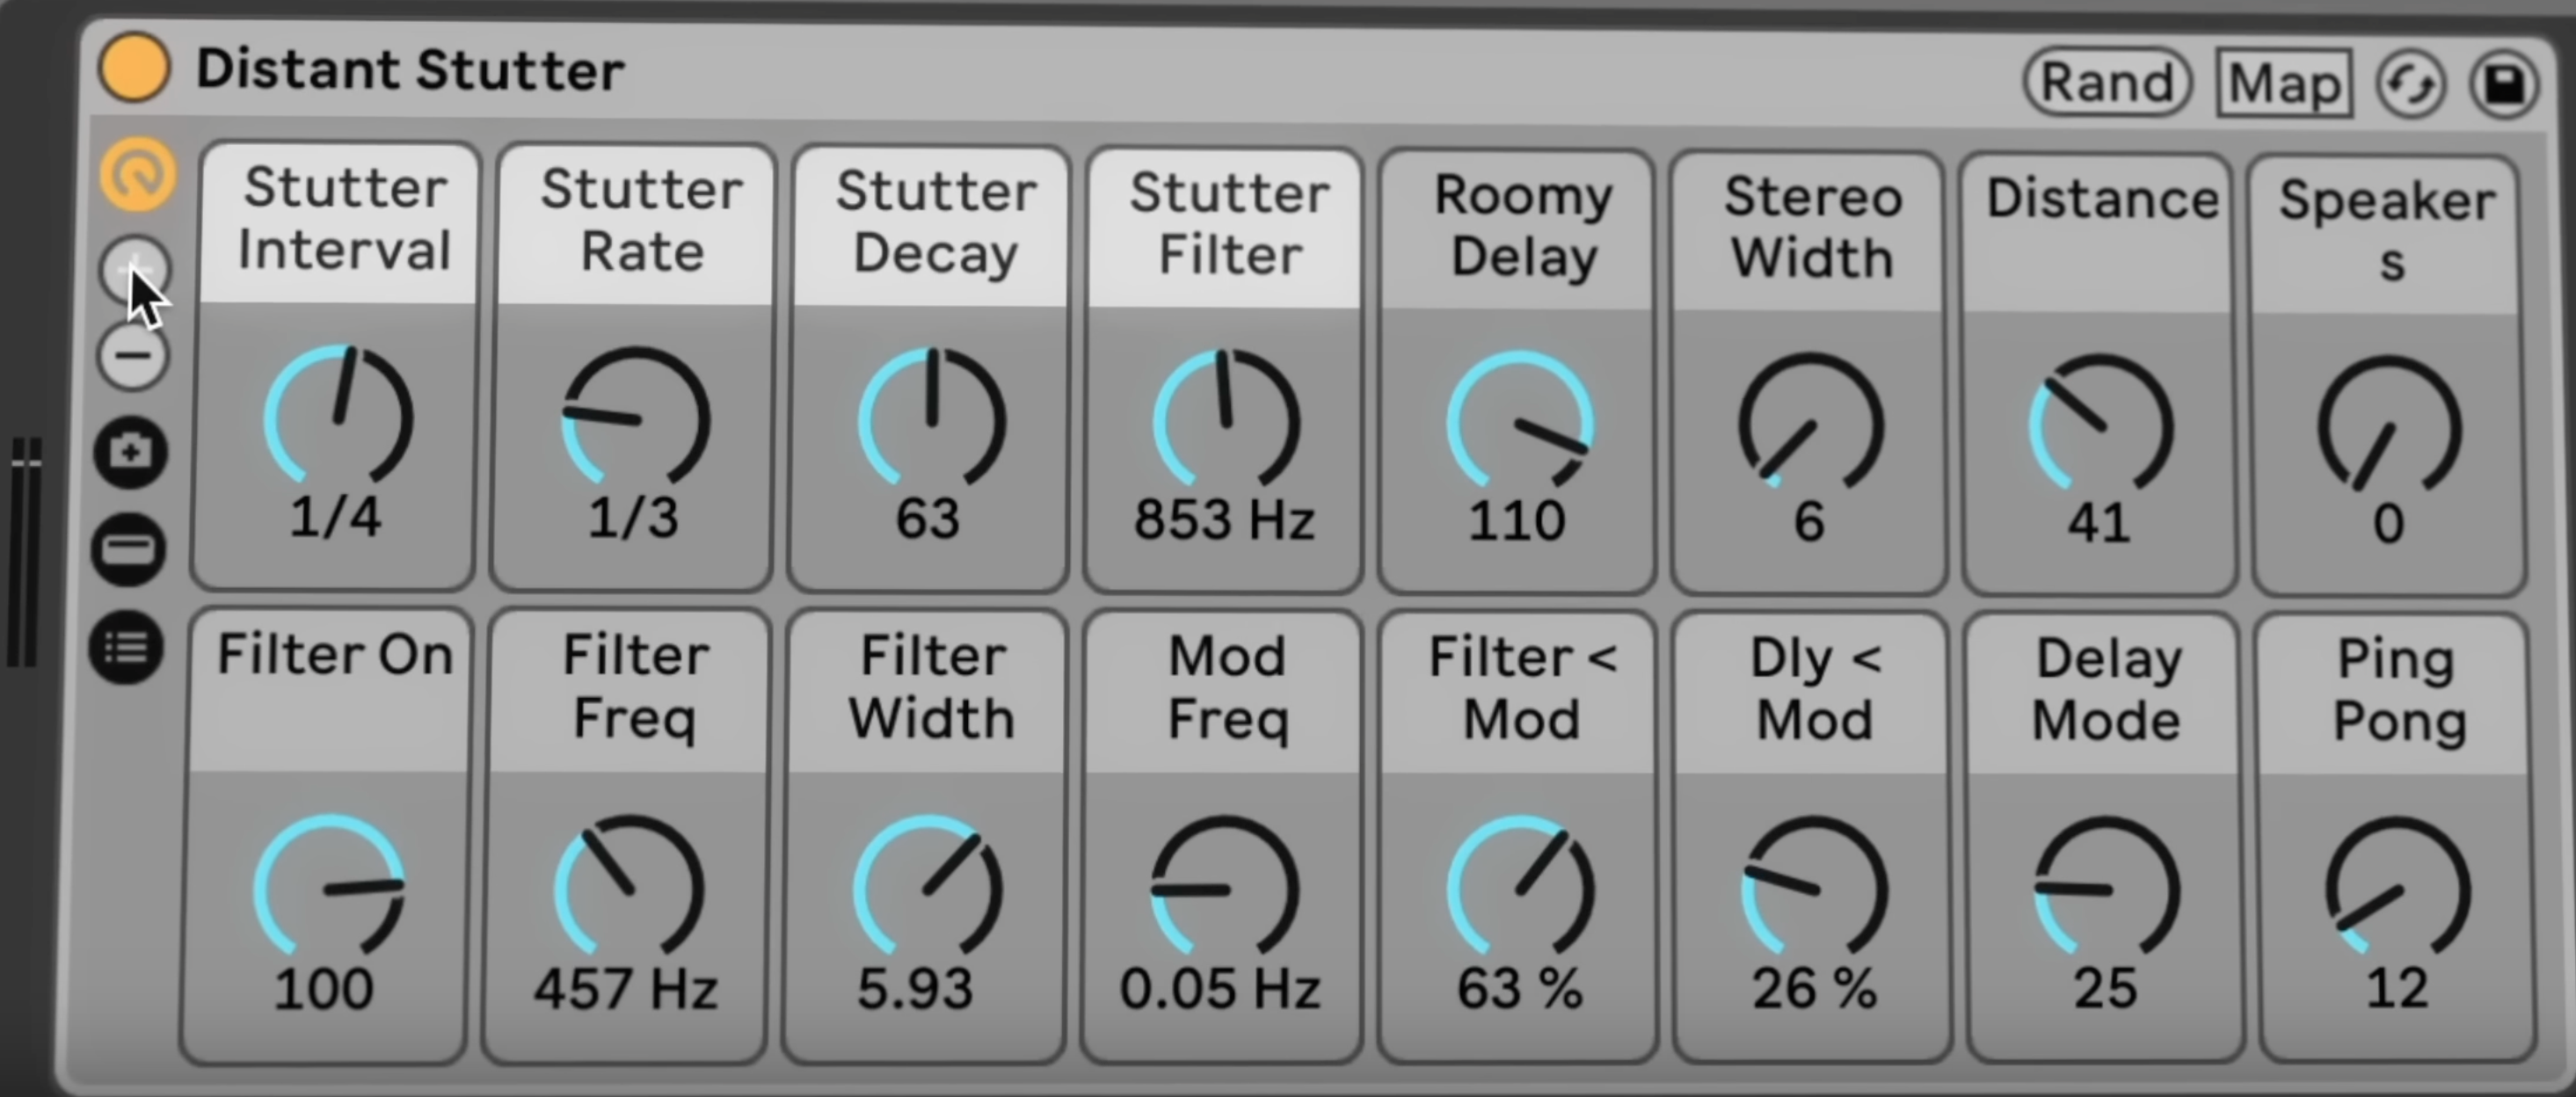
You can now add up to 16 macro controls instead of the previous limit of 8 macro controls.
Probability Controls
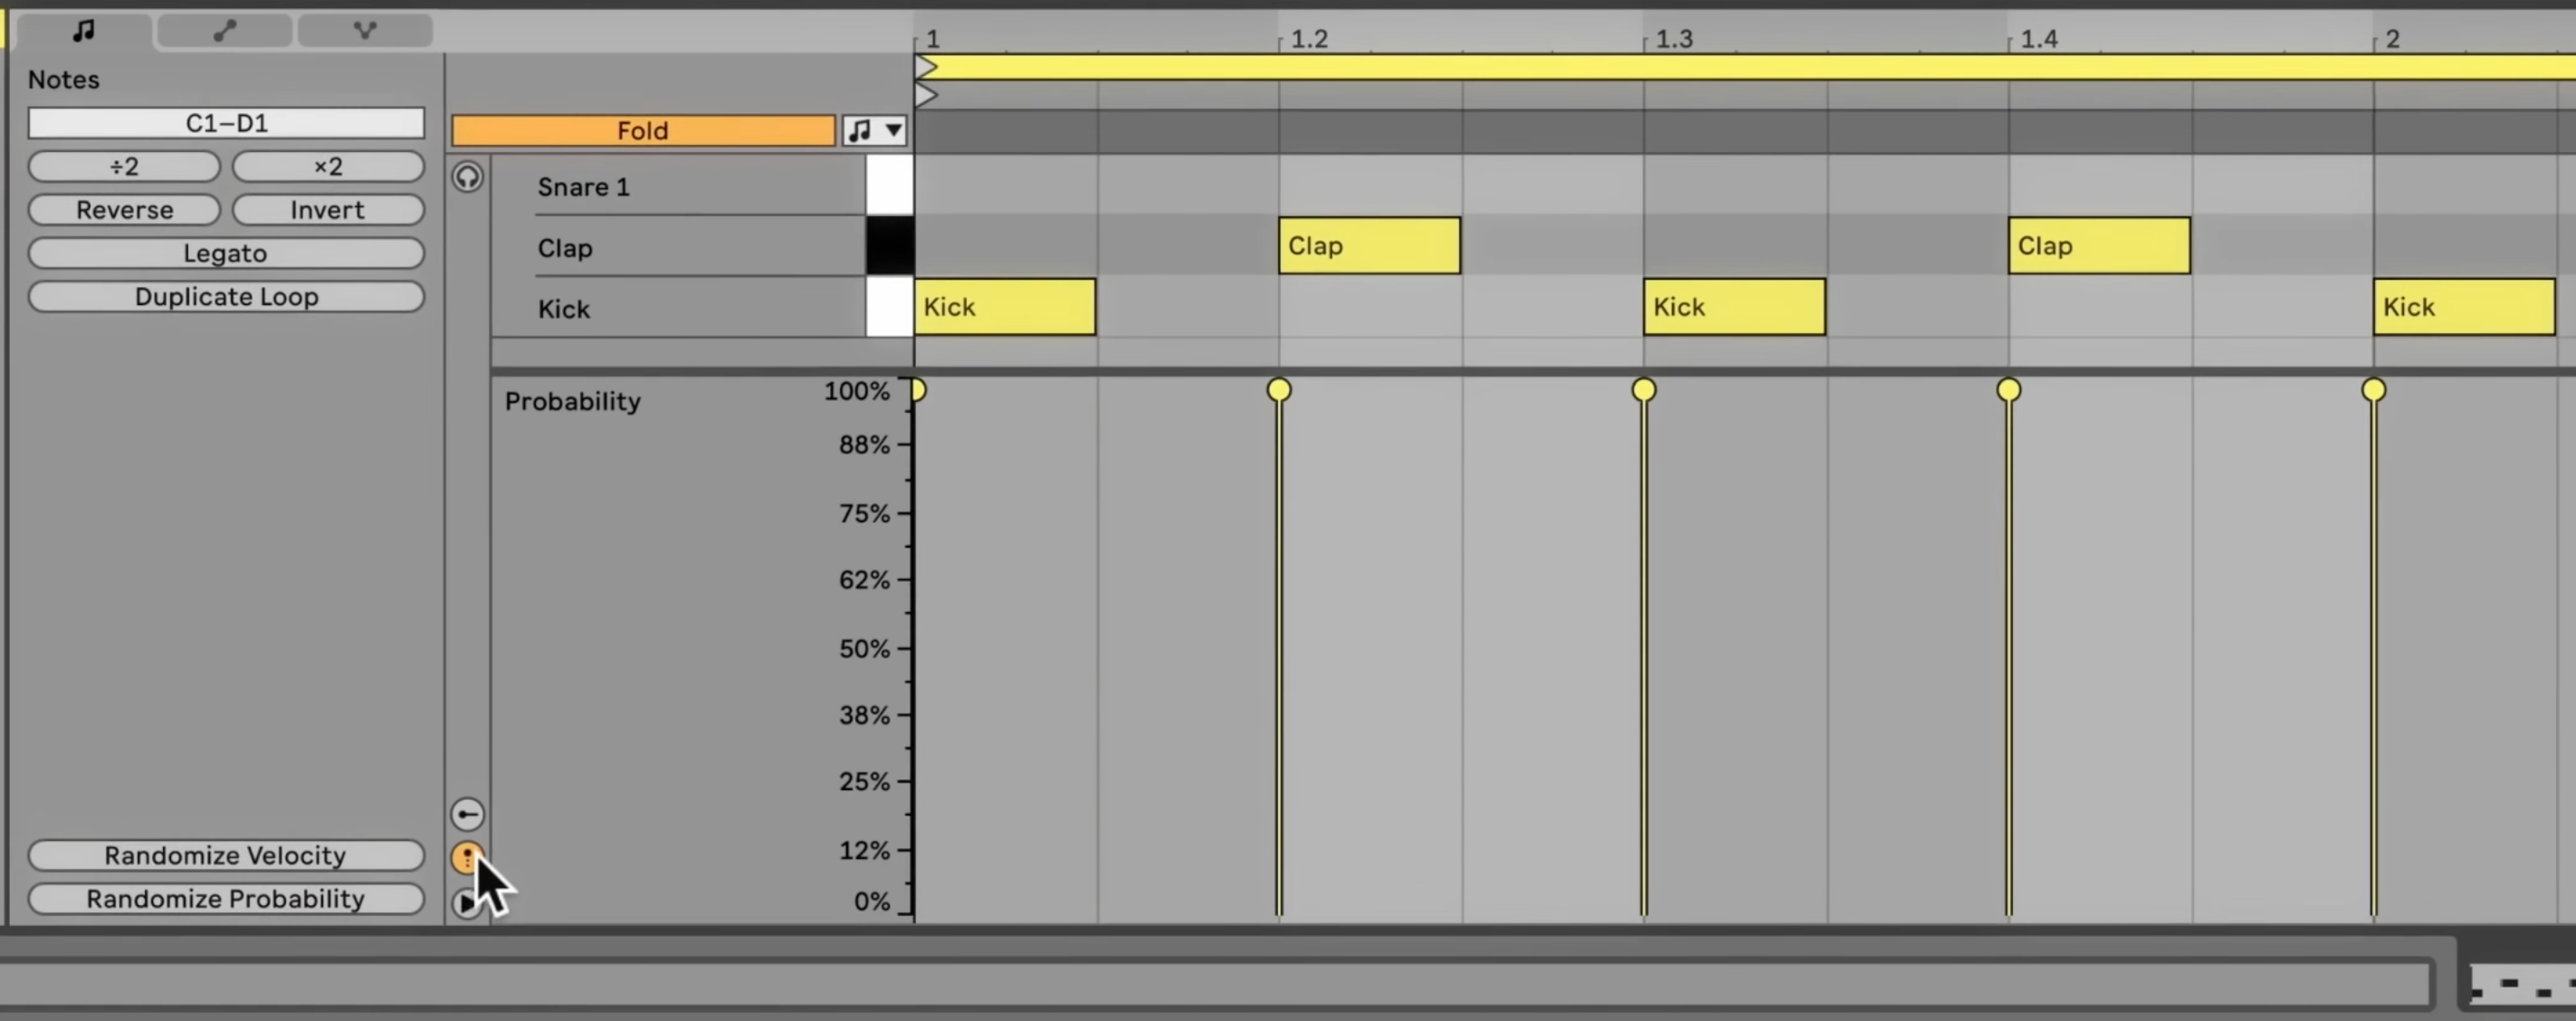
In most DAWs, the piano roll is fixed and plays back the same data every time. Live has introduced probability controls to MIDI clips.
-
You can set the probability of whether or not a note in your MIDI clips will occur or not.
-
You can also set MIDI note velocity ranges in a probabilistic way. In other words, a note or group of notes can be programmed to occur within a range of MIDI velocities. For example, you can tell a group of hi hat notes to trigger between 80-100 velocity. The actual velocity values will be a little different each time.
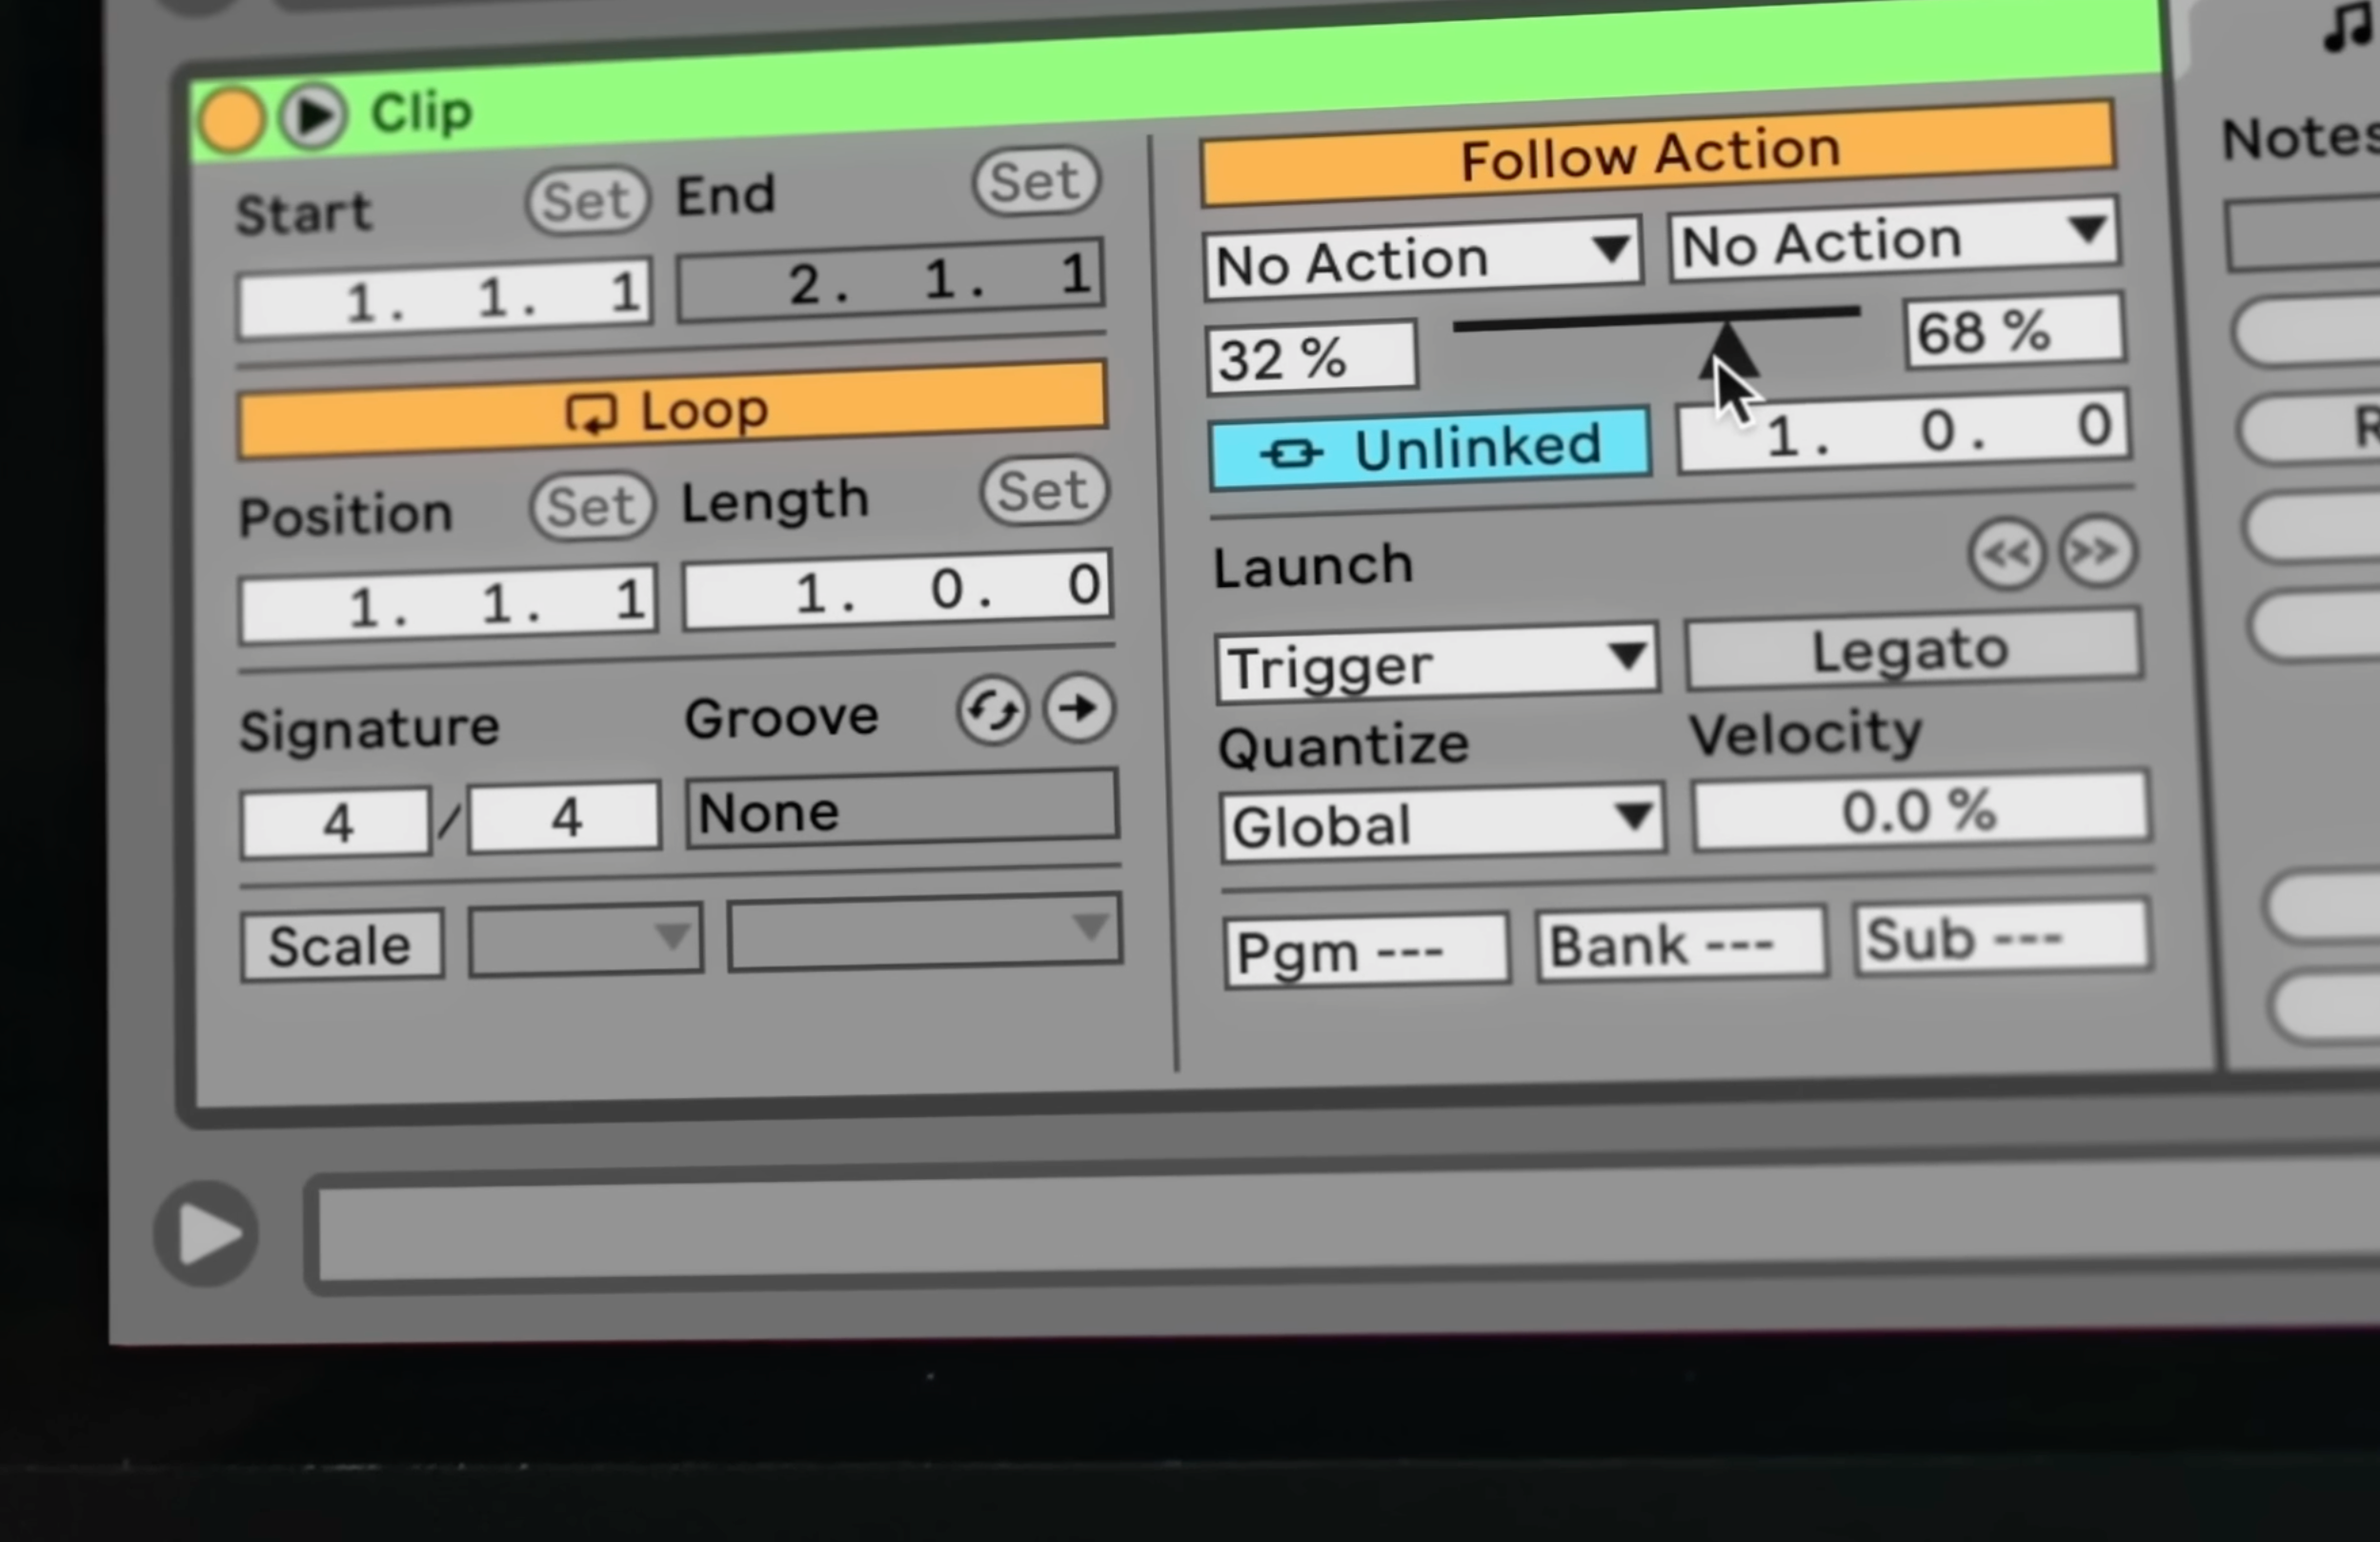
Improved Follow Actions
-
Can be linked to clip length.
-
Can be programmed to jump to specific clips.
-
More intuitive controls
New Sound Packs
There is an Upright Piano, a string quartet, and a brass quartet made in collaboration with Spitfire Audio.
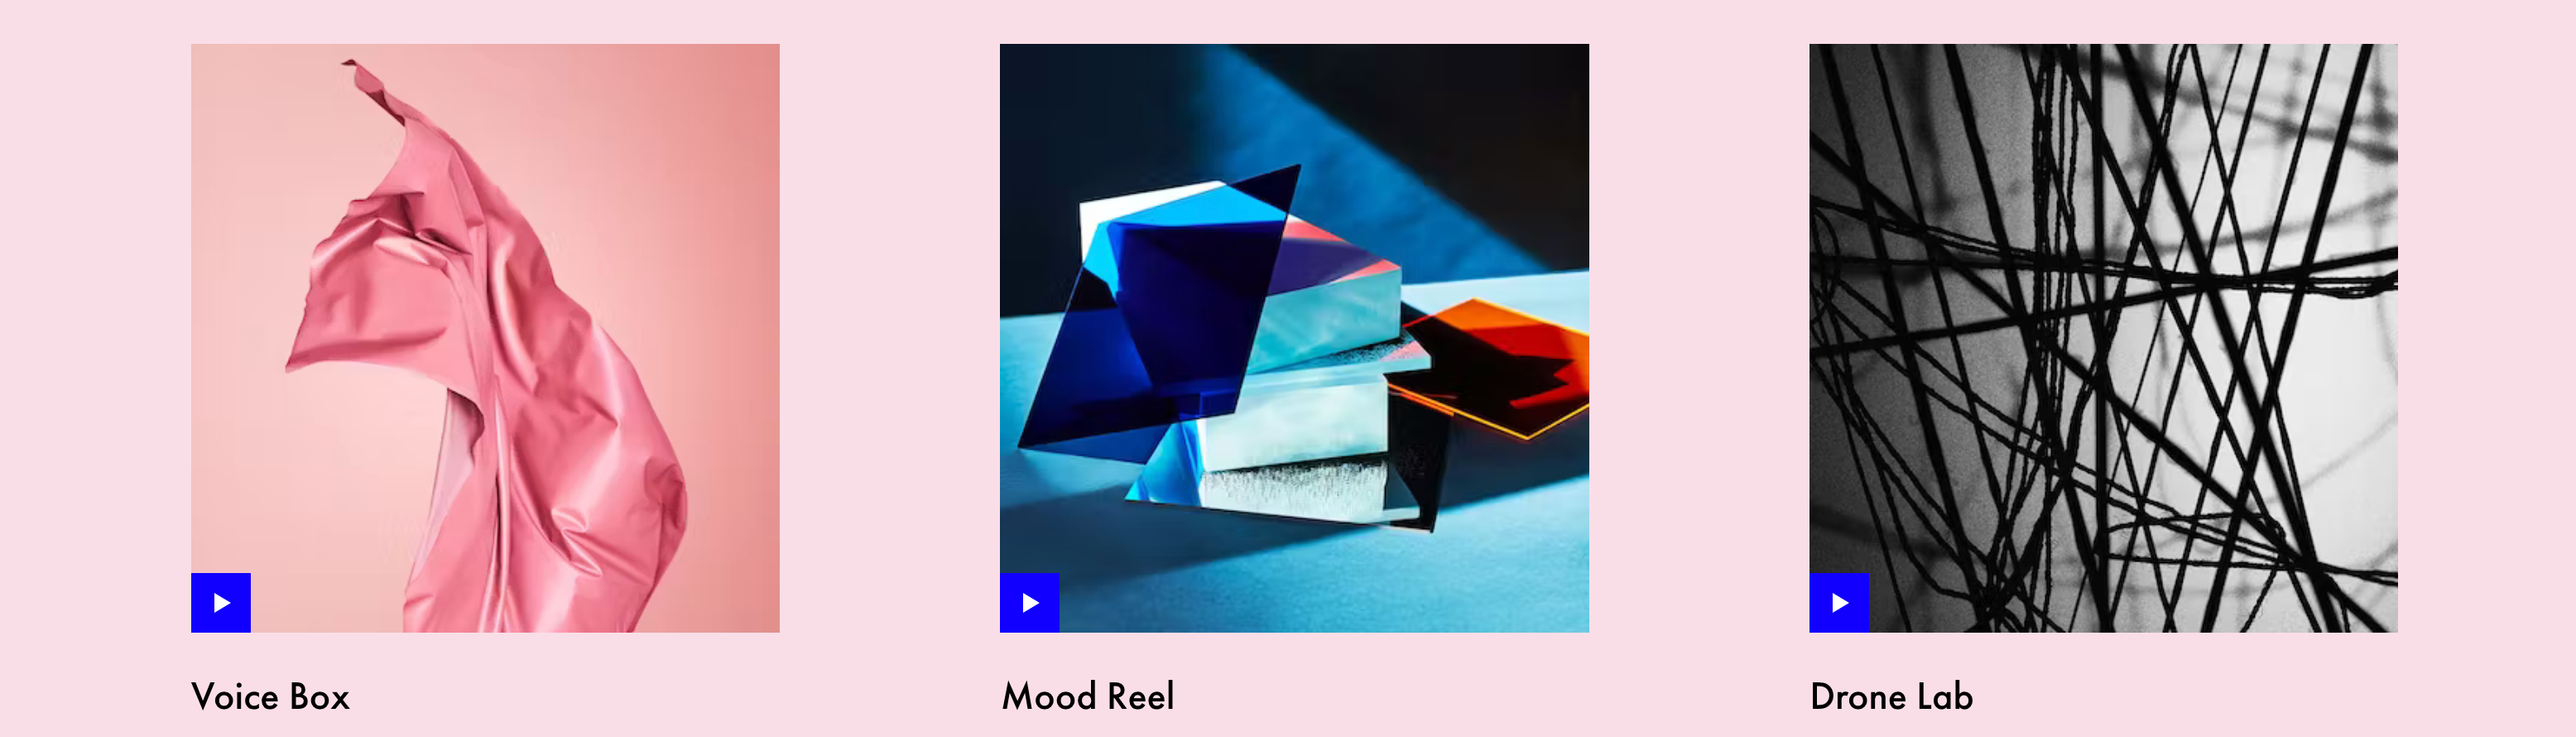
Live 11 also includes new curated sound packs such as Voice box, Mood Reel, and Drone Lab that each are organized around a central theme.
Voice Box
As you might expect, this collection is full of vocal samples, instruments built around the voice, as well as effects racks designed specifically with vocal processing in mind.
Mood Reel
Mood reel is a collection the fuses organic and synthetic elements using modern music production techniques. This creates an interesting narrative because the sound quality is very high, but you can't always identify exactly what you are listening to.
Drone Lab
Drone lab is exactly what it sounds like. A collection of tonal and texture based samples, as well as instruments, multi-samples, effects racks and devices designed for sustained sonic experimentation.
Drones can serve as a bed for other instruments to dance on top of, something to sidechain your drums to, be the basis for other instruments you build, or simply be the entire composition that gets processed and sent out to your master track.
Many Other Small Optimizations
Many of Live's plugin interfaces, menus, template options, and metering have been improved to be more accurate and easier to use.
Is Ableton Live 11 free?
No. There is a free version called Ableton Live Lite that is included with certain MIDI controllers, but it is very limited. You can use a maximum of 8 tracks and it does not include most of the major plugins.
The Intro, Standard, and Suite versions of Ableton are all paid products.
Will Ableton Live 11 be free?
Ableton has not said anything to suggest the Live suite will be free. They have however released a very inexpensive smartphone app called Note that is the very affordable cost of $6.
Why is Ableton 11 so expensive?
People will pay a premium for Ableton Live 11 over other DAWs because it can do things that most other DAWs can't do.
The arrangement view and session view, high quality stock plugins (like the new convolution reverb and hybrid reverb), a very streamlined user interface, and easy interfacing with physical hardware are all reasons people choose to use Ableton.
In Live 11 specifically, there are major improvements to sound quality, new support for midi polyphonic expression (MPE), macro variations, macro snapshots, entirely new tools like the spectral time plugin or spectral resonator, and a whole suite of other optimizations that make it even more powerful.
Where Can I Download A Cracked Copy of Ableton?
Don't do this. The biggest reason you shouldn't download cracked software that will personally affect you is these cracked software is a good way to get viruses on your computer.
If you wanted to distribute some kind of malware to as many computers as possible, cracking a popular and expensive piece of software, then posting links on Reddit is a great way to distribute it. And this is exactly what happens.
Instead, we recommend you start with one of the cheaper versions of Ableton like Intro or Standard, then you can upgrade to the full version later.
What's included in Ableton Live 11 intro?
You can see a full comparison here to understand what Live Intro has.
However, the biggest limitation we see that you will likely run into first is the track limit. Intro is limited to 16 audio tracks or 16 scenes in the session view. Live Standard and Suite both allow for Unlimited track editing.
Is it worth it to buy Ableton?
Ableton has a very generous free trial period to decide for yourself.
However, we also recommend you ask yourself how serious you are about music production and performing because you want to consider the cost per use over the lifetime of the software license.
If you pay the full price of $750 for Ableton Suite, open it once then give up it's obviously not worth it. You just paid $750 for one use
If you use it instead for 6 months pretty heavily, then never again, this is a cheaper cost per use but still might not be worth it.
However, lets say you buy Live Suite on sale for $600 use it for 5 years nearly every day and have to pay an upgrade fee for $200 at some point. The total cost is $800, but we would say that is worth because you've spent thousands of hours in Ableton so your cost per use is almost nothing.
How much does it cost to use Ableton?
Ableton (thankfully!) has not decided to impose a subscription model on it's users like a lot of companies. You buy a license for a flat fee of $99, $349, or $749 for Live Intro, Standard, or Suite (respectively)
Is Ableton a good DAW?
Ableton Live is one of the best DAWs out there in our opinion. The stock plugins are good and out of the DAWs we use, it has the cleanest user interface. As much as we like DAWs like Logic and Reaper (we also use these often) they're much harder to deal with when you want to move very quickly.
Ableton also has some features which are completely absent or not as well done in other DAWs. These are features like
-
Session view
-
Instrument racks
-
Easy re-sampling of two or more tracks
-
track linking and linked track editing
-
easy to map macro controls and macro variations
-
sane default keyboard shortcuts for MIDI editing
-
Velocity probability and Note Probability inside MIDI clips
Also some of the new features include plugins that we now cannot live without for sound design. These plugins include:
-
Wavetable synth
-
Spectral Time
-
Spectral Resonator
-
Hybrid Reverb
-
The instrument rack improvements
Lastly, don't forget that Ableton Suite also includes Max for Live which is incredibly powerful. Say you have an idea for a plugin or new feature Ableton doesn't already have. Fire up Max for Live and built it.
Is Ableton a good DAW for beginners?
Maybe. It depends on your personality. One of the people involved at Glitch Magic just bought Ableton on impulse and was obsessed enough to spend the next 5 years mastering it.
But it's deep software. For certain people, getting a full copy of Ableton Suite will be overwhelming because there is just so much to use inside it.
You don't need to necessarily start in Ableton either. Whatever you learn in other DAWs carries over easily. These days when we build sample packs and do sound design, we like to bounce between Ableton, Logic Pro, and Reaper pretty seamlessly.
How to get Ableton for free?
The only path we know of to potentially get Ableton Live for free that is legal and won't risk the security of your computer is to get an artist endorsement of some kind from the company. We would imagine this is much more difficult to do in 2023 and beyond than in the early days of the company.
How long is the Ableton live 11 Free Trial?
You can try Ableton Live 11 for a full 90 days. During the COVID-19 pandemic lockdowns, Ableton increased this. Previously the free trial was only 30 days.
Now, you get 3 months to try an unrestricted version of Live and decide if the software is worth it for you.
Which is better Ableton or FL Studio?
We have a whole article on which DAWs are the best for beginner producers. Looking at Ableton Live and FL Studio specifically, it depends on what you need a DAW to do.
FL Studio is better for composing with just a mouse in the piano roll. It has lots of helpful functions that with make this part easier. Overall, it's an extremely powerful DAW that's probably a little underrated in a lot of music circles. However, FL is also more of a studio tool that stays in the studio.
Ableton is different because it was built as a Live performance tool that slowly was built out into a full featured DAW. We find it easier to connect external hardware to Ableton as well.
So when you're choosing a DAW, we think you should ask yourself if you plan to use it only for production or if you need something that will also double as a live performance tool.
Is Ableton better than Logic Pro?
Both Ableton and Logic Pro have their advantages. We actually use both here at Glitch Magic.
For composing with large orchestral libraries and a lot of scoring tasks in general, we find Logic to be a little easier to deal with. However, the interface and keyboard shortcuts in Logic are kind of clunky. There's a lot going on and we like the more minimal arrangement in Ableton.
Also, while both can do incredibly powerful things with MIDI data, we like how Ableton deals with external gear better.
Setup tends to get more complicated in Logic because its pretty common that the feature you need is buried a few layers deep in a menu somewhere.
What is Ableton Live 11 good for?
We love Ableton Live 11 for music production and composition, especially when it relies heavily on a lot of time in the MIDI clip editor or we plan to eventually take the session on stage in a Live environment.
Also, the stock effects are very high quality and may be all you need for a long time.
What are the cons of Ableton Live?
We have a few places where Live could use some improvements.
-
Adding some functions to automate common MIDI editing tasks would be helpful. For example, a function to stagger a selected group of notes in a chord.
-
Sometimes we get cpu spikes when a session has a lot of latency due to 3rd party VST plugins.
-
Ableton compensates all audio for latency, but does not compensate visual DAW elements for latency. Most of the time for making music, this is never a problem. However, when we have to score music to video, this can be a really big problem because everything is off a few milliseconds from the visuals. Other DAWs seem to handle this problem better.
Is Ableton 11 better than Ableton 10?
Yes, the Ableton team fixed a lot of things as well as added a lot of new features like plugins, MPE support and quality of life upgrades like improved macro controls, macro variations, and linked tracks.
Most importantly, the audio engine in live is now basically perfect. People have complained in the past about the audio quality and aliasing in certain situations. That appears to be completely fixed!
Is Ableton 11 worth the upgrade?
It certainly was for us. The improved audio quality is a big deal, but more importantly there's just a lot more cool stuff to play with and experiment with in Live 11 that we're excited about.
Ableton Live 11 has been out for a while now at this point and we still feel like we're just scratching the surface.
Can you upgrade from Ableton 10 to 11?
Yes! And you will be happy when you decide to do it. The new audio effects, soft synths, and ability to send MPE data are really cool.
Can Ableton 11 open Ableton 10 projects?
Yes! Ableton Live 11 is backwards compatible with Ableton Live 10.
You will be able to open old projects, but when you save, Ableton will prompt you to save a new version of the project for Live 11.
Is Ableton Live 11 Intro free?
No. However if you're considering Ableton Live Intro we suggest trying to obtain a copy of Ableton Live Lite.
Live Lite comes for free with a lot of entry level MIDI controllers and has similar features to Ableton Intro. It helps to ask around. In practice, we've noticed a lot of musicians have a copy of Live Lite sitting dormant somewhere because they bought a new MIDI controller, but never installed Lite because they already own the full version of Ableton.
Is Ableton Lite or Intro better?
They're really similar. We suggest trying to get a copy of Live Lite from a friend. Or if you buy a MIDI controller that includes it, you'll at least own a MIDI controller that will be helpful later on with a full version of Ableton Suite
Is Ableton 11 free if you have 10?
No, there will be an upgrade fee. How much that fee is depends on which level of Ableton your on. Most people are upgrading either a Suite or Standard license.
What Plugins and Sounds Are Included With Ableton Live 11?
The core Ableton Live library includes a new hybrid reverb, libraries sampled by Spitfire audio, a brass quartet, a string quartet, various sound effects, an upright piano, an updated chorus ensemble, a spectral time plugin, spectral resonator, and as of Live version 11.3 an entirely new synth called Drift.
Don't forget, your ability to control these libraries and synths is also vastly improved.
This is thanks to new macro controls that include macro snapshots as well as midi polyphonic expression or MPE control. If you have an MPE capable controller, this allows for all kinds of interesting bends, slides, and pressure. You can also automate these MPE parameters like any other parameter in Ableton.


How To Make The Ultimate Ableton Drum Rack
What exactly is the perfect Ableton Drum Rack? Its one that you can use over and over again in different situations.
You'll never make a single holy drum rack that covers all your bases at all times.
You'll probably need to make a lot of them over your career as a music producer.
But we think we have a concept for one that almost can.
Utilize Every Drum Sound You Have
Today we have a technique in Ableton that will allow you to put literally hundreds of drum samples in one drum rack you can use over and over again.
We're going to do it in a way that will keep things organized and be easy to use. It's a huge time saver too.
It's much more convenient than building dozens of drum racks and decide which samples should go together ahead of time or using the hot swap button constantly.
We recommend you fill this drum rack with all your best sounds because you'll be able to scroll through the entire drum rack very quickly to find your favorite combinations.
What You Will Need First
Before we show you how do build this drum rack, it will help if you have all the drum sounds you want to use organized in a folder first.
You want drums in each major category of sound you find in a drum kit.
Make a folder of kicks, snare, hi hats, cymbals, electronic sounds, other instruments, effects, and one shots you want to use.
A minimum of 10-20 sounds in each folder is a good start with a maximum of 127 sounds per category.
For example, you can have up to 127 sounds in the kick drum category, 127 snares, etc. Not 127 total sounds in the kit.
Unfortunately you're not going to be able to dump your entire sample library into this kit, but that wouldn't be so practical anyway.
It would make more sense to build some of these kits with a single genre or vibe in mind.
Learn This One Time and It's Yours Forever
Let's get this set up. First, drag an empty Drum Rack onto a new MIDI track in Ableton Live.
Next, drag and empty instance of Ableton Sampler on to an empty drum pad in your Drum Rack.
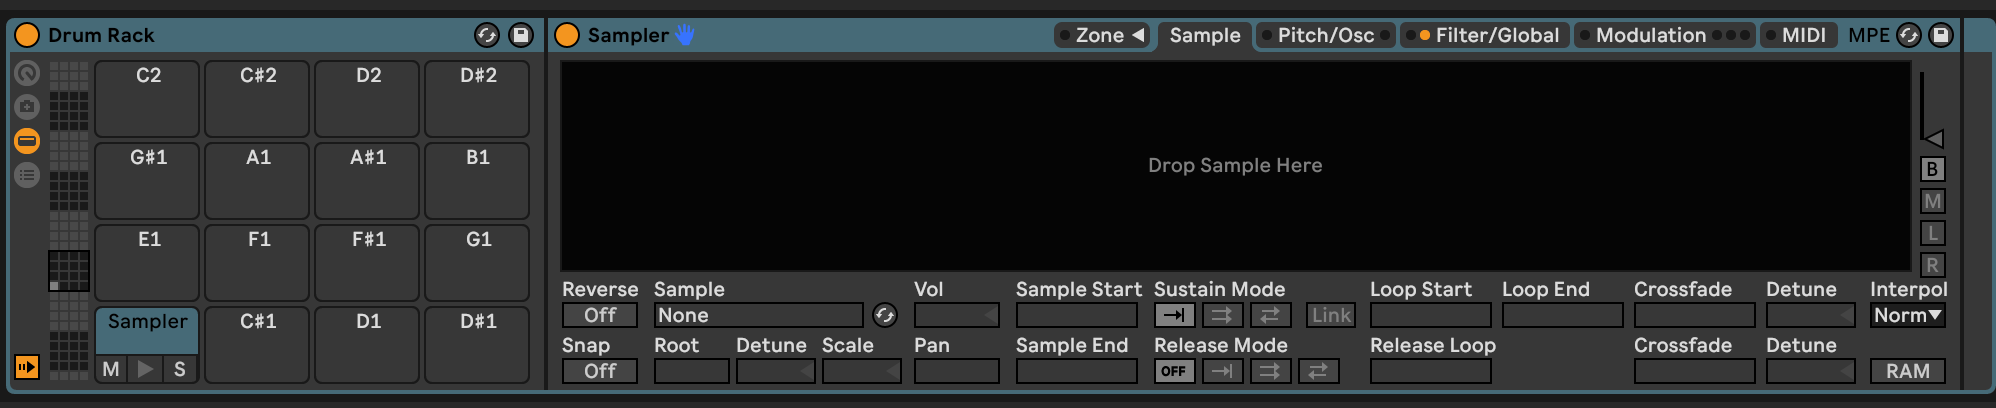
Open up the Zone menu inside the Sampler.
This is where the majority of the editing will come together.
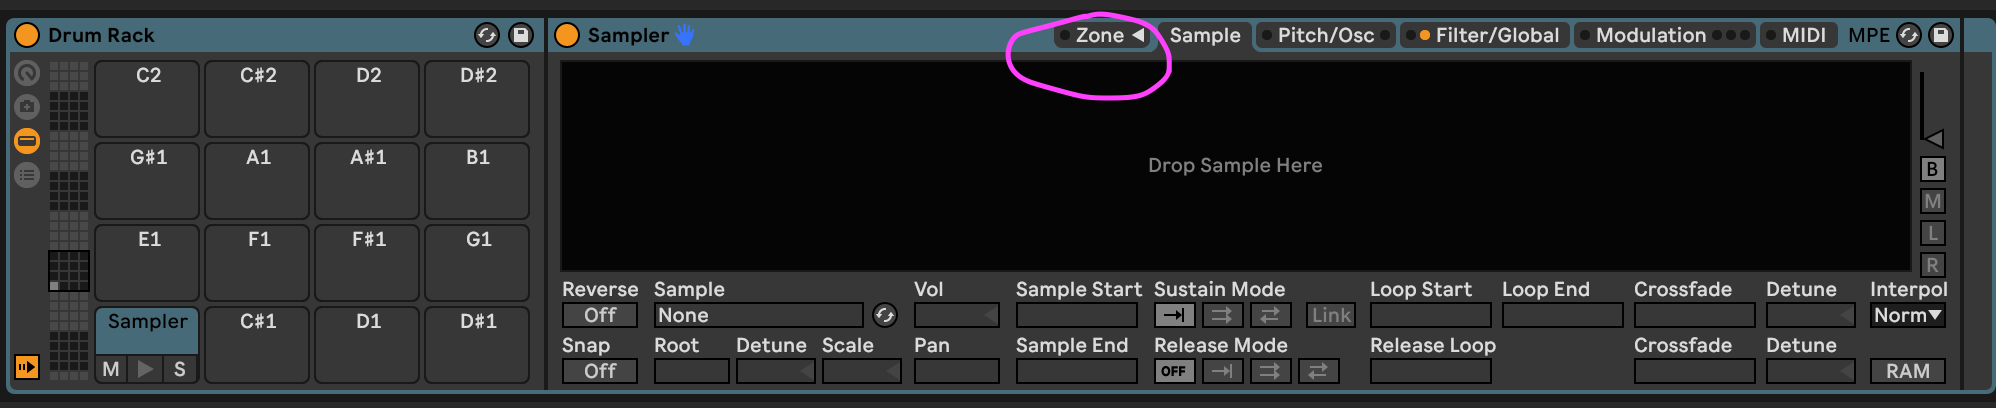
How To Add Drums & Distribute Them In Ableton Live
From either your folder or the Ableton Live Browser, you can now drag a collection of drum samples into the drop zone of your Sampler instance
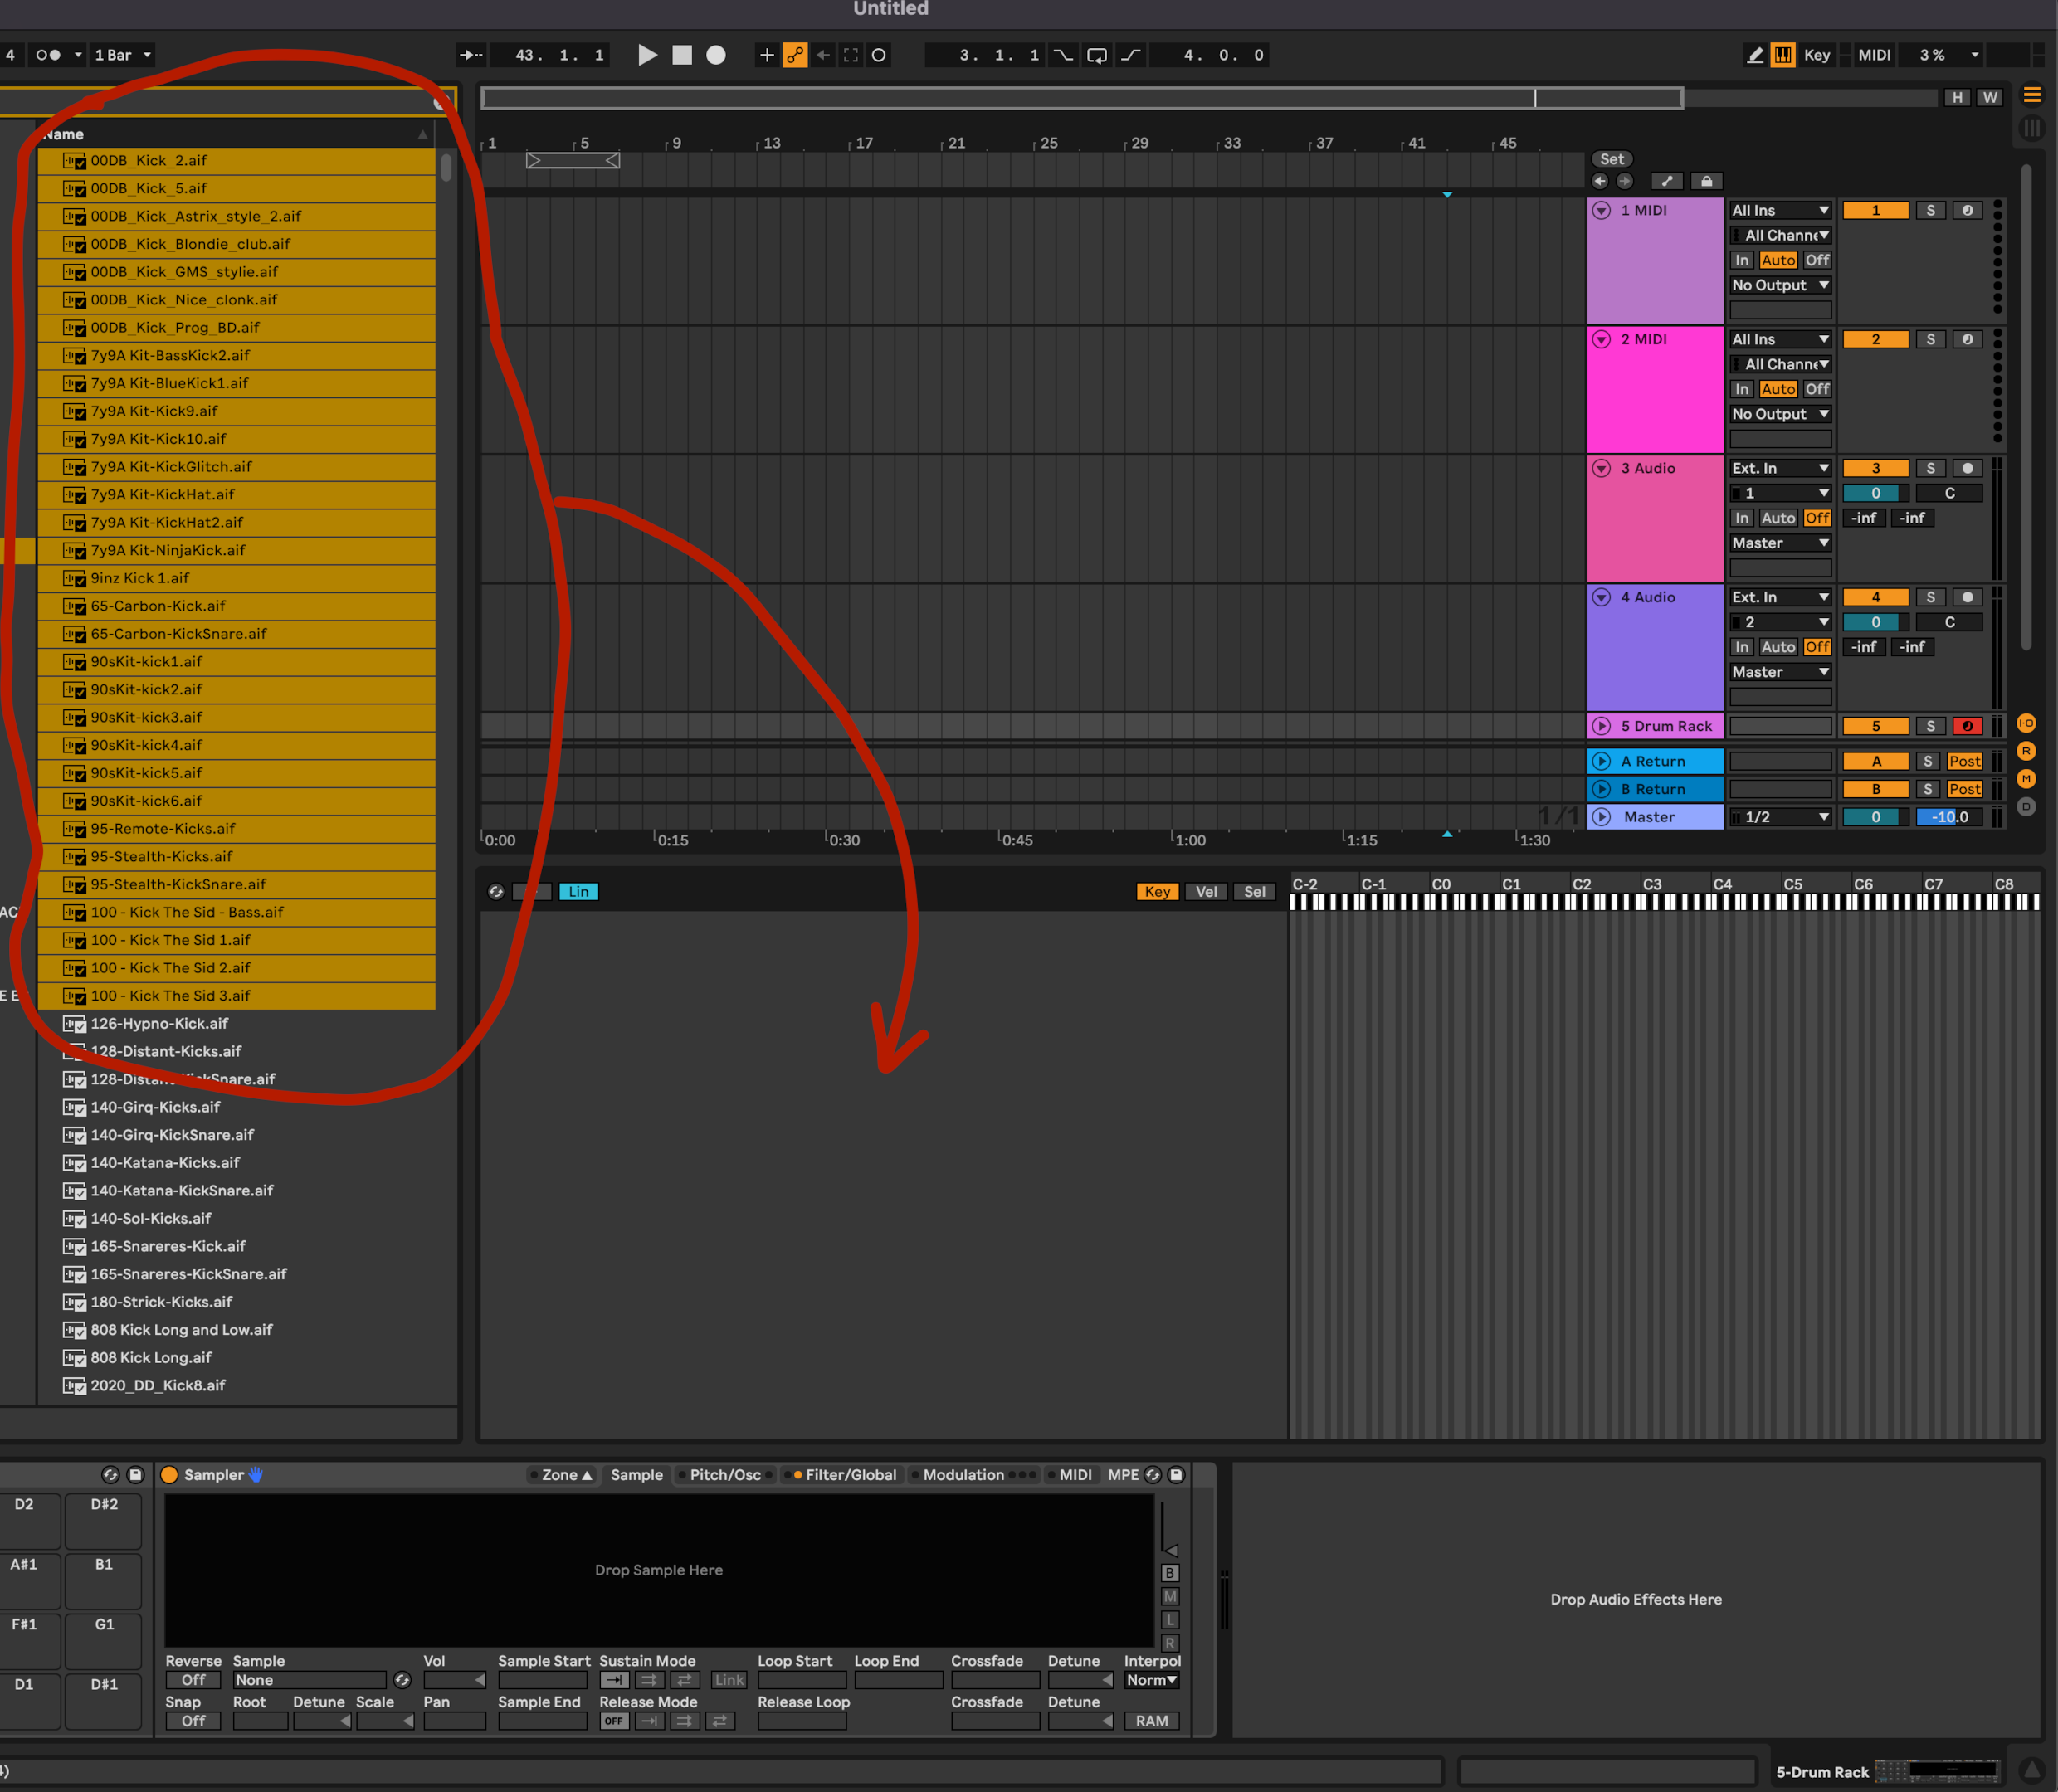
Ableton Sampler allows you to edit the key zones a sample corresponds to, velocity zones, and sample selection. You need to pick the third option, sample selection.
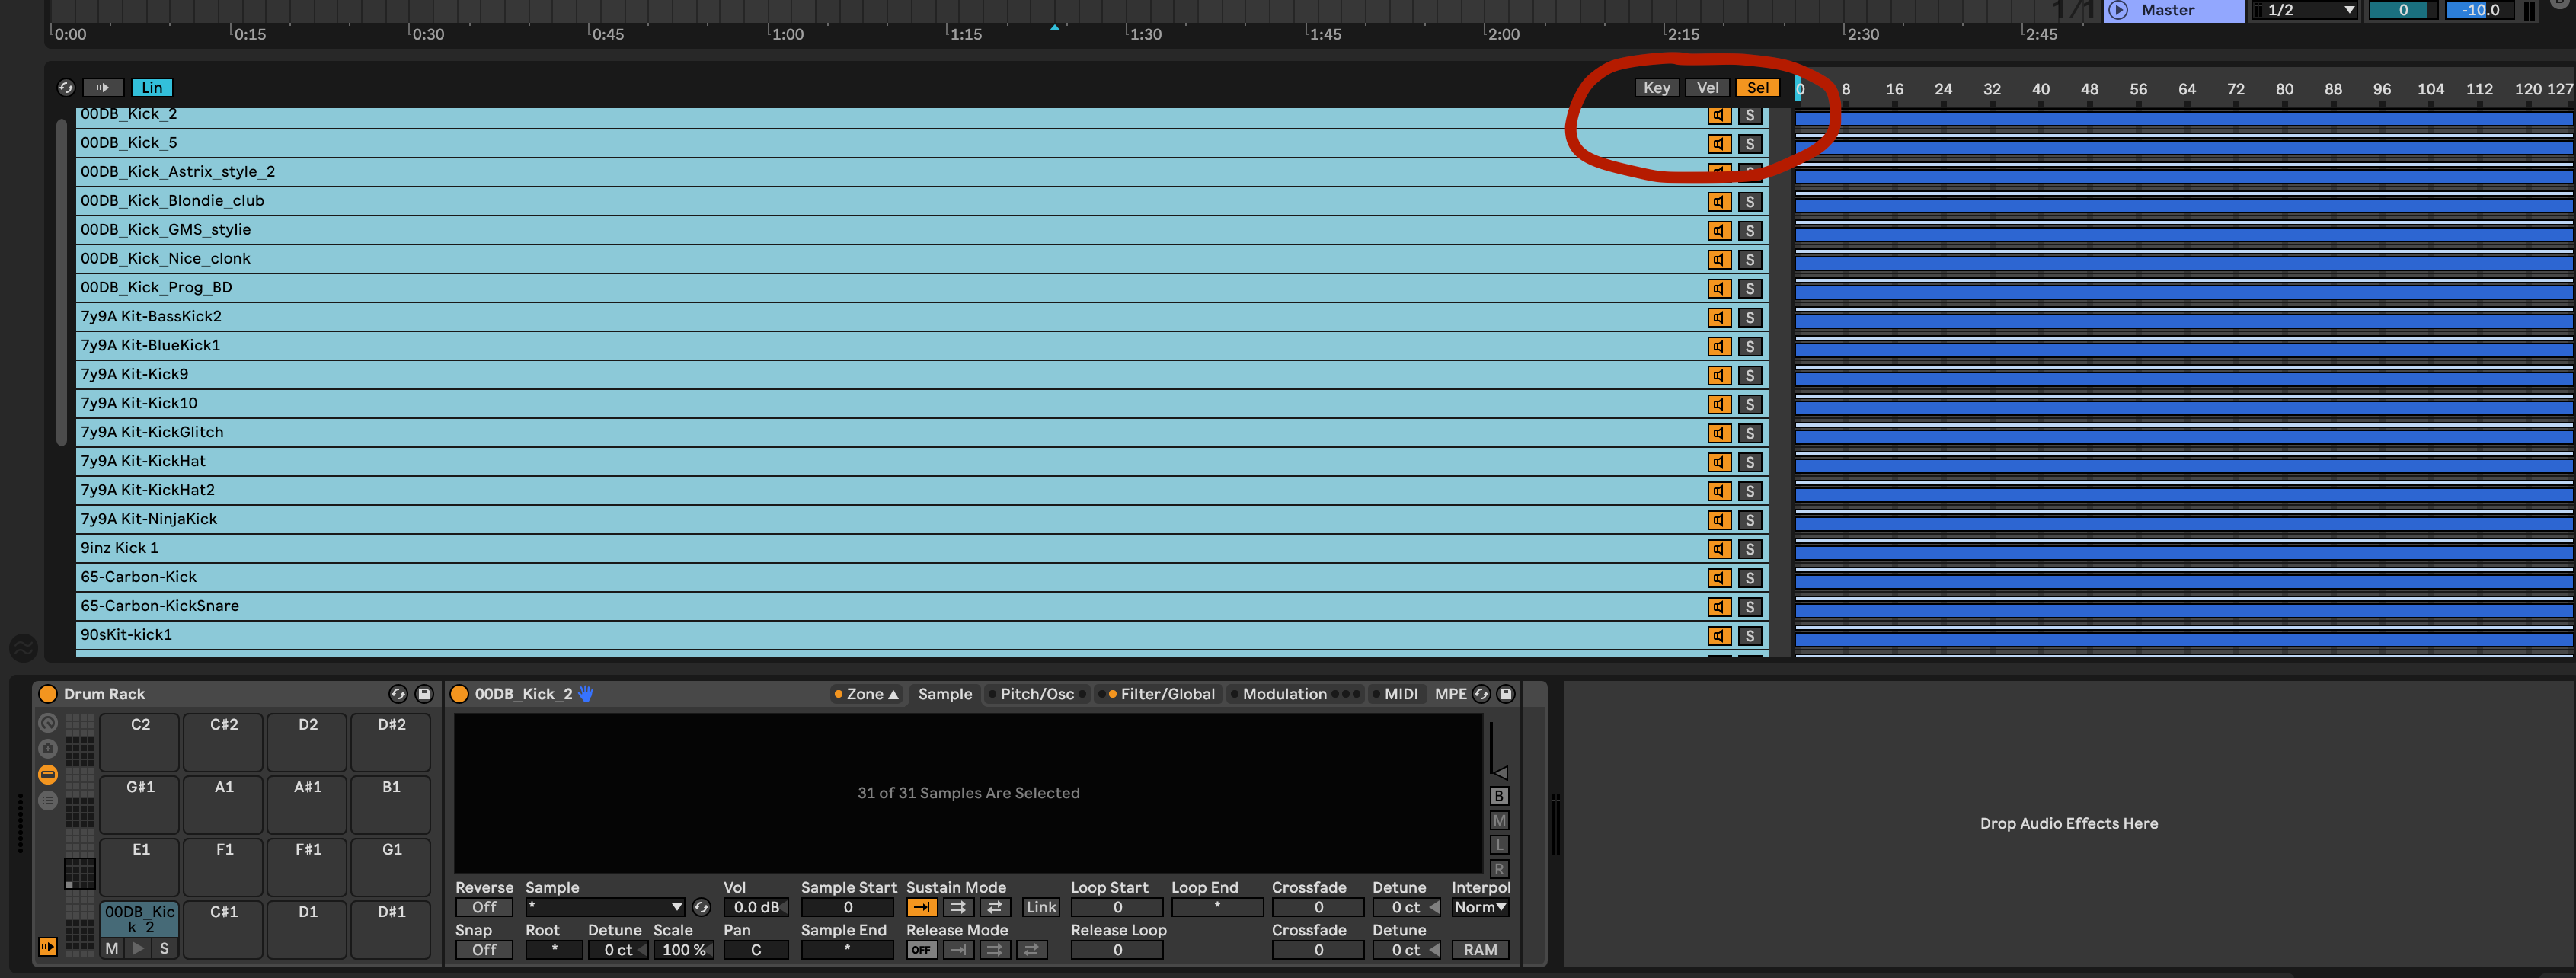
In it's current state, when you trigger the drum pad that this Sampler is placed on you will hear every drum sample you have loaded play back at once.
We are going to tell Ableton Live that we only want to trigger one sound at a time.
Once you are in the sample select menu, right click on the blue markers with all your drum sounds selected in the left pane.
Choose the option "Distribute Ranges Equally".
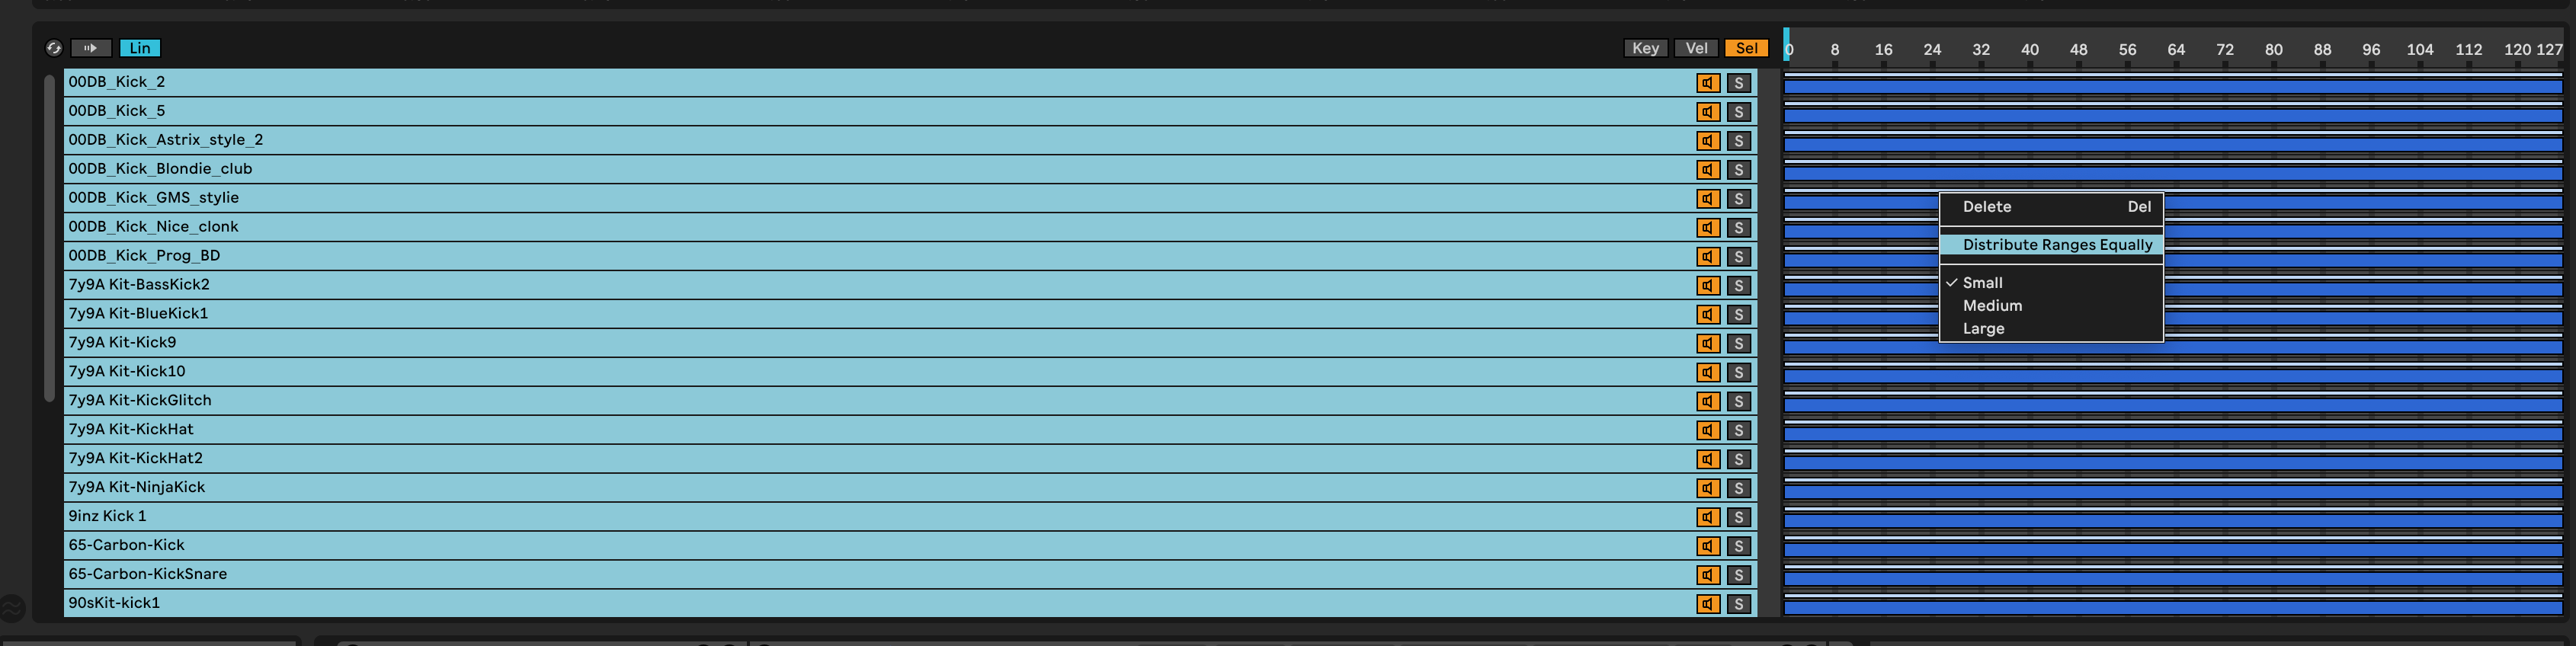
Now you should see the dark blue range indicators for each of the different drum sounds automatically arranged so none of them overlap.
As a reminder, you can drag in more than 127 total samples, but you won't be able to distribute the ranges equally.
All your extra samples beyond that number will overlap and trigger at the same time.
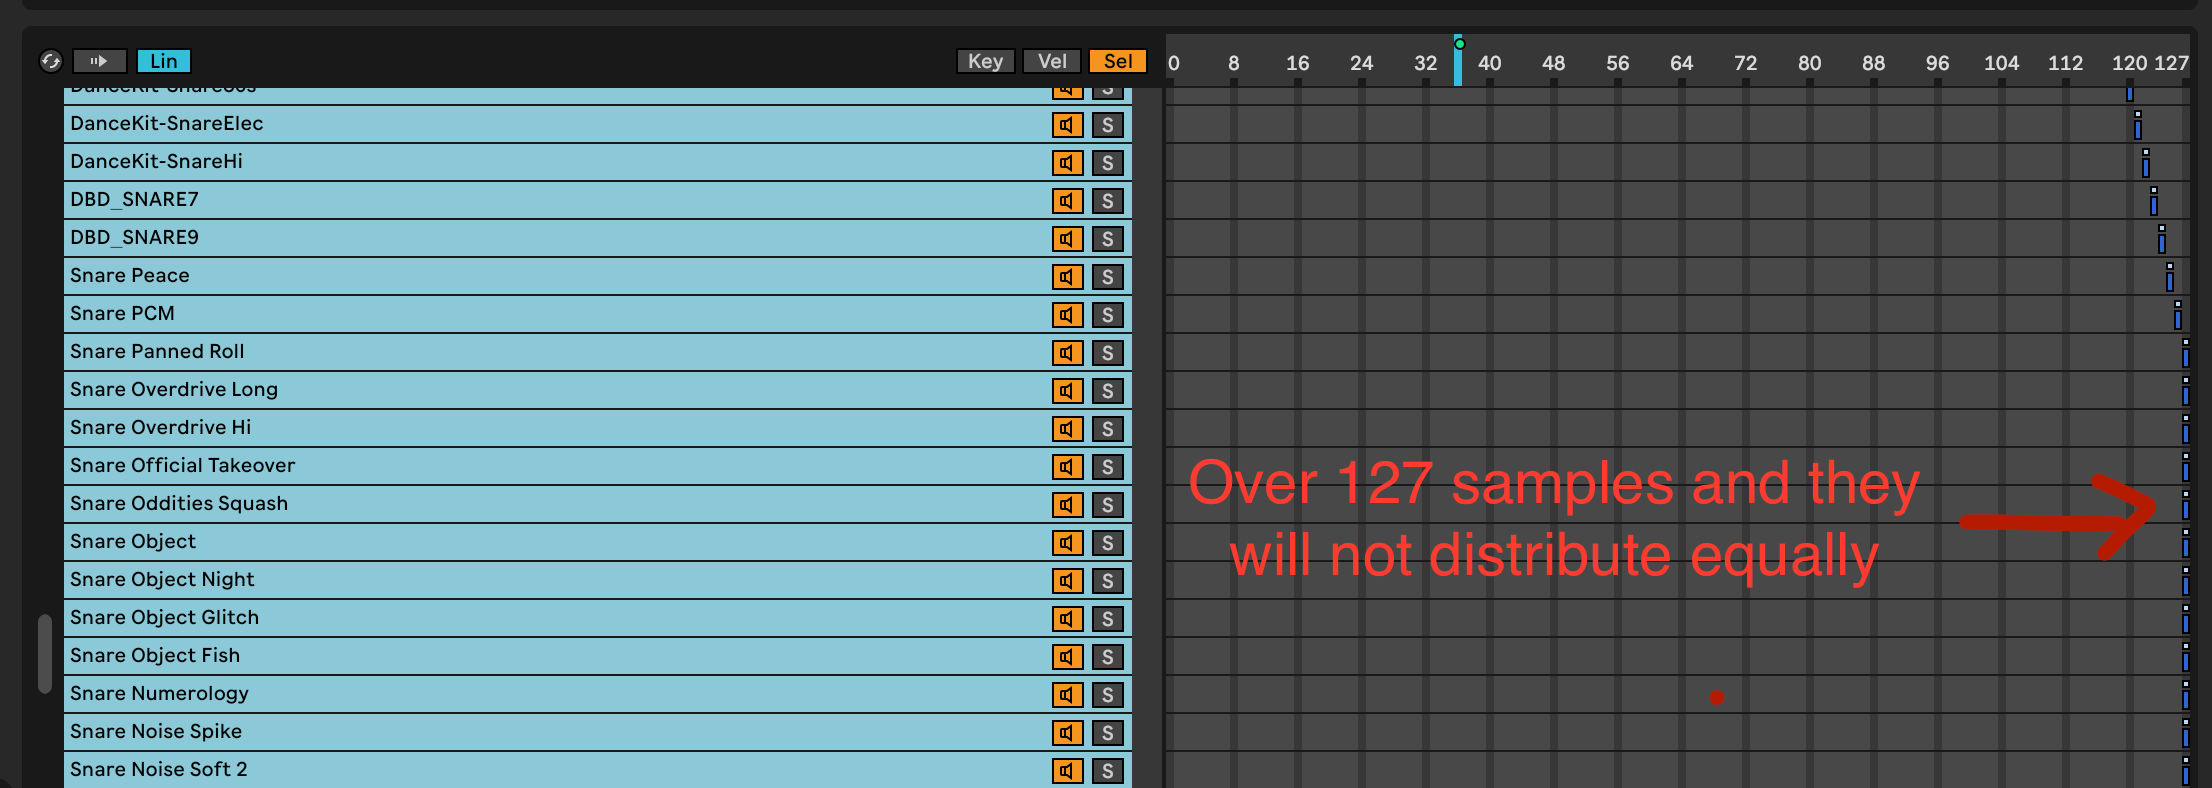
More importantly, there is a light blue sample selector at the top of the pane you can click and drag side to side.
Whatever sound files are in range of the selector will be played back. Since none of the sample ranges overlap, the selector can never be over more than one of them.
Therefore, we only hear one sample at a time. This is a good start. However, needing to fish around with the mouse to position the sample selector is annoying.
We can do better!
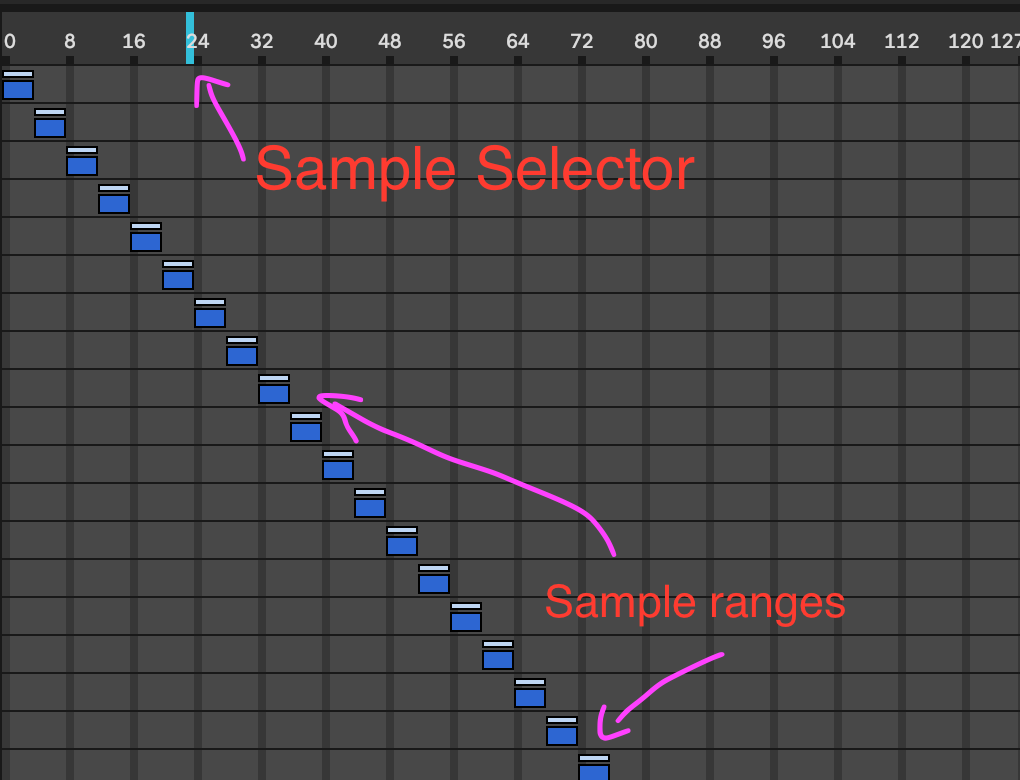
Right click on the sample selector and assign it to Macro 1 on your drum rack.
Rename Macro 1 to Kick Select. Now, you can turn this macro to select the Kick drum sample you want to play back.
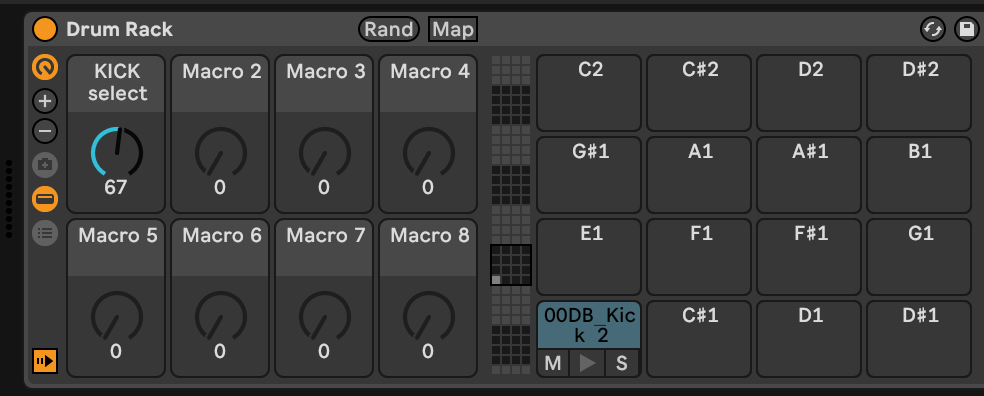
This is already more convenient. If you want to take this further, you can map that Macro to a knob on your MIDI controller.
Or if you want a more experimental idea, try mapping an LFO to that Macro so the kick sample that gets played back changes.
Lastly, rename the pad to something representative like, Kick Drum.
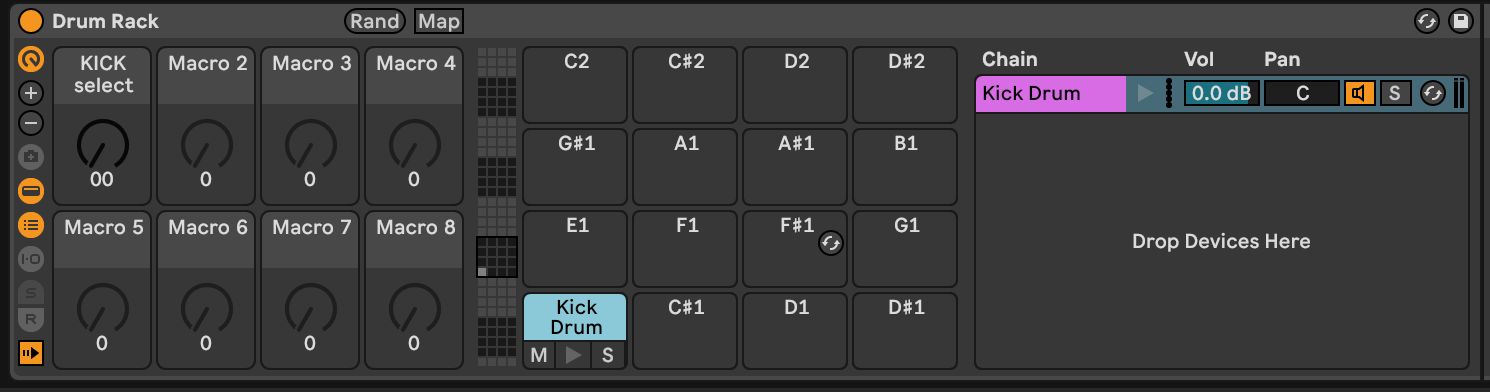
Adding Other Instruments
Hopefully by now you can see where we are going with this "drum rack to end all drum racks".
Next, you're simply going to repeat this process for each kind of sound you want to use.
For example, you might create a drum rack pad for your Snares and Hi Hats with a corresponding sample select Macro to allow you to quickly audition sounds.
Or automate to add some unpredictability to the track.
You also aren't limited to tradition drum kit instruments!
There's no reason why you can't set up a few drum rack pads with old movie clips, recordings from space, vocal chops, modular synthesizer loops, or any other sound you can dream up.
Crazy Sample Math
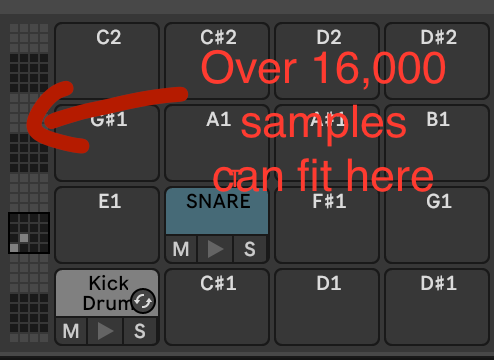
Also, despite being able to fit 127 drum samples per pad, you still might want to load up more to give yourself options, setup choke groups for similar sounds, or make some pads fixed sounds and others probability driven.
This gives you more space to dump samples in your instrument racks than you might realize.
You can in theory drive an entire track with a single drum rack and a single MIDI clip.
You can put 127 samples on each pad and you have 127 pads to work with.
That means you can put up to 16,129 possible samples on a single drum rack.
And you can drop audio effects after the Samplers to transform them.
Building More Diverse Drum Kits
This way of setting up your drum racks is a great way of demonstrating the power that drum racks offer.
However, you're probably going to use a bunch of these instead of a single 16,000+ sample monster.
Good luck finding the perfect drum sound in that mountain!
A good way to start grouping your drum racks in the DAW is by genre.
Make 2-3 of these racks for each genre you produce in and you will have your bases very well covered and then some.
For example, you load all your favorite Jungle samples in one drum rack.
Make another from Drum and Bass, then another for trap or modern Hip Hop, then yet another for old school Hip Hop, etc.
Yes, this is a lot of work to catalog each drum sound in your library.
But there's a perfect time to do this which you may not be utilizing.
Utilize the mise-en place philosophy to prepare for your work when you don't feel like working on music.
Mise-En Place
Mise-en place is a cooking term that means "to put in place".
When you're not doing the main task of cooking, you chop vegetables and organize the kitchen for when that time comes.
Music production works the same way.
Building a drum rack, tweaking instrument racks, or recording foley samples are good activities for those days when you aren't super inspired to write music.
(If you need more drum sounds to build with, of course we're here to provide professional drums you can use over and over again in your library.)
It will allow you to move more quickly when you're in the headspace to write music, but the bar of success is lower.
Writing music, coming up with melodies, programming drums, or recording instrumental takes are hard work that demand a lot of focus.
Dragging sound files into drum racks, building templates, making presets for VST instruments are all helpful but not so hard to accomplish.
Effects Processing
So far we have only discussed how far you can go just by arranging samples inside a drum rack.
But, you should also do some basic effects setup and adjustment to make sure it blends well.
Adjust Sample Start times
Sometimes samples are not perfectly trimmed to the start of the transient.
In practice, this slight gap of a few milliseconds can make the sound feel late when you trigger it.
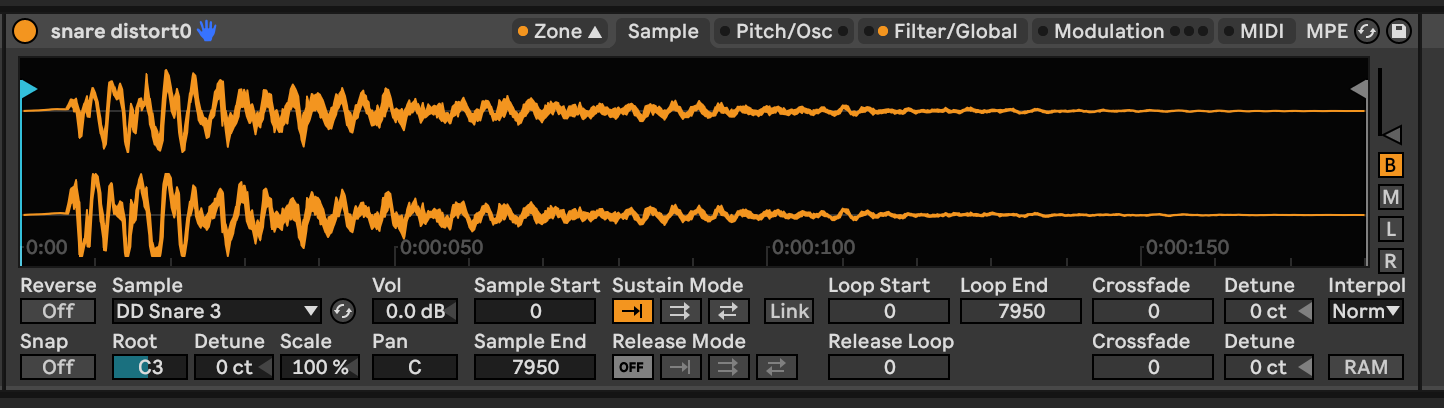
You will need to move the sample start marker to the beginning of where the transient begins to make sure the sample triggers on time.
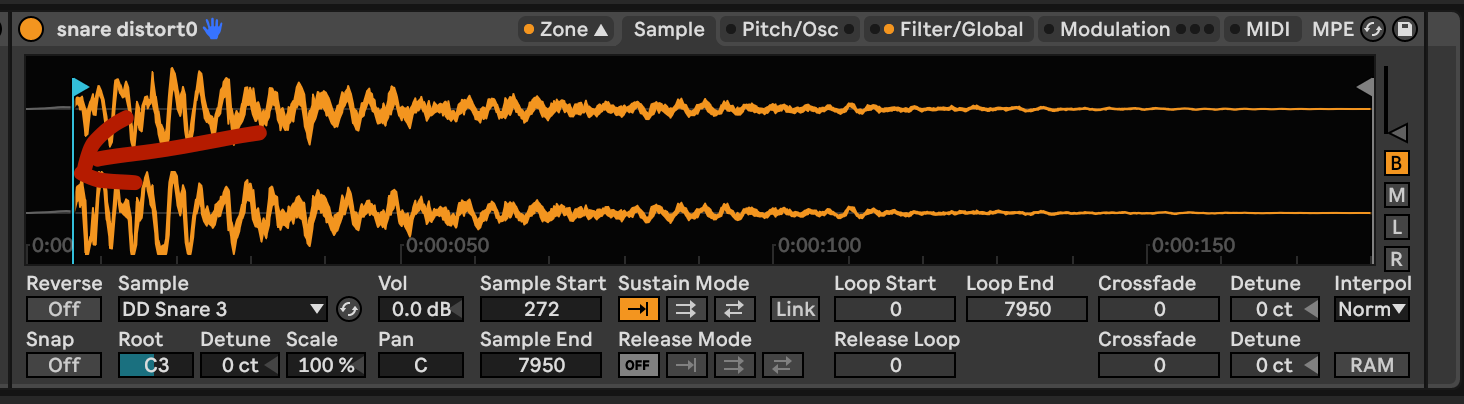
Add a compressor and limiter
Before we add additional creative effects, you should get in the habit of putting a basic compressor and limiter on your drum racks.
Use a ratio of 4-6, an Attack time of 32-60ms to let the transients through, and a Release time of 200-500ms.
Adjust the threshold by hand.
Remember, these are just an examples of where to get started
You want to adjust these by ear and make sure the compressor isn't getting too pumpy or crushing the transients prematurely.
Also, don't forget to put the drum rack, compressor, and limiter in a group.
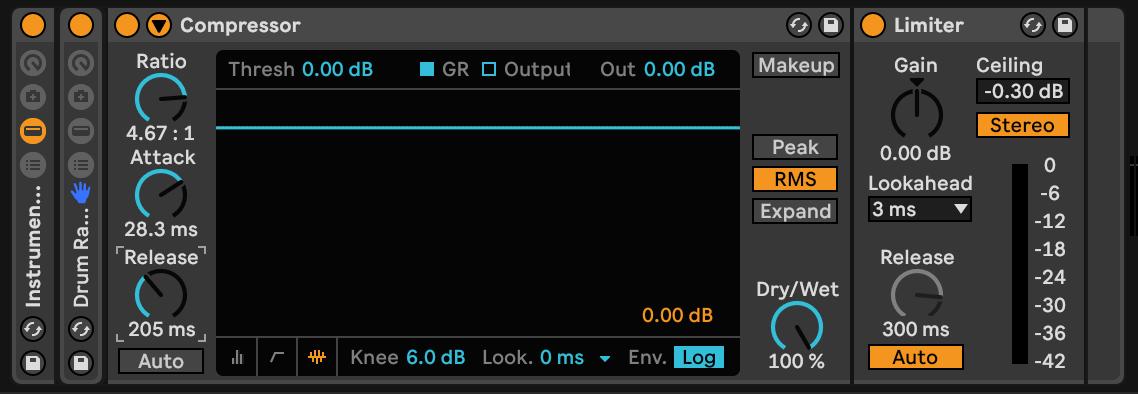
Make Some Choke Groups
if you have similar types of sounds that live in the same frequency range you may want to assign them to choke groups so they don't trigger at once.
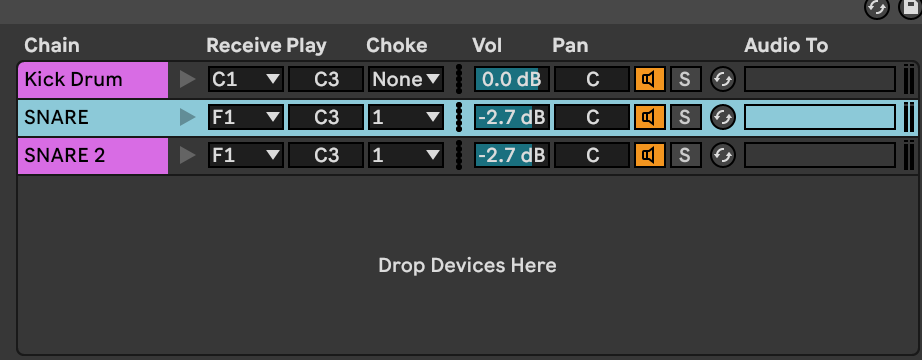
Optimize Volume Levels
You may notice some sounds hit your Limiter or Compressor very hard because they are significantly louder than the other sounds.
Don't try to fix this with more compression on individual drum pads or the whole kit will start to sound over compressed.
The best way to fix it is simply to adjust the volume level.
Do this inside Sampler inside the Filter/Global controls.
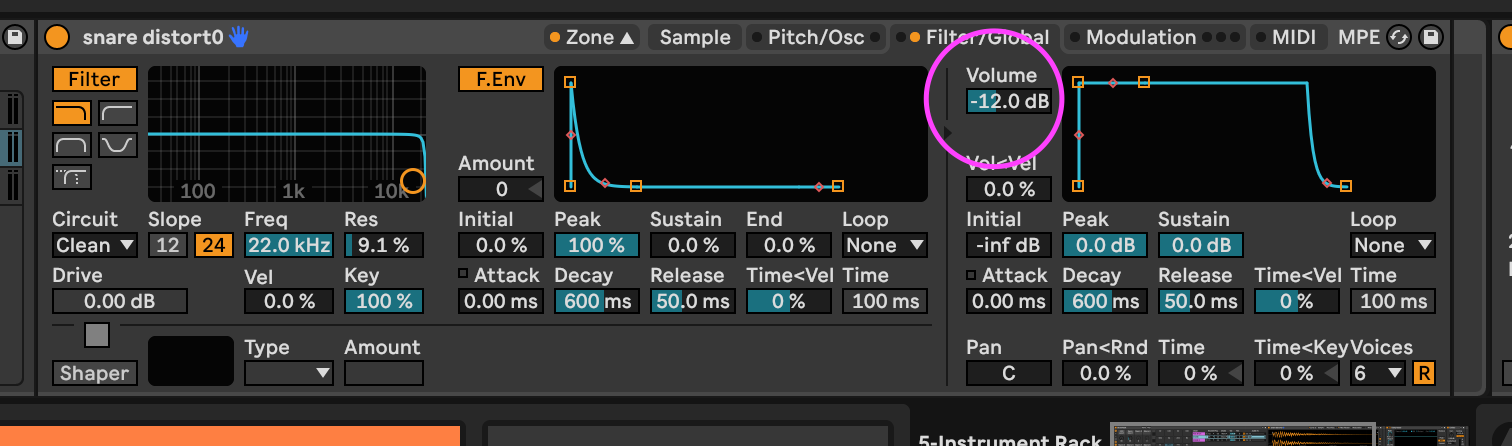
With a very large drum rack that has potentially hundreds or thousands of samples, it may be difficult to do this all in one day.
Just adjust them as you use the rack and save new, updated versions of the rack.
Also, don't forget you can adjust the volume for everything on a particular drum pad by going into the chain list and adjusting the volume of that collection of sounds.
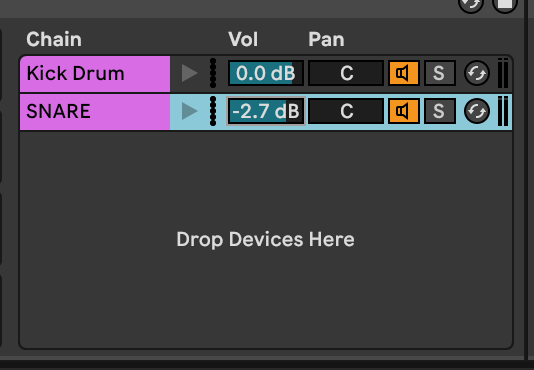
Build More Instrument Racks
You can take this further with macro controls or creative effects, but at the least we hope you use this technique to make sure you make the most of all the sample packs you pick up.
And of course we hope you check out our packs when you decide to build more!


The Beginner's Guide To Becoming An Ableton Beat Maker
If you're interested in making beats in Ableton Live we're going to cover all the individual steps you need to go through. Your path to being an Ableton beat maker will have a lot of ups and downs.
Look at it like learning an instrument you can play forever. It's worth it.
It is ok if you feel stuck with any part of the process whether that's finding good drum sounds, building them into a proper drum rack, mixing, writing melodies, or just getting your first beat done.
You'll know by the end of this article what you need to work on and have a some ideas for what to do next in your journey.

What Do You Need to Make Beats?
We used to say a laptop and a DAW, but that's not even true anymore! You just need something that you can load sounds into and sequence. For a lot of people, this might just be a phone with an app like Koala or Ableton Note. These are popular with many younger artists.
Also remember, hip hop is in many ways a minimal style of music production that has it's roots in pretty sparse equipment. You should know this even if you work in a different genre because the roots of beat making and sampling go back to hip hop.
But since this is an article about Ableton Live, we're going to be focused on a DAW based workflow on a computer. A MIDI controller is also a big help, but not required.
But most importantly if you're not going to be playing instruments and recording parts with live mics, you need sounds! For most people they sample from records or use sample packs.
You can learn more about the pros and cons to each approach in some of our other articles about working with sample packs vs sampling records.
How To Make A Beat With Ableton Live
Making a basic beat in Ableton Live is something any and every music producer should know how to do, even if you don't consider yourself explicitly a "beat maker".
If you're trying to make your first beat, don't worry about making a masterpiece. Just make something and figure out where to improve the next one.
Many famous beat makers commit to making a certain number of beats every single day because simply doing it often gives you more opportunities to improve and discover your own artistic process.
But if you want the beginner's guide to beat making, you can break the process down to a few steps.
-
Picking a Tempo and Key
-
Choosing Drum Sounds
-
Sequencing the Beat
-
Adding Melodic Parts
-
Mixing
It is important to note that steps 2-4 don't need to be done in order!
Let's look a little more deeply at each part.
Choosing A Tempo and Key
This is easy. Usually the genre of music you work in will live in a particular tempo range. So, sometimes this part is decided for you.
The key is sometimes decided for you too. You can of course just pick a key you like to write in. Sometimes challenging yourself with an unfamiliar one can help you find new ideas.
And finally, if you like to work with samples of records or sample packs, sometimes the key is also decided for you.
For example, say you found a synth loop in C minor you really love in a synth sample pack. You like the vibe and you don't want to lose that feeling by re-pitching it. Just write the beat around the key of the sample!
Choosing Different Drum Sounds & Samples To Work With
Your drum sounds are sacred. The drums you choose to make beats with can more or less make or break your tracks.
This is the reason why so much so that a lot of music producers will re-use drum hits or drum loops they really love once they find some drum samples that align with their sound.
A common example of this is if you're trying to write in a genre like Drum and Bass or Lo Fi Hip Hop, an EDM sample pack isn't really going to be useful for you at all. You either need to find new samples or make them yourself.
Also, the drum samples you choose will become a big part of your sound as an artist over time. As much so as your choice of chords, the instruments you like, or your note choices in melodic parts.
So, it is worth spending some time experimenting inside Ableton Live and trying different sounds and creating various drum racks to use.
How To Make A Drum Kit In Ableton Live
We have entire articles on the art of creating great drum racks in Ableton Live. There are so many techniques and tricks to making them great to cover that we could easily write a whole book about this.
We highly recommend checking these articles out because it is such a huge topic and essential for any Ableton beat maker.
To make a basic Ableton drum rack, find 16 drum sounds that include at least a Kick, Snare, closed Hi Hat, and an Open Hi Hat.
You can also add melodic samples, other drums, percussion, even loops and synths. Drag each one of those on to the drum pads of a blank Drum Rack in Ableton.
Then, connect a MIDI controller or press the M keyboard shortcut to use your computer keyboard as a MIDI controller.
Now, you have a playable kit. It's not a super hard process. But if you check out our other articles you'll see that a drum rack can get much more complex than this.
You can work with up to 127 sounds on a single rack instead of 16 and do things like use techniques like Multi-Sampling to create a more realistic drum rack that feels and responds like an acoustic instrument.
Replace the Default Drum Samples With Your Own
Another technique for making a drum rack is to find an already built drum rack you like.
Then, add or replace some sounds with samples you've made yourself.
Or you can use sounds you downloaded and like. They can be free samples, an artist pack, or something from a sample pack company like us.
When To Use Drum Racks vs. Other Methods
There are definitely other methods to getting the drum sounds started. Some music producers prefer to begin with a drum loop from a record or sample pack.
They will edit it in the arrangement view rather than play the beat by hand or sequence it in Ableton Live via the piano roll which you access via the clip view.
Another method is to use the session view to automate the process of slicing the beat in Ableton Live and create variation.
We would use this method if you already have samples in mind with drum grooves you don't want to change too drastically.
Or if you're working in a genre where specific drum loops are part of the genre, like the Amen Break.
But whether you're super experienced or new at beat making, you should learn to sequence drums from one shot samples or chops. It's an essential skill for just about every music producer.
Start Making Beats With The Drum Rack
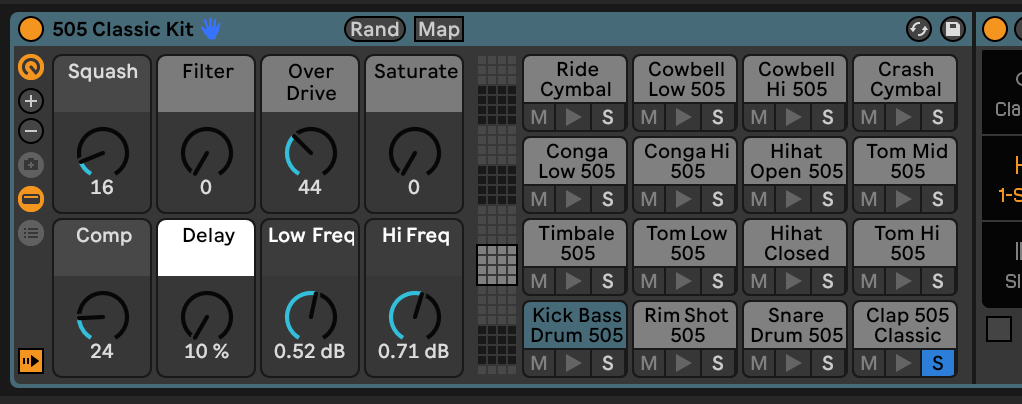
Now that you have some sounds you want to work with and have them loaded up, you need to either draw notes in the piano roll with the mouse or start playing in parts with your MIDI controller and recording the performance.
Playing in parts to a metronome takes some practice. If you're new to music production or music in general it might be easier to look up some drum patterns and program them in with the mouse.
We have an article about a classic hip hop track "Breathe and Stop" and the pattern behind it that would make a good place to start.
Sequencing The Beat & Writing Different Sections
Especially if you're drawing in MIDI notes with the mouse, don't be too hard on yourself if the beat doesn't groove right away.
Especially if this is your first beat. Ableton has a bunch of features to help you get it feeling good.
Create a Kick Drum and Snare Pattern

There's no rule that says you need to start with the kick and snare pattern, but if you're starting a beat from scratch, getting a basic kick and snare drum loop happening is a simple place to start.
There are only so many basic hip hop drum patterns so you don't have to over complicate it.
Then you can experiment with layering other parts over it.
If you're working with a sample like a drum break, this pattern might be already predetermined or mostly predetermined by the sample.
There are no real rules because this is an art!
But if you need some tips to get started with the basics, the beginner's guide is to keep snares on beats 2 and 4 of a 4/4 measure and the kick drum usually lands or anticipates beats 1 and 3.
If you really aren't sure what to do, you can also sync a few beats you like to Ableton's tempo. Then, just program kicks and snares where they hit in the beat. Next, mute the original and just listen to your kick and snare pattern to understand how that particular pattern works.
Also, this is a great exercise in warping and training your ear for what to listen for.
Add a Hi-Hat Pattern
Next, you should try adding your own hi hat pattern.
Some people like to just drop in a hi hat loop from a sample pack, but you should learn how to program these yourself.
You need to know how to customize there, then you can use the loop packs later for days when you're in a rush to get a track done.
The actual pattern and drum samples you use are going to vary depending on the genre.
For example, if you're making trap or EDM, those hi hats are usually a totally different sound and pattern than you would use for classic boom bap hip hop beats.
We find that a lot of the modern styles of hip hop and electronic music production tend to be more "on the grid".
Older styles less so, because that music was invented before most people were using DAW's or even computers. Lots of that music was made with hardware samplers.
How To Make Your Beat Groovier
Let's say have a good kick drum and snare pattern sequenced.
You copied a hi hat pattern that fits from a reference beat.
But you have a problem. Everything still feels too straight and stiff.
There's no swing or groove to anything.
-
Add Swing By Hand
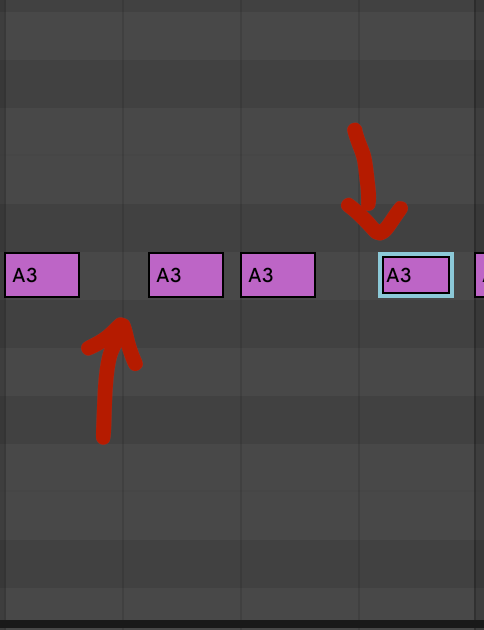
You can literally just start to swing certain parts more. If you had a straight 1/8th note hi hat pattern, you'd just move the upbeat notes closer to being triplet based, instead of duple based.
-
Apply Swing From Live's Groove Library
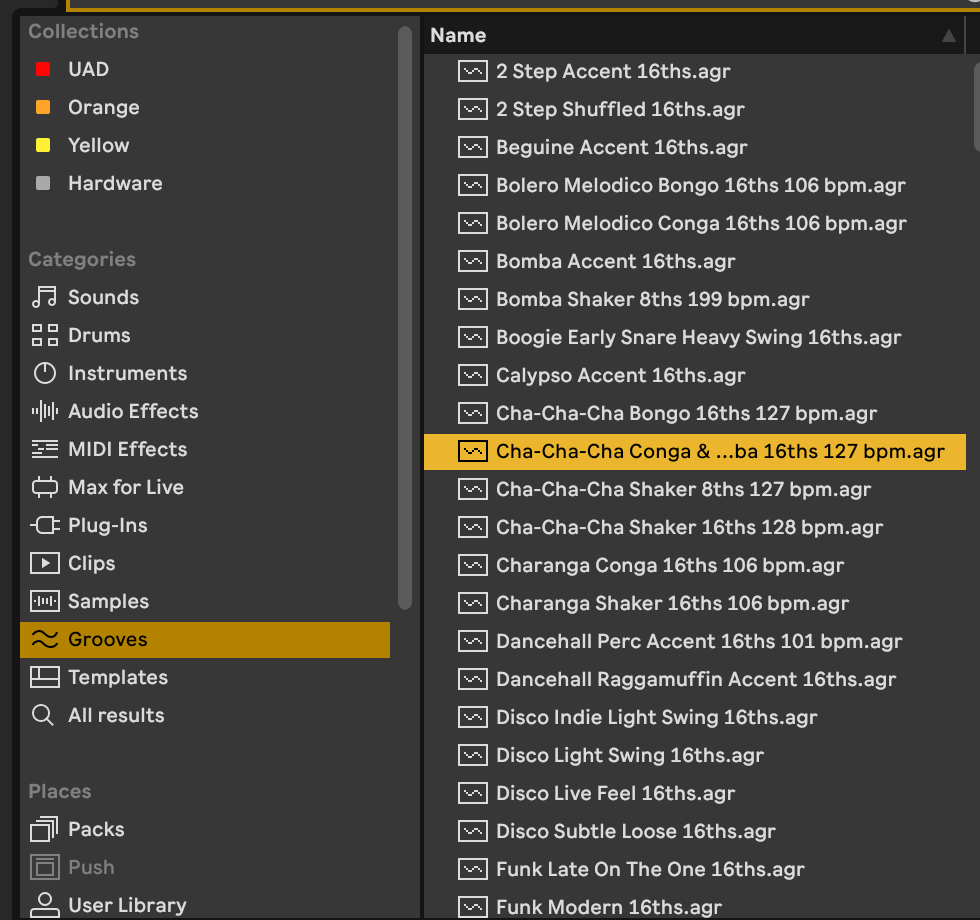
Ableton has a feature called Groove Pool that has pre-loaded swing patterns, including patterns from Logic and the MPC.
Additionally, you can analyze the swing of any audio clip to create your own groove files.
Then, you apply that groove file to your programmed MIDI clip. Adjust how strongly you want it to influence your pattern.
-
Add Percussion to Make the Beat More Interesting
Another method is instead of using the built in features of Ableton Live to create swing and groove from samples on the piano roll or playing your parts in is to use some loops.
You can program in the basic kick and snare patterns yourself, then add shakers, extra hi hats, or hand percussion loops that naturally have a swing to them.
-
Nudge
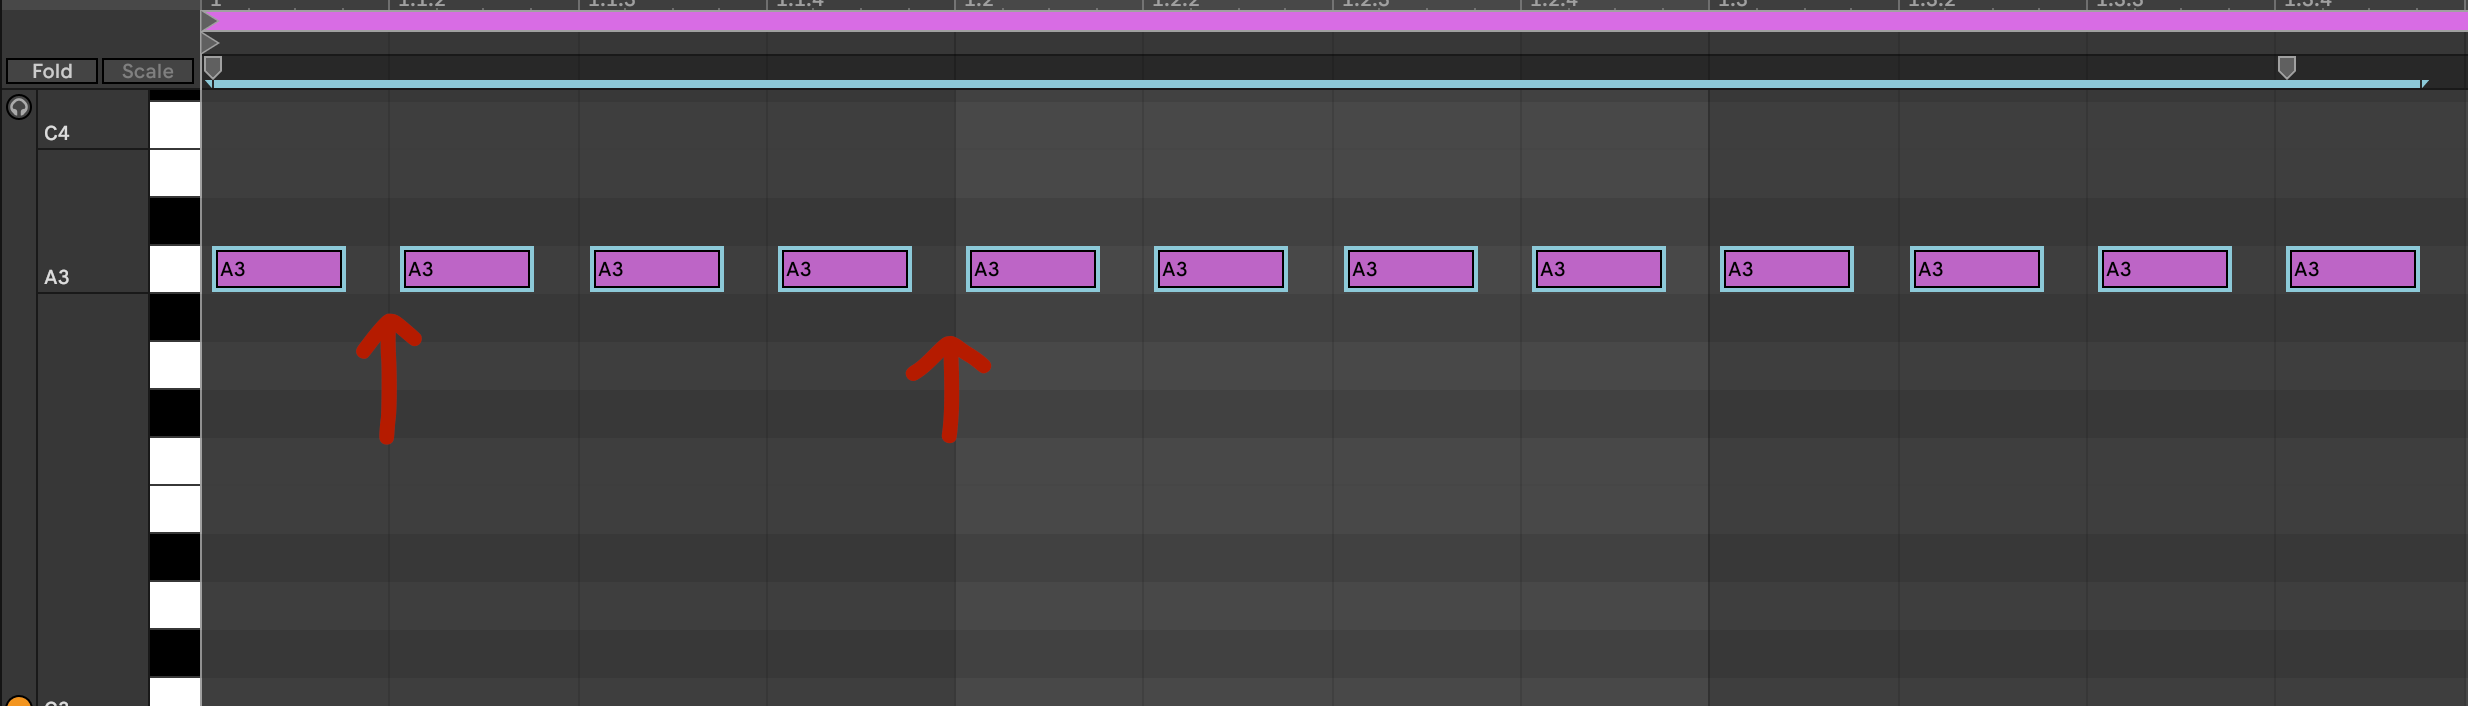
In addition to using techniques like applying Grooves, you may want to experiment with nudging certain drum hits slightly off the grid.
-
This is closer to how real drummers play. For example, you can take your hi hat part and move the MIDI notes to be slightly after the beat. It won't feel like the hi hat notes are late. Instead they will feel like they're laying back a bit. You can try this with all the different parts in your beats, even kicks and snares
Change the Sample Length on Longer Sounds
Another technique beat makers use is to alter the sample playback length for longer sounds.
On short sounds it doesn't make a huge difference.
On longer sounds it allows you to create variation by programming or playing different notes of different lengths
There are a lot of ways to do this.
In Ableton Live one of the easiest ways to change this is to change the play back mode inside of the Simpler device.
(when you drop a Sample onto an empty drum rack pad, by default it is inside an instance of Simpler)
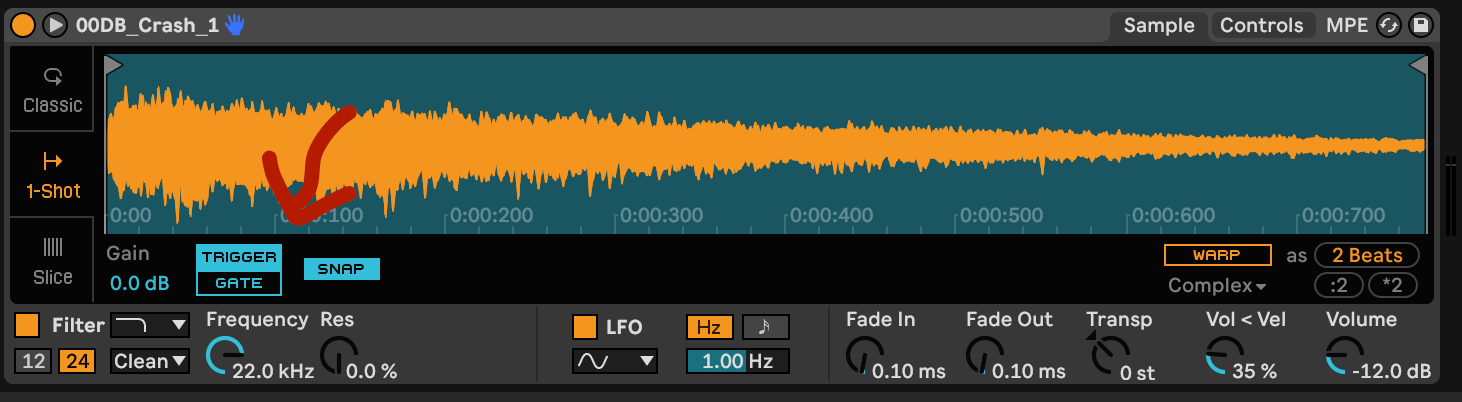
By default, this is set to Trigger which will play back the entire sample every time it is triggered. It doesn't matter how long the MIDI note you program or play is. You might not want to do this for something like an open hi hat sound or a sample of keyboard chords.
Instead, you can set this to Gate.
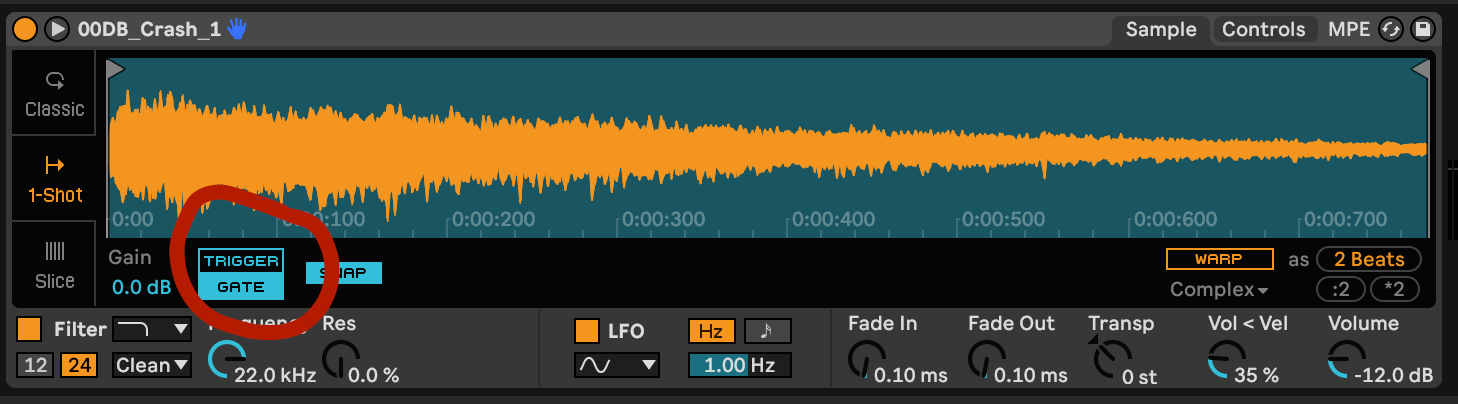
If you don't see these options, make sure that the Simpler device is set to One-Shot mode, not Classic or Slice. Those can also be useful for manipulating drum sounds in your music production, but in different ways.
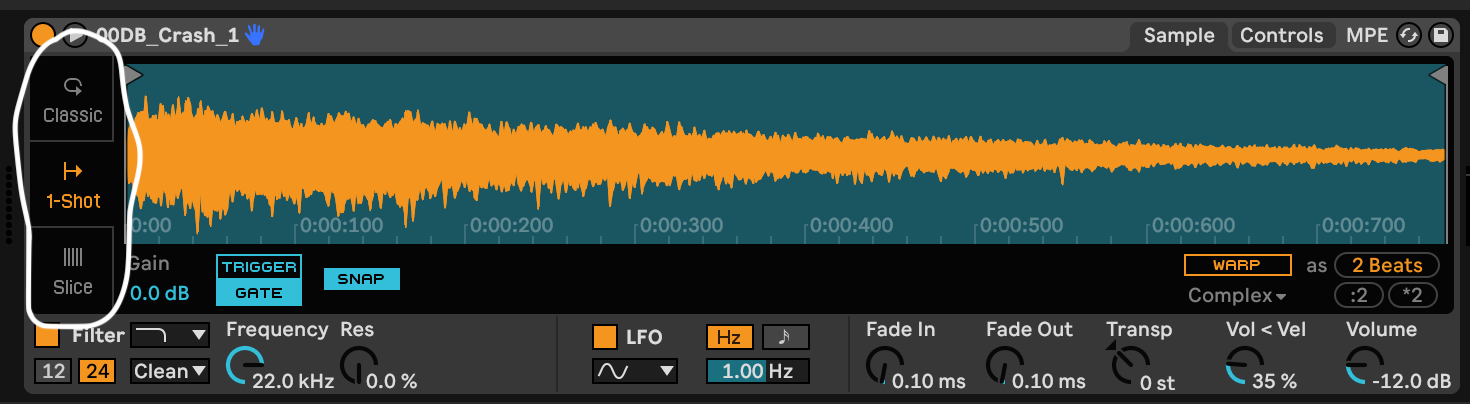
Adding Melodic Parts

Complete Your Beat With a Bass line and Melody
You might decide to leave out a proper melody from a beat to leave room for a top line vocal part. This is perfectly reasonable, but you probably shouldn't skip adding a bass line.
Bass lines add a the funk and groove to a beat that makes you want to move, as we as provide a counter melody for the top line that will eventually be there.
At this point you can open up a new MIDI track and start playing or programming a bass line with your favorite synth bass plugin. You pretty much can't go wrong with MiniMoog emulation, but there are million others that work well.
If you struggle to write good bass lines and melodies, we have two suggestions:
-
Learn how a musical scale works
-
Transcribe good basslines from other beats
The second suggestion is time consuming and well worth the effort.
Just get a recording of one of your favorite beats, line up the project BPM to the beat, and rewind it as many times as you need to pick out the notes of the bass line. You can even slow down the audio if you need.
Program the notes in a bass synth in another track. Not only is this a fantastic exercise for your ear, this will help build your melodic vocabulary.
After you've done this with dozens of bass lines, you will understand what makes a great bass line great.
Yes, it's a lot of work, but it's worth it because the knowledge will be with you for life.
Mix The Beat in Ableton Live
You'll probably mix your entire production very carefully when it's time to release it. But even in the early stages, you should stick have a solid rough mix to work from.
This might include applying some EQ and basic filters to your drums sounds to clean up any obvious problems.
For example, you don't want levels to be so hot that you're clipping the output of your audio interface or hearing low end rumble in hi sounds like cymbals, bells, and hi hats.
Apply Effects to Polish Your Beat
Some effects you might want to add to polish your sounds might include saturation or even clipping on sounds you want to be more "forward" in the mix like snares. This is especially important in genres like hip hop and more aggressive types of electronic music.
You also can apply reverbs to make certain elements feel further back in the mix, as well as add delays of varying lengths to add movement.
Luckily in Ableton Live, if you use any of the stock time effects like the delays or Echo plugin, you can set this up to be perfectly in time with everything else in your project.
At this stage you should have a beat.
Now try to work for a batch of 10-20 beats and see if you can find ways to improve your workflow as you write more.
If You Need Sounds To Get Started, Download Our Sample Packs!


The Ultimate Guide To Ableton Live 11 Keyboard Shortcuts
Why Learn The Essential Ableton Live 11 Keyboard Shortcuts?
We will be honest, keyboard shortcuts are not the most exciting topic in the world.
But working faster, getting more music done, and being more creative are all really exciting. This is why we did a whole post just on Ableton Live 11 Keyboard Shortcuts.
Learning keyboard shortcuts will let you do those things, so they are worth learning. Life is too short to waste time in a dropdown menu somewhere.
Why is this such a big deal? Because you waste time and focus fishing around in menus with the mouse. And the workflow of music production requires that we use the mouse a lot anyway.
So, anytime you can free up your hands to move faster, this save a little bit of mental stamina that can go into creative tasks, not moving the mouse around. Also, some helpful features are only accessible with keyboard shortcuts. So, you have to learn a few anyway.
A couple seconds here and there will add up to days of your life saved over the course of a year.
We will cover the most important keyboard shortcuts to know, how to look up shortcuts as you work, and even how to program your own shortcuts if one doesn't exist yet.
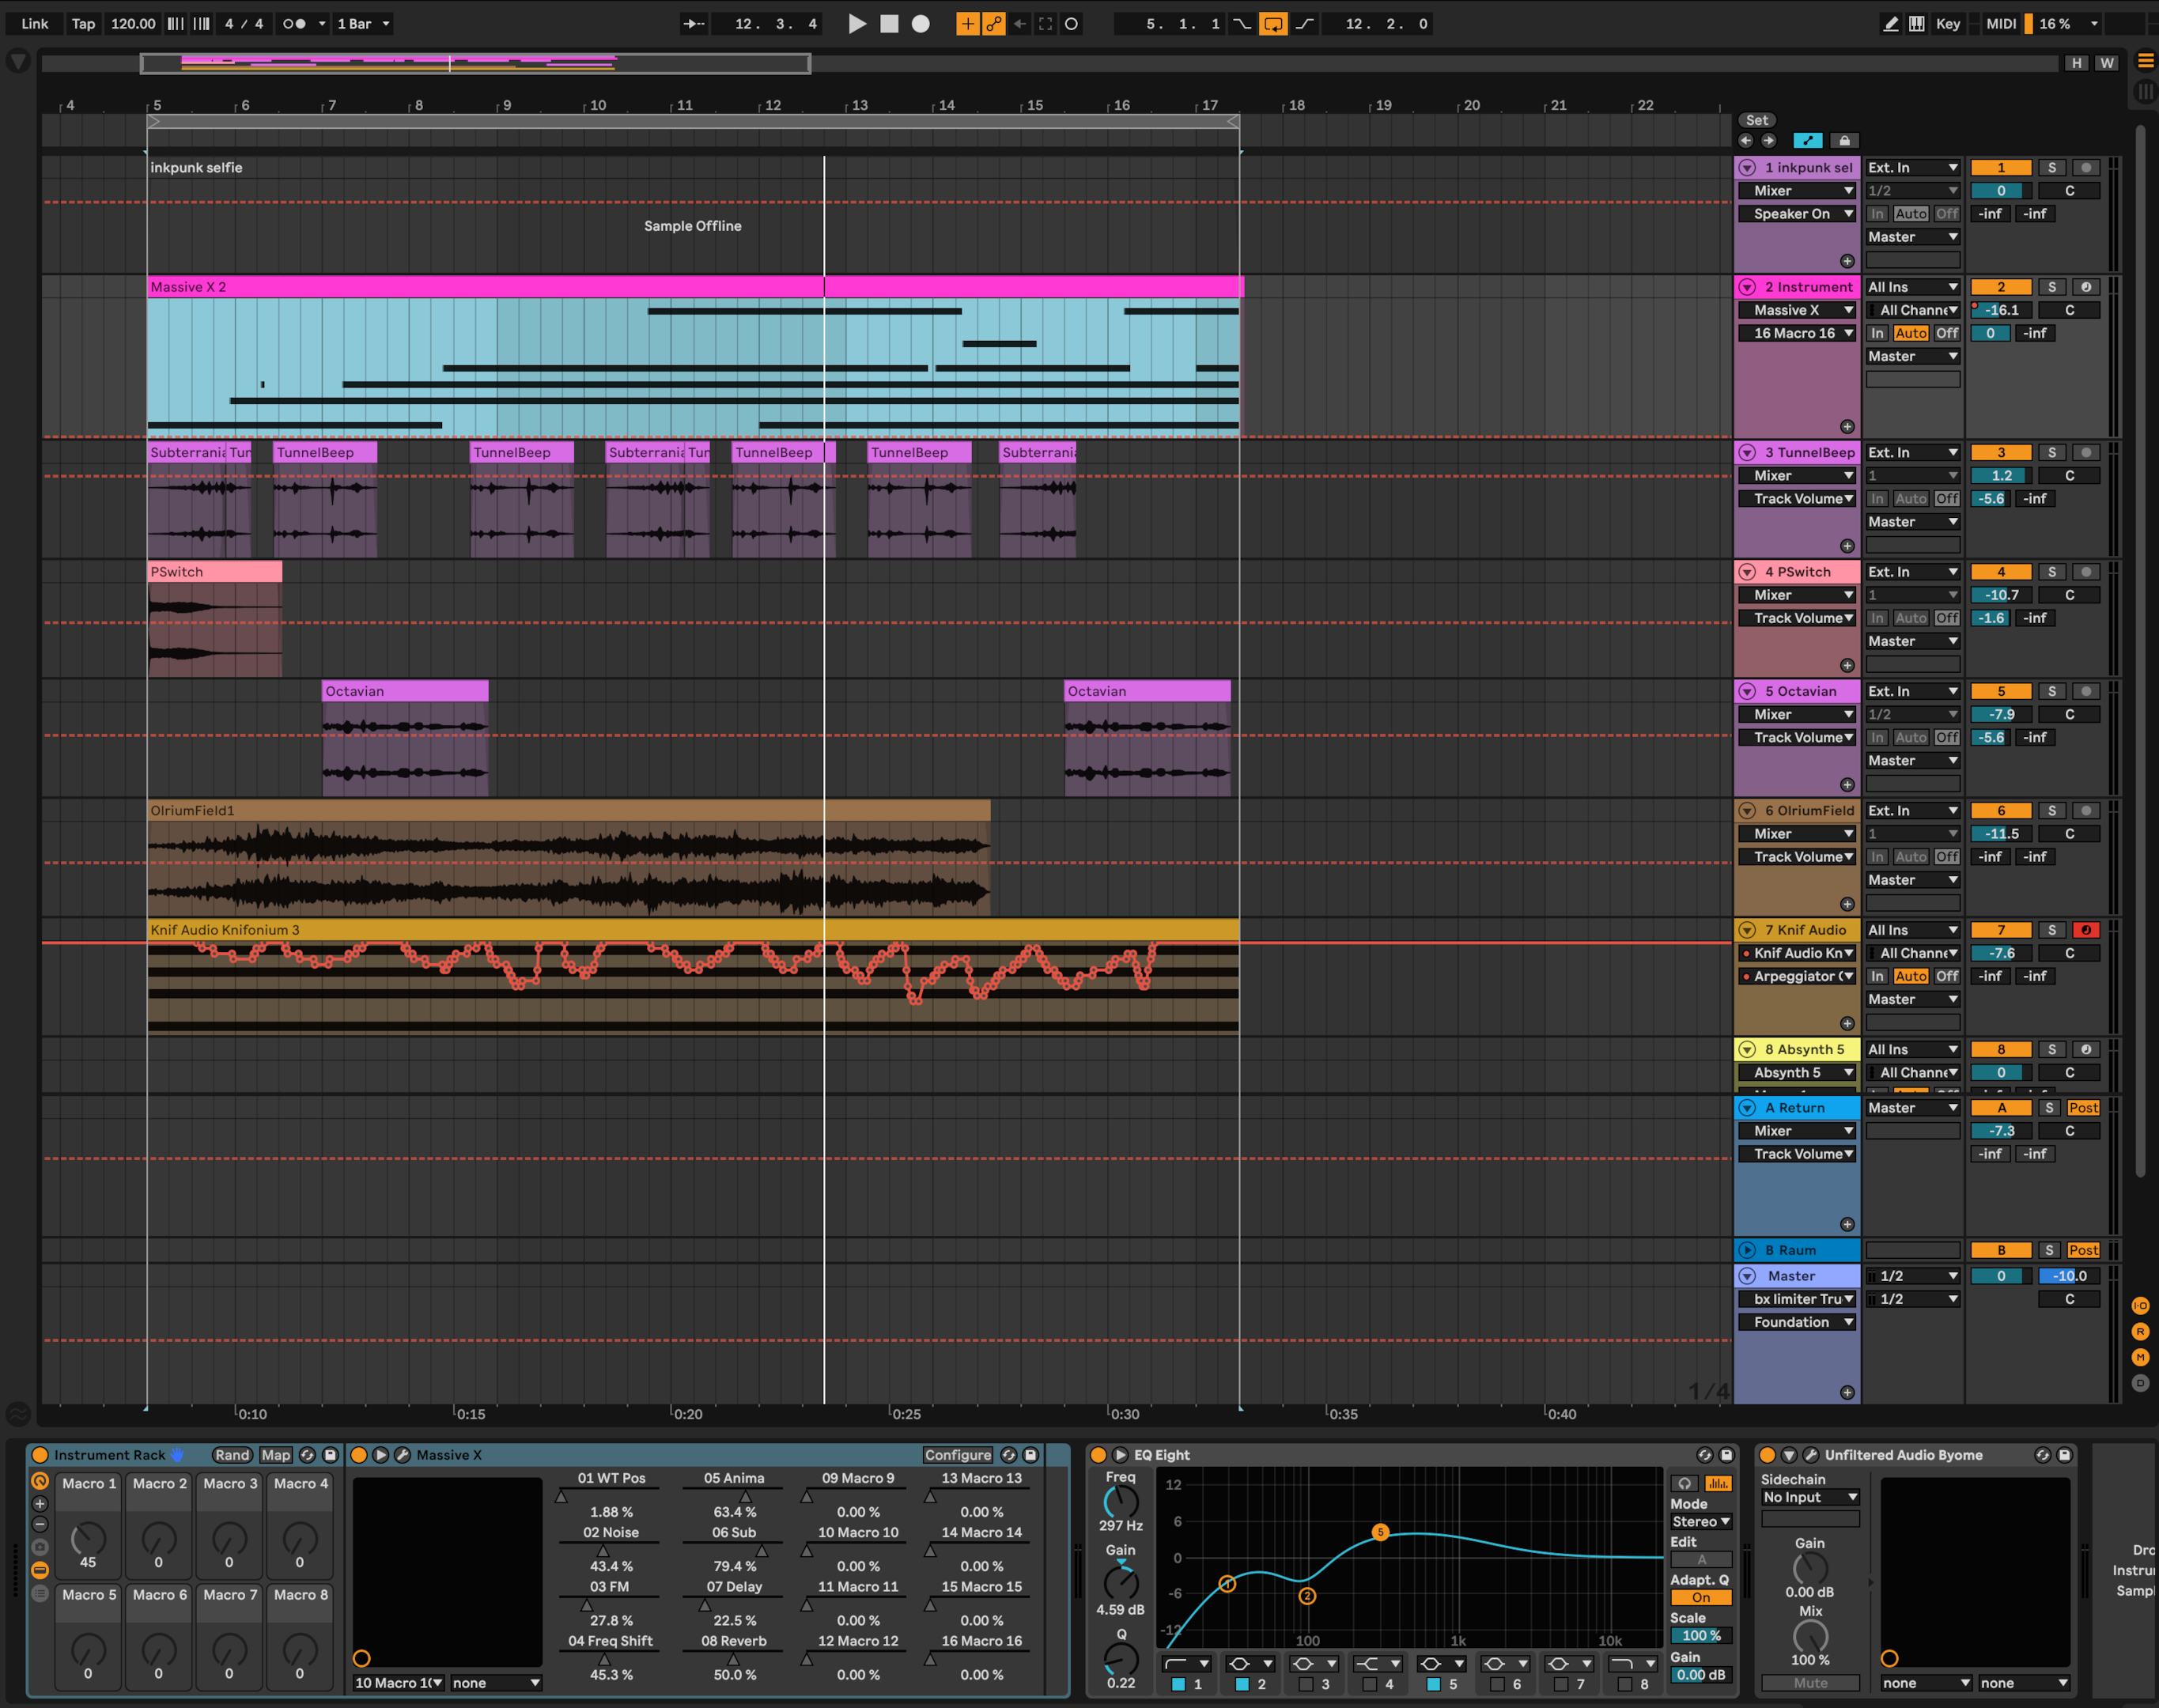
Learn The Ableton Shortcuts These In Order
All these shortcuts are in the Live manual. But we wanted to teach you the best order to learn them in instead of throwing a book at you and saying good luck.
The most important shortcuts are earlier in the article. This is the stuff we can't live without and that will dramatically speed up your workflow.
The more niche shortcuts come later. They're still useful, but you they tend to be used in more specific situations.
Over time you'll learn all the shortcuts. Just try to pick one or two new ones every time you sit down to work. The main point is these are the most important keyboard shortcuts we actually use every time we sit down to produce.
How To Use This Guide & CMD⌘ + F
Before we start learning Ableton 11 keyboard shortcuts, you need to learn one of the most important shortcuts on your entire computer. This will make you faster at learning and overall better at using computers in general if you don't already know it.
Read that again. We're not kidding.
That magical shortcut is: CMD ⌘+ F (Mac) or CTRL + F (Windows)
Remember by thinking that F stands for "Find in Page"
It opens a search box where you can type in the term you're looking for.
Try it now. You should use this whenever you need to search long webpages or PDFs. You can now save this page and use it as a reference later. Just hit ⌘+ F and type the command you are looking for, then use the arrow keys to scroll through mentions of your search until you find the command you need.
Unless you have freakishly good memory, you won't remember every shortcut we talk about here. But you can bookmark this page, then come back and use CMD ⌘+ F to find the shortcut you need. Some people like to print out a "cheat sheet" but you can't search that like you can a web page.
Also, CMD ⌘+ F is the Ableton Shortcut to search in the browser.
Windows vs Mac Keyboard Shortcuts
Some of you are on Mac and some will be on Windows. Here is how the shortcuts translate:
CTRL on Windows does the same thing as CMD ⌘ on Mac.
ALT on Windows is usually the same as OPT ⌥ on Mac.
Shift ⇧ is the same on both.
Here's the confusing one: Macs also have a CONTROL^ key that is not the same as on Windows.
Macs also have a Function (FN) key that you sometimes need depending on your keyboard. This comes up much less on Windows systems.
We mostly use Macs here so we will use the symbols for each key. Windows users can just substitute the equivalent key as you need. When there is a completely different Windows command, we will list it.
A good example is the shortcut for Full Screen Mode with is F11 on Windows, but on Mac it is CTRL + CMD + F. Since on Windows you usually substitute CMD for CTRL, this doesn't work because you would need 2 CTRL keys which doesn't make any sense.
The 3 Basics
While we're at it, there are 3 other basic shortcuts you need to know that are pretty universal in most computer programs and you will use them all the time in Ableton Live.
Cut: CMD ⌘ + X
Copy: CMD ⌘ + C
Paste: CMD ⌘ + V
These are handy for moving audio and midi clips around, as well as modifying effects racks, moving presets from one track to another and a zillion other things. You should never be going into the menus for these three unless you enjoy wasting time.
The Ableton Live Help Menu: SHIFT⇧+ ?
This one will help you learn what things do in Ableton as well as look up more keyboard shortcuts inside the DAW. Ableton Live has a Help menu you can open and close with ⇧+ ?
You will see it appear in the lower left corner of the screen.
Have a question? Just open the help menu and put the mouse over the item you have a question about. There will be a short explanation and any available shortcuts. Try to use that shortcut next time.
Save Your Work (And Your Sanity)
This should be an obvious one. Ableton Live has a good backup and recovery system, but why leave it to chance?
Save: CMD ⌘ + S
Save As: CMD⌘ + SHIFT⇧ + S
There is unfortunately no stock shortcut for Collect All and Save. We will teach you how to make custom shortcuts later on in the article for this one.
Here's another essential for when you accidentally highlight your project and bump the delete key:
Undo: CMD ⌘ + Z
Did you just Undo some automation that took you 3 hours to get right?
Redo: CMD ⌘ + SHIFT⇧ + Z
We would have gone crazy a long time ago without these last two shortcuts.
Ableton Transport Shortcuts (Play, Stop, Record)
On most DAWs including Ableton Live, the Spacebar toggles play and stop in the transport.
Live by default restarts playing from the place where the cursor is on the timeline.
To continue playing from Stop Point: SHIFT⇧ + spacebar
F9 toggles the Arrangement record button. On a Mac, depending on the keyboard you use, this may be FUNCTION (FN) + F9. The Function key is located in the lower left corner of an Apple Keyboard. If you use a 3rd party keyboard with a dedicated F9 button, you don't need to do this.
Arrangement/Session View Ableton Shortcuts
Ableton Live has two views for working with audio and MIDI clips. The session and arrangement view.
Use the TAB key to toggle between the session view and the arrangement view.
Learning Ableton Views Shortcuts
One of the cool things about Ableton Live is you can easily toggle most parts of the interface to be hidden or shown with keyboard shortcuts.
This helps de-clutter the screen and keep a clear head as you work. We have found that just being able to get things you don't need out of the way quickly speeds up out whole flow in the studio. Especially when we need to edit or come up with new ideas for a track we're writing.
We already talked about how to toggle the help menu so let's learn the rest.
(By the way, here's the trick to remember these. They are mostly in this format: CMD ⌘ + OPT ⌥ + a letter key)
Show/Hide Browser: CMD⌘ + OPT⌥ + B
Show/Hide Detail View*: CMD⌘ + OPT⌥ + L
Show/Hide Mixer Section: CMD⌘ + OPT⌥ + M
Show/Hide Return Tracks: CMD⌘ + OPT⌥ + R
Show/Hide In/Out Section: CMD⌘ + OPT⌥ + I
Show/Hide In/Out Take Lanes: CMD⌘ + OPT⌥ + U
Show/Hide In/Out Groove Pool: CMD⌘ + OPT⌥ + G
Show/Hide In/Out Plugin Windows: CMD⌘ + OPT⌥ + P
*The Detail View is the pane at the bottom of the screen where you can switch between the Piano Roll or Audio Clip and your instrument and effects devices. Press Shift + TAB to toggle between your audio or MIDI clip and the devices on that track in the Detail View.
Moving Around - Use the Arrow Keys
You can almost always use the arrow keys in Ableton Live to move around and do things. You can move around the Browser between sections, move the cursor in the Arrangement view, change cells in the Session View, and move notes as well as the cursor in the Piano Roll using the Arrow Keys.
Additionally, in the browser the right arrow key is Preview Selected Browser Item. It will play a selected sample for preview.
General Editing Keyboard Shortcuts
The next set of shortcuts come up all the time when we're editing a track and are going to be used a lot when dealing with both audio and MIDI clips.
Create New Audio Track: CMD ⌘+T
Creates a new Audio Track. Sometimes referred to as insert audio track, which means the same thing.
Rename: CMD⌘ + R
Most things that have a name in Ableton Live can be renamed, like tracks, clips, effects racks, Ableton drum racks, instrument racks, and other devices. This works for pretty much all of them.
Duplicate: CMD⌘+D
Similar to Rename, you can Duplicate tracks, Clips, effects, and more with the Duplicate shortcut.
Create New MIDI Track: CMD⌘ + SHIFT⇧ + T
This shortcut creates a new MIDI track.
Insert New MIDI Clip: CMD⌘ + SHIFT⇧ + M
Highlight an area in the timeline inside a MIDI track, then use the insert midi clip shortcut CMD⌘ + SHIFT⇧ + M to create a new MIDI clip.
Group Tracks or Devices: CMD⌘+G
Select a few tracks and existing Groups, then CMD⌘+G will create a new group. This also applies to devices in the Detail view area. Select the devices you want to group together by holding SHIFT and clicking
Insert Return Track: CMD⌘ + OPT⌥ + T
Use this shortcut to create a Return Track for effects, especially time based effects.
Loop Selection: CMD⌘+L
Select an area in the arrangement view and press CMD⌘+L to set the loop length and markers to that area. This is also helpful to know when setting points to punch in or punch out when recording overdubs in addition to setting the loop selection.
Fine Tune Parameters: SHIFT⇧ + Drag
This is not strictly a keyboard shortcut because it requires the mouse, but it is still an extremely handy shortcut. Sometimes when you are adjusting parameters with the mouse , you need to hit a specific value and its easy to miss the exact setting you want.
If you click and drag the automation parameter or device control while you press SHIFT⇧, the values will move more slowly. This makes it easier to dial in the exact setting you want.
Consolidate Clips: CMD⌘+J
This shortcut works in both audio tracks and MIDI tracks. Select 2 or more clips in a track, then use CMD⌘+J to combine them. MIDI clips will be joined and Audio Clips are bounced to a new file and normalized.
Split Clips: CMD⌘+E
Put the cursor where you want to cut a clip using the mouse or arrow keys, then simply press this shortcut to split the clip.
Toggle Draw Mode: B
Press B to Toggle the Pen Tool, also known as Draw mode. This is used in Automation to change automations by literally drawing them in instead of programming them with individual automation breakpoints.
Curve Automation: Hold OPT⌥ and hover over the automation segment
Did you know that in Ableton Live 11 you can create curved automation segments. Hover the mouse over a linear segment and hold OPT⌥. You will see the mouse icon change to have a small curved icon. Click and drag to shape the curve of the segment.
Toggle Computer MIDI Keyboard: M
If you are pressing the B key or C key and they aren't working, you might have the Computer MIDI Keyboard enabled which allows you to play MIDI instruments with the same keyboard you use to type on when you normally use your computer.
When the Computer MIDI Keyboard is enabled, the Z and X keys change the octave of the keyboard's notes up or down, and the C and V keys adjust the velocity since a standard computer keyboard does not send velocity data like a proper MIDI controller does.
Arm Selected Tracks for Recording: C
Self explanatory. This will toggle the record arm for a track.
Toggle Automation Mode: A
Toggles the automation lanes to be hidden or shown. If it isn't working, double check that the Computer MIDI keyboard isn't enabled, otherwise the A key just sends a MIDI note.
This is especially useful in sessions with a lot of automation and numerous automation lanes you want to keep out of the way when you don't need to adjust them.
Solo a Track or Group: S
Helpful when editing or mixing and you need to quickly check or toggle and individual track. You can move between tracks with the Up and Down arrow keys.
Incremental Zoom In/OUT: + & - keys
In the arrangement view, use + to zoom in and - to zoom out.
These shortcuts also shows/hide devices in the Detail view at the bottom of the screen when they are visible. Use - to collapse a device or + to expand it.
Optimize Height and Width: H & W keys
Optimize height width H or W keys. Helpful for when all your tracks are at different heights or you have to back out of working on something that required you to zoom all the way into the timeline.
Zoom To Selected Time (Z)
Highlight an area and hit Z. Live will zoom into to what you highlighted. Hit Z again and it will increase the track height so you can see what you are doing more easily. Hit Z a third time to go back a step, but stay zoomed into the area.
Zoom Out From Selected Time (X)
Think of X as the inverse of the Z key. Hit X to zoom out.
Mouse Scroll Zoom: CMD⌘ + Scroll and OPT⌥ + Scroll
Hold CMD⌘ and move the scroll wheel. Live will horizontally zoom in.
If you hold OPT⌥ and move the scroll wheel, Live will zoom vertically depending on where it is positioned.
Collapse all tracks: OPT⌥ + U
This is an easy command to hit accidentally which will collapse every track in the session. If you don't know this one and keep collapsing a large project while you're trying to work, it can be really frustrating.
However, if you know it, it will help you navigate a large project with ease.
Adjust Individual Track Height: OPT⌥ + Mouseover & Scroll
Use this one with the last command to quickly expand the track you need to adjust in a large session. Hold the option or alt key, hover the mouse of the track you want to adjust and move the scroll wheel to expand it vertically.
Adjust and Effect Control: Click + Type Numbers + ENTER
Need to enter and exact value for the control of a device? Say you need the output gain of an effect to be exactly -12.6dB. Click on the control then type in the number you want and hit Enter.
Alternatively, you can use the arrow keys to adjust the value in small increments as well.
Return To Default: Del or Double click parameter
This is one of those features that is only available via the shortcut. Want to return an control of effect or a slide on the mixer to its default value? Double click it or select it and hit delete.
Duplicate a section: CMD⌘ + SHIFT⇧ + D
To duplicate a particular part of audio clips or MIDI clips, select the region, then hit CMD⌘ + SHIFT + D as many times as you need and live will insert the duplicates.
Much faster than manually copy and pasting the element even if you know the shortcuts for copy and paste.
Reverse Audio Clip Selection: R
Great for editing and experimenting or creating a smoothly looping audio clip. Select the clip and hit R to reverse.
Disable Clip: 0 (zero)
Need to try different options quickly? Use the zero key to toggle selected audio and MIDI clips on or off so you can compare and decide if a part is worth keeping without having to delete it. Sometimes you need to try a few different combinations of sounds and this shortcut makes it very fast to do so.
Insert Silence: CMD⌘ + I
Have you ever had a cool idea while writing a track that required you extend a section in the middle of the tune? If you have a big session with lots of tracks with automation data it could be very tedious to select everything then manually drag them to create the space you need.
Instead, just put the cursor where you want to insert empty space, hit CMD⌘ + I and enter the amount of time you want to create in the dialog box. This might be as little as a beat or as much as a 32 measure section.
Delete Time: CMD⌘ + SHIFT⇧ + X
This is the opposite of the previous command. Highlight the selection in time you want to remove, hit CMD⌘ + SHIFT⇧ + X and Live will remove it across all tracks
Move a clip: Highlight + Left and right arrows
In the arrangement view, click on a clip you want to move and use the arrow keys to move it. You can change how much it is moved by adjusting the Grid size. The Grid shortcuts are a few items down on the list.
Modify Selection: Click + SHIFT⇧+ Arrow Keys
You can click to place the cursor on the timeline in the arrangement view, then if you hold SHIFT⇧ while you tap the arrow keys, you can modify the selected part of the clip to the desired length or extend the selection to other audio or Midi tracks.
This is very helpful when you need to split several clips if you combine it with the Split Clip shortcut CMD⌘+E. Place the cursor with the mouse, hold Shift and use the up/down arrows to extend the cursor into other tracks, then split them.
Grid Shortcuts: CMD⌘+ 1, 2, 3, 4, 5
Use these shortcuts to modify the grid size as you edit.
Narrow Grid: CMD⌘+ 1
Widen Grid: CMD⌘+ 2
Toggle Triplet Grid: CMD⌘+ 3
Toggle Snap To Grid: CMD⌘+ 4
Toggle Fixed Grid: CMD⌘+ 5
Insert Take Lane: OPT⌥ + SHIFT⇧ + T
Take lanes allow you to comp together a single audio track from multiple clips of audio very quickly.
This is a handy shortcut to know if you record yourself or others often. Especially vocalists. You will need to create new take lanes very quickly on the fly.
Shortcuts For Editing MIDI Clips In The Piano Roll
The following Ableton Live 11 keyboard shortcuts mostly apply to working specifically in the piano roll when editing MIDI clips. These are going to be used especially often if you use a lot of VST instruments.
Move MIDI Notes: Arrow Keys
You can click on MIDI Notes (hold SHIFT⇧ to select a group of them ) and then move them around the piano roll with the arrow keys.
If you hold SHIFT⇧ and tap the Left/Right Arrow Keys with MIDI notes selected, you will modify the note length according to the current grid width.
If you hold CMD⌘ and tap the Left/Right Arrow Keys you can move the notes in very small increments.
Transposing Octaves: SHIFT⇧ + Down Arrow↓ or SHIFT⇧ + Up Arrow↑
Select a MIDI note or a group of notes, hold SHIFT⇧ and tap the Up/Down Arrow Keys to transpose those notes by octaves
Quantize: CMD⌘ + U
Select a group of notes and simply press this command to quickly quantize them.
Quantization settings: CMD⌘ + SHIFT⇧ + U
Need to adjust the quantization settings? Use this shortcut to quickly access the menu, make your selection, then use CMD⌘ + U to apply it.
Change MIDI Editing Detail View: OPT⌥ + 1, 2 3
Use the following key commands when editing notes and automating envelopes or note expression in the piano roll to move between their respective views quickly.
MIDI Piano Roll: OPT⌥ + 1
Envelopes: OPT⌥ + 2
Note Expression: OPT⌥ + 3
Mapping and creating your own Ableton Live 11 Keyboard Shortcuts in the OS
Learning the default shortcuts in Ableton Live will help you to work much more efficiently, however sometimes you need to create custom Ableton shortcuts. There are a few ways to do this. Namely, the MIDI mapping mode, Key mapping mode, and modifying keyboard shortcuts for the app in your operating system.
Midi Mapping Mode: CMD⌘+M
This method of creating a MIDI map is mostly used for assigning different MIDI controllers to various parts of Live.
Hit CMD⌘+M, to enter MIDI Map mode. You will see a bunch of elements in the User Interface turn a dark purple color. Anything that changed to this color can be mapped. Select the control you want to assign, then move the knob or slider on your connected MIDI controller you want to map it to. Live will automatically assign it. Hit CMD⌘+M again to exit mapping mode and the control you moved should be able to adjust the mapped parameter.
Key Mapping Mode: CMD⌘ + K
Key mapping is very similar to MIDI mapping, except instead of mapping a MIDI controller, you can map a custom shortcut. Say for example you want to use a keyboard shortcut to turn a device on or off. Same process as a MIDI map.
Hit CMD⌘ + K, select the element you want to map, then press a key on the keyboard and exit the mapping mode.
Custom Shortcuts
Need to create a custom keyboard shortcut at the operating system level? This is usually because there is a function you want to access in the menus that does not have a shortcut assigned.
Some software has a shortcut mapping menu that you can completely customize to whatever you want. This is extremely helpful because if you use several different types of editing software like Ableton Live, Logic Pro, Pro Tools, Adobe Suite, etc you can keep most of your shortcuts relatively consistent.
However, Ableton Live does not have this feature natively yet. Luckily, there are ways around this.
For example, MacOS allows you to do this natively in the operating system. Navigate to Preferences, then choose Keyboard, then click the Shortcuts tab.
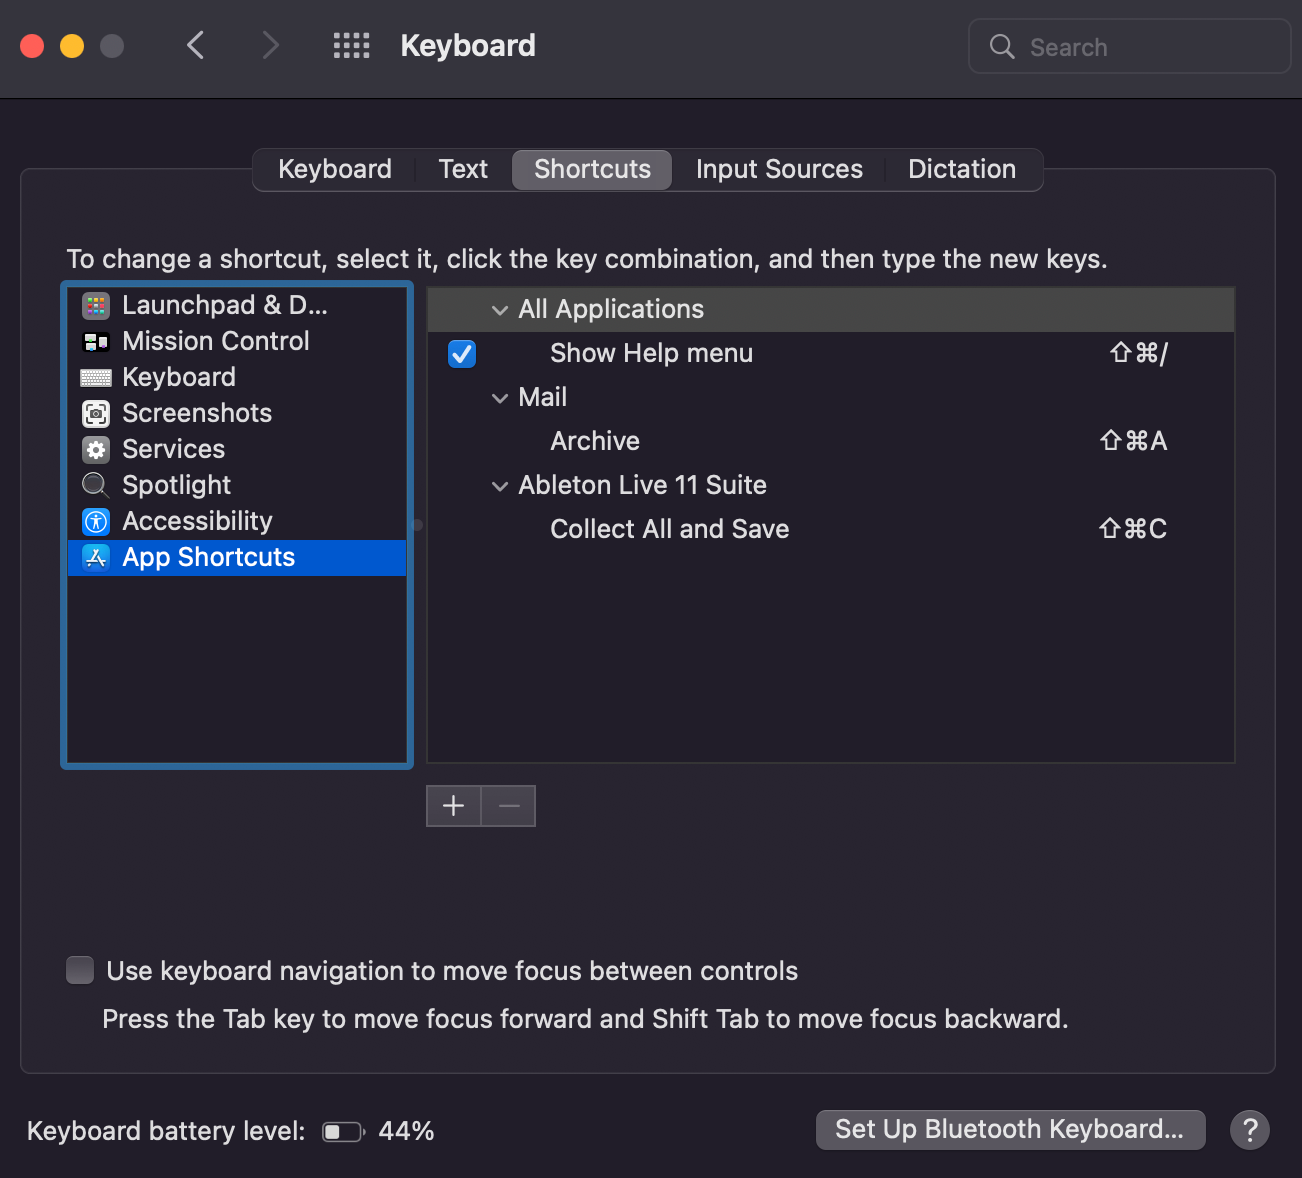
You will need to click the + button, choose, Ableton from the menu, then enter the exact command in the menu you want to create a short for, and finally hit those keys on the keyboard. Next, press Add and restart Ableton. You now how a custom shortcut you can use.
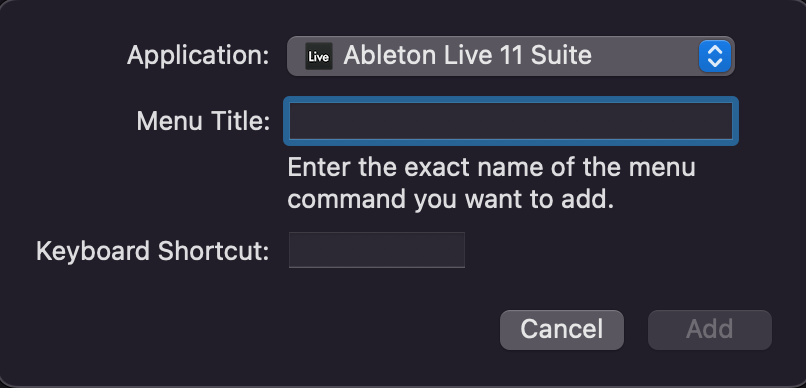
We set the shortcut CMD⌘ + SHIFT⇧ + U to trigger Collect All and Save because we also want to copy over audio files into the project folder when we save a project.
You will not be able to do this with options found in a context menu by right clicking, but anything from the top menu bar should be possible.
Wrapping Up Ableton Live 11 Keyboard Shortcuts
There are of course more Ableton keyboard shortcuts you can learn by just looking up commands in the menus.
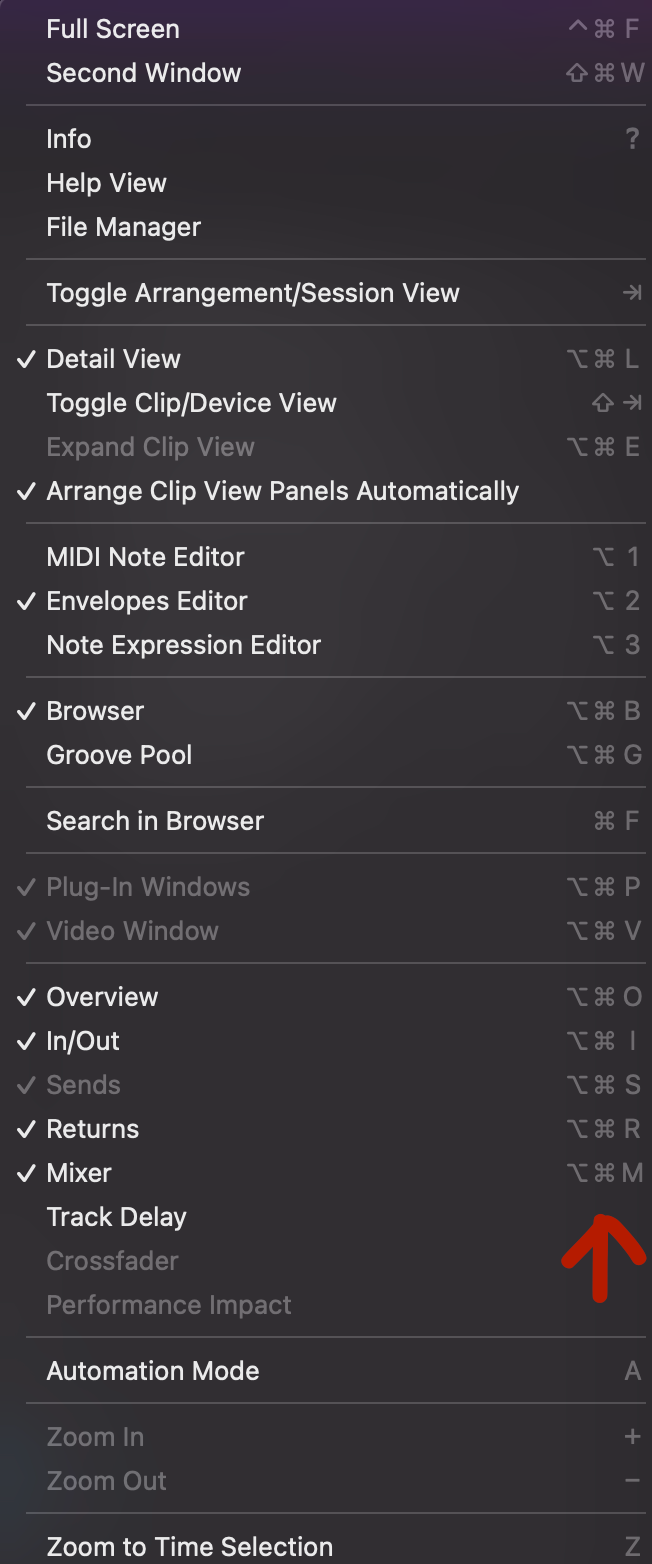
However, these are the commands we use the most when we're actually working on music.
We also did our best to put these in roughly the order of importance that you should learn them in.
We will say it again: do not get overwhelmed. Just start at the beginning or leave the page open in a tab while you're working on music, then search for the command you need.
Make yourself learn a new command or two every time you work and eventually you'll have them committed to memory because they save a ton of time. So you use them over and over again, which helps teach your fingers where to go.
The Real Magic Part
After a while, you'll get so good with shortcuts that working in the DAW starts to feel kind of like playing an instrument. You decide you want to do something and your fingers just go to where they need to without having to think about it at all.
Over time, you will become extremely fast at editing to the part where its hard for someone watching to keep up with what you're doing. But the key is not to be in a rush to get there and trust the process.


How To Start Making Your Own Synth Samples
Always downloading synth samples instead of making them? Imagine if you could walk into any studio anywhere in the world and figure out any synth they have sitting on the rack, right away.
You could have the freedom to just setup and cook on the spot. You'd be incredibly valuable as a producer. People will talk about what a wizard you are. There are people like this in the world and you can be one of them if you choose to.
What is stopping you? Like even a lot of established producers, it might be that you're addicted to using free samples all over the place. If you want to make a new track or get inspired, you have to go get sounds from someone else or you can't get anything going.

Be honest here. This article is for anyone who answers YES to any of the following questions:
-
Have you ever wondered how to make your own sample pack?
-
Are you worried that you use too many free synth samples in your music production?
-
Are you getting bored searching Google or YouTube for free downloads every time you want to make new music?
-
Are all the free synth samples you find online too generic and aren't who you are as an artist?
-
Do you want to build a professional library of samples you can take into the studio to work with artists?
-
Do you love classic synth sounds and want to learn how to make them?
If this is you, we're going to walk you through the process you need to make all the samples you will ever need for your own music production. And you're going to learn synthesis from the inside out if you do this long enough.
Also, you'll be able to release lots of free synth samples strictly for the culture or to help promote your own music. Everything from classic synth sounds to the most modern synth sounds.
But first...
8 Reasons Why You Shouldn't Use Free Synth Samples
We're not saying to never under any circumstances use free synth samples. Obviously. We're a sample pack company!
We're not so drunk on out own Kool-Aid that we won't be honest about the pros and cons of free, paid, and homemade samples.

We think of it like food. Sometimes you eat out at the nicest place you can afford, sometimes you cook at home, and sometimes you hit the drive through. They all have their place.
Having a bunch of sounds you like, ready made, is very convenient. Also, maybe you have found a company that does a certain kind of sample really well so you use their material in certain places.
Or maybe you're interested in making some free samples so you can share them with other producers and build community. Making things to share is a great thing.
These sounds certainly have their place and we give away from free synth samples for this reason. We hope to be one of your favorite sample pack companies that you use in your music and we're always always always interested in hearing music people have created with our free synth samples.
But, you should make your own sounds too! It's important to see both sides things and participate instead of only searching for yet another free download to make a track.
#1 Everyone Else Has Them
You need to develop your own sound and music is a very saturated industry. You need to stand out. If you're using the same sounds as everyone else, it's easy to get lost in the crowd.
#2 Sound Quality Issues
A lot of free synth loops and sounds you find for free have recording quality issues. Sometimes doing it yourself is the only way to get it done right.
#3 Lack of Variety
There are tons of packs with classic synth sounds for download because they won't go out of style. They're classic for a reason. But again, you might be looking for something to help you stand out. For example, a Moog bass patch sounds great and works a lot of the time, but its not going to turn heads as easily as something more modern and innovative.
#4 They aren't always royalty free
A lot of people don't understand copyright law and give away free downloads of samples that aren't royalty free.
Sample pack companies are a bit more reliable because there are more people involved, but some musicians are getting sounds from individual, independent producers who don't fully understand what you are and are not allowed to legally sample.
#6 No Updates :(
One benefit to paid sample pack products is a good company gives you access to premium service. If they improve the pack, add to it, or fix problems, paying customers will usually get updates for free.
A strictly free sample pack of drum sounds or synth sounds is generally not supported in this way.
#7 Not Customized
If you get in the habit of making your own collection of sounds, you can customize them to be exactly how you like. This can be in how you shape the collection of sounds themselves, crafting them to your exact genre, or simply how you organize the collection
#8 Missed Learning Opportunities
Knowing how to adjust a sound or make what you need on the spot are essential skills for a music producer. One day you will be in the studio with someone you want to impress and if you don't know how to tweak a synth preset or cook up what you need, you could miss a big opportunity to contribute.
Making your own samples will push the limits of your creativity, what you can produce, and give your tracks a more personal feel. If you only use free synth samples, you'll miss out on some big learning opportunities.

Bonus: Another Revenue Stream
Making a living as a musician is a major challenge and selling branded sample packs is another thing artists and producers can do to create an income stream from their art.
We don't see this as creating competition for ourselves, this is just creating a richer ecosystem which is essential to a creative industry.
What Should You Make?
By now you understand some of the downsides to being over reliant on free downloads to obtain your samples. So what should you make?
Different genres have different requirements for samples.
If you produce hip hop, you're probably not as interested in making bass drops like a Dubstep producer might be. Similarly, the kinds of drums you need for old school hip hop are going to be very different from what you need for modern EDM or electronica.
That said, we generally recommend that you break up you sampling efforts into the following categories:
Drums/Percussion
Your drums and percussion samples can be drum loops or one shot drum samples that you load into a sampler and play or program to make rhythms.

One Shot Effects
Functionally, these are all the samples you use for transitional moments as well as "ear candy" that add detail and polish to a track.
These are things like risers for a big EDM bass drop, sound effects you can use in a percussive way, and all the samples that add vibe and texture to a production, but aren't always as explicitly noticed by the listener.
Melody Loops
Melody loops are exactly what they sound like. Pitched melodies that feel good when you repeat them. Generally, you want to make sure these are labeled both by key and BPM so you can search for them efficiently, pitch them to match existing tracks, and easily line them up with your project tempo.
These are also some of the most important samples to make yourself because they tend to cause a lot of royalty and take down issues on various music streaming platforms.
If you're buying premium sample packs, you're probably ok, but if you've made the sounds yourself you know for a fact nobody else has them.
Ambient Textures or Soundscapes

These are the kinds of sounds mostly used to add texture and a sense of depth and space to a production.
The fastest shortcut to making these types of sounds is to take any sound, loop it, then throw it through some kind of time based effect like delay or reverb.
Then, you can easily use this as a bed of sound that you can compose over. You can simply layer other synth samples over an ambient texture, sidechain drums to it for pumping rhythmic effects, or trigger it with a sampler.
Multi-sampled Instruments
Multi-sampled instruments are a little more sophisticated than basic one shot samples, but it is entirely possible to make them yourself. Instead of individual samples, you have collections of samples for different velocity ranges and you load these into a sampler instrument like Kontakt or your DAW's native sampler.
Some samples are triggered when you play more lightly and others are triggered when you player harder.
These are significantly more work than a basic set of one shot drum kit samples or basic synth loops, but this allows you to build a playable instrument you can play over and over again on your tracks or even in live performances.
Where To Start Making Your First Synth Samples

We're about to get into specific techniques you can use to create original synth samples or even your own sample packs and bundles of synth loops.
You don't have to make every class of sampled sound outlined here and you don't have to use every technique. That's a lifetime of work and this is a good thing. It means you'll never run out of synth sounds to explore and push your creativity to new places.
Overview of Different Synthesis Methods You Can Use

If you discover an oddball synthesis method (or invent one yourself) you can of course use this to make all the synth sounds you want. However, there are some common synth techniques and architectures you need to know about that
The Major Types of Synthesis In Music Production
-
Subtractive Synths
-
Additive Synths
-
Wavetable Synths
-
Frequency Modulation (FM)
-
Granular Synthesis
-
Physical Modeling
Each of these has a characteristic sound as well as things they do well and areas where they struggle. Additionally, they all show up in different genres of music so if you don't know where to start, just pick one and start making noise.
Over time you'll start to be able to pick out each of them while you listen to music.
Let's start with the one responsible for many of the classic synth sounds. Subtractive synthesis.
Subtractive

When people think of warm, spacey "analog" synth sounds, this is usually what they are referring to.
It's also sometimes referred to as East Coast synthesis thanks to the contributions of Bob Moog, who was born in New York City. This basically starts with an oscillator generating a waveform like a sine wave or saw tooth wave, then using filters and envelopes to sculpt it in a musically useful way.
It is subtractive because you are using these filters generally to remove frequencies or shape them. We say generally because it's actually a bit more sophisticated than that once you introduce things like LFOs to modulate filters and techniques like self-oscillating filters.
Our VISION MAGNET collection of synth samples is made from a Sequential Prophet 6 synth, which is a subtractive synthesizer.
(We have a version called VISION MAGNET LITE that includes to some fun free synth loops)
Additive

If you can subtract to make sounds, then you should be able to do the reverse, right? Correct!
Additive synthesis works by adding together individual waves from separate oscillator sources to build up a complex waveform instead of starting with something already complex and removing frequencies like a subtractive synth.
A common additive synth that many people might own and not already realize it is Native Instruments Razor.
Wavetable

Imagine if you had subtractive synth with a basic sine wave sound, except instead of staying on the static sine wave, you could slowly morph the sin wave in a more complex waveform or ever other synth samples.
This is basically how a wavetable synth works. This allows you to make very complex, evolving synth samples.
If you are using a plugin based wavetable synth like Massive or Ableton's Wavetable, this allows you to time the modulation with the tempo of your DAW, which can allow you to create complex synth loops that move in time with your tracks.
Frequency Modulation (FM)

FM synths work completely differently than subtractive or wavetable synths and are usually associated with a "digital" sound. This method usually works by starting with a pure wave and modulating directly it with other waves.
The poster child for this the first commercially available FM synth, the Yamaha DX7. However, this is a dated example because the DX7 only used sine waves and did not have basic features like filters.
If you want to make a sample pack from a modern hardware synth like the ASM Hydrasynth, you get a lot of flexibility because it incorporated virtual FM with analog modeling and wavetable synths.
If you want to get started not only with free synth samples, but an completely free synth plugin, you should check out Dexed. It is an open source recreation of the original Yamaha DX7.
Granular Synthesis

Granular synthesis can work on a live audio signal or a pre-existing sample, but the process is the same.
You synthesize a new sound by slicing another sound into many tiny slices called grains. Then, you can perform different processes on the grains like looping, reversing them, jumping between different grains extremely quickly to synthesize different sounds.
Of all the synthesis techniques here, this is one of the best ones for re-imagining your packs of free synth samples. You can even combine all the samples in interesting ways.
Physical Modeling

So called physical modeling synthesis is one of the more interesting ways to create synth samples. They will have a very different character than classic synth sounds.
Instead of using actual samples or oscillators to provide a sound source, they use mathematical models that attempt to recreate the physical characteristics of different instruments.
Except unlike a real instrument, you can alter the synth in ways that aren't possible in real life.
If you are interested in making a sample pack of synth samples that imitate real instruments or impossible to build instruments (imagine trying to build a bowed saxophone or a wind powered guitar) this is probably the way to go.
No idea which to learn first?
If this is overwhelming and you really have no idea where to start making your first set of free synth samples to put on your website or release with your next album, just jump in with subtractive synthesis.
It is arguably the most widely used of all of them.
Sound + Technique + 30 Days Of Samples

The number of recipes out there for cooking up synth samples are just about endless. There's no way we could list all of them in one article or even a whole book.
Instead, we want to give you a framework to study this seriously. After a month, you'll easily have enough sounds to put out more than one sample pack of your own.
First, you're going to decide the kind of sound you want to make.
Second, you're going to pick a synthesis method.
Then, you're going to go for 30 days of working on. If you can do this every day for a month straight, you'll learn an incredible amount. However, if you need to space it out and take breaks of a day or two between sessions, it will still work.
For example, you could easily spend 30 making Melody Loops using Physical Modeling. You'll still barely scratch the surface of what is possible.
Your First Sample Pack of Synth Samples
This is a HUGE topic. And you'll have all the samples you need for a record, a sample pack, of free synth samples, or the beginnings of a great personal sample pack library to use in the future.
Where do you learn how to actually do it? There are hours of synth tutorials on YouTube for nearly any synth you want to learn to use.
Another helpful exercise for creating synth samples is to watch a tutorial on a synth you don't have and try to adapt it for the synth you do have.
For example, if you see a cool Serum tutorial but only have Ableton Live, try to recreate it in Ableton Wavetable.
This will force you to solve problems, go into new creative territory, and focus on the underlying techniques instead of just copying settings from the tutorial video.
How To Record Synth Samples, Mix, and Proof Them
While you record your synth samples, you need to stay organized.
Cut and label loops with logical names, key, and BPM. You can do this later but its going to be a ton more work to figure out what you did after the fact. This is generally a good habit for a music producer to be in anyway.
However, it would make sense to come back later to do any EQ work and add the final coat of polish to your synth samples when your ears are fresh.
Organizing Your Samples

At the end of your 30 day study, bounce everything to a folder, organize it into groups that make sense.
If you look at how we structured VISION MAGNET, there is a folder for every major and minor key so we can quickly grab the sounds we need without losing the flow in the studio.
Once everything is organized, we like to use an A, B, C rating system to go through the sounds.
A is for the absolute best samples we definitely want in a sample pack. B is acceptable but not our favorite, and C going to the sample pack junkyard.
Maybe we can clean up the C samples later for something, but they aren't our best so they aren't getting released.
At this point you should have a collection of synth samples that are ready to go!
Common Questions About Synth Samples and Synth Loops
What is a synth sample?
A synth sample is simply an isolated recording of a synthesizer for use in music production. Synth samples are usually part of a synth sample pack, usually recorded at 44.1K or 48K sampling rate and it should always be exported to a lossless format like WAV or AIF at 24-bit resolution.
Should I get a sampler or synth?
This really depends on what you are trying to do! Synths tend to be designed for musicians who want a piece of equipment that is closer to a traditional instrument
Another approach to this question is to examine the kind of equipment that is used in the kind of music you want to make and just get that.
However, the alternative is just as valid too. You deliberately get the opposite piece of gear or just use what you have available. Then, try to make it work in the genre you work in.
What is the difference between a synthesizer and a sampler?
A synthesizer uses analog oscillators or mathematical models to generate sounds, which are then shaped through various processes that can include filters or various methods of introducing modulation from other oscillators and envelopes.
A sampler works by recording audio to digital memory, then manipulating the playback of that audio.
What are the best synth sounds?
There is no single "best" set of synth samples that works in a superior way to everything else. A lot of what makes or breaks a sample as being good is how capable the producer behind it is.
Similarly, nobody "wins" at music because it's not a zero-sum game. In many ways, what makes a sample good or bad is defined by what you are able to do with it.
Analog synth samples are great. So are FM synth samples. Modern synths are awesome. So are classic synth sounds. All the samples out there have a place in music production somewhere.
Where can I get free loops for FL Studio, Ableton Live, or Logic Pro?
Ableton Live, FL Studio, and Logic Pro are all DAWs that include free synth loops and free synth samples with the purchase of the DAW.
If you are looking for additional sounds, most sample pack companies offer royalty free synth samples that you can download as a preview for their paid sample packs.
There are many other free downloads on various website and forums, but keep in mind they may be pirated or not cleared for commercial use.
Where to get hip hop samples?
There are dozens of sample pack companies that sell sample pack libraries built around any genre of hip hop you can think of. We of course offer some as well, like GRITMATTER drums and DUST DMG drums.
Wrapping Up
Now that you better understand the pros and cons of using free synth samples and free synth loops, you can mix and match what you download with the synthesis methods you choose to study to build your own, homebrew library.
Its really as simple as blocking out the time and doing it. Pick one of the methods we outlined earlier in the article and start making noise. Just don't forget to hit record!
And of course if you want some sounds for inspiration (or to warp and stretch for your granular synth experiments!) don't forget to check out some Glitch Magic synth samples.

